A trampoline can be a great addition to any backyard and provide endless hours of fun for the whole family. But before you can start bouncing, you need to know how to draw a trampoline. This step-by-step guide will show you everything you need to get started.
First, start by drawing two parallel lines that are slightly curved inward. These will be the sides of the trampoline bed. Next, add four more lines coming off of each side of the first two lines.
These will be the legs of the trampoline. Finally, connect all of the lines at the top with a curved line to complete the frame of the trampoline.
- Begin by drawing a rectangle in the center of your page
- This will be the mainframe of the trampoline
- Next, draw two curved lines on either side of the rectangle
- These will be the springs that attach the trampoline to its frame
- Finally, add a series of horizontal lines across the surface of the trampoline
- These will be the cords that make up the jumping surface
Drawing trampoline tutorial | How to draw a trampoline | Easy Drawings BRO
How to Draw a Trampoline Park
If you’re looking for a fun and unique activity to do with your friends or family, look no further than a trampoline park! Trampoline parks are popping up all over the country and are a great way to get some exercise while having a blast. Here’s how to draw your own trampoline park:
First, start by drawing a large rectangle in the center of your paper. This will be the main jumping area of the park. Then, add several smaller rectangles around the perimeter of the big rectangle.
These will be the individual trampolines. Finally, add some safety nets around the outside of the park to catch jumpers if they fall off their trampoline.
Now that you know how to draw a trampoline park, it’s time to have some fun!
Invite your friends over and see who can come up with the most creative design.
How to Draw a Person Jumping on a Trampoline on Your Hand
Assuming you would like a step by step guide on how to draw a person jumping on a trampoline on your hand:
1. Draw a rectangle for the trampoline. This can be any size, but make sure that the lines are light so they can be erased easily later.
2. Next, add four circles for the legs and two smaller ones for the arms of the jumper. Again, keep the lines light.
3. To create the effect of movement, start with one foot in front and one behind.
Make sure that the back leg is bent at the knee and has a line coming off of it to indicate motion. The front leg should also be bent slightly at the knee.
4. For the arms, have one swinging up in order to jump and one down by their side.
Add a few curved lines around each arm to show movement as well.
How to Draw a Trampoline With a Net
Assuming you would like a blog post about how to draw a trampoline with a net:
A trampoline is a great way to get some exercise, have some fun, and impress your friends all at the same time. But before you can start bouncing around, you need to know how to set one up properly.
This includes drawing it out so that it looks realistic. Here’s how to do it:
Start by sketching out a rectangle in the center of your page.
This will be the shape of the trampoline itself. Then, add two curved lines on either side of the rectangle – these will be the supports for the trampoline. Next, add a series of horizontal lines across the top and bottom of the rectangle – these will be the springs that make the trampoline bouncy.
Finally, add a net around the edge of the rectangle using curved lines. Make sure to leave an opening at one end so that people can climb onto the trampoline!
Now that you know how to draw a basic trampoline, try adding some other elements to make it look more realistic.
For example, you could add shading underneath to give it more depth, or draw people using it so that we can see just how much fun it is!
How to Draw a Car
Assuming you would like a blog post discussing how to draw a car:
Have you ever wanted to draw a picture of a car, but didn’t know where to start? It can be tricky to get the proportions and details right, but it’s definitely doable with some practice.
In this blog post, we’ll walk you through the steps of drawing a car so that you can add this skill to your repertoire.
Before we begin, let’s gather up the supplies we’ll need. You’ll need a pencil and paper (or a digital drawing tablet), as well as something to reference for your drawing.
This could be a photo of a car, or even just a picture from Google Images. Once you have your materials ready, find a comfortable place to sit or stand and let’s get started!
The first thing we need to do is sketch out the basic shape of the car.
Start by drawing two long rectangles side by side – these will be the body of the car. Then, add two smaller rectangles on top for the roof. To finish off the overall shape, add two circles at each end for the wheels.
How to Draw a Dragon
Assuming you would like a blog post discussing how to draw a dragon:
Dragons are one of the most popular creatures to draw, but they can also be some of the most challenging. Here are a few tips on how to draw a dragon that will help you get started.
1. Start by sketching out the basic shape of your dragon. This doesn’t have to be perfect, just get an idea of the overall size and proportions.
2. Next, start fleshing out the details.
Add in the horns, scales, wings, and anything else that makes your dragon unique.
3. Once you have all the details in place, it’s time to start adding in some color. Dragons can be any color you want them to be, so have fun with it!
4. Finally, add any final touches and highlights, then step back and admire your work!
Credit: www.alamy.com
How Do You Draw a Trampoline to Make It Cute?
Assuming you want tips on how to make a trampoline drawing look cute:
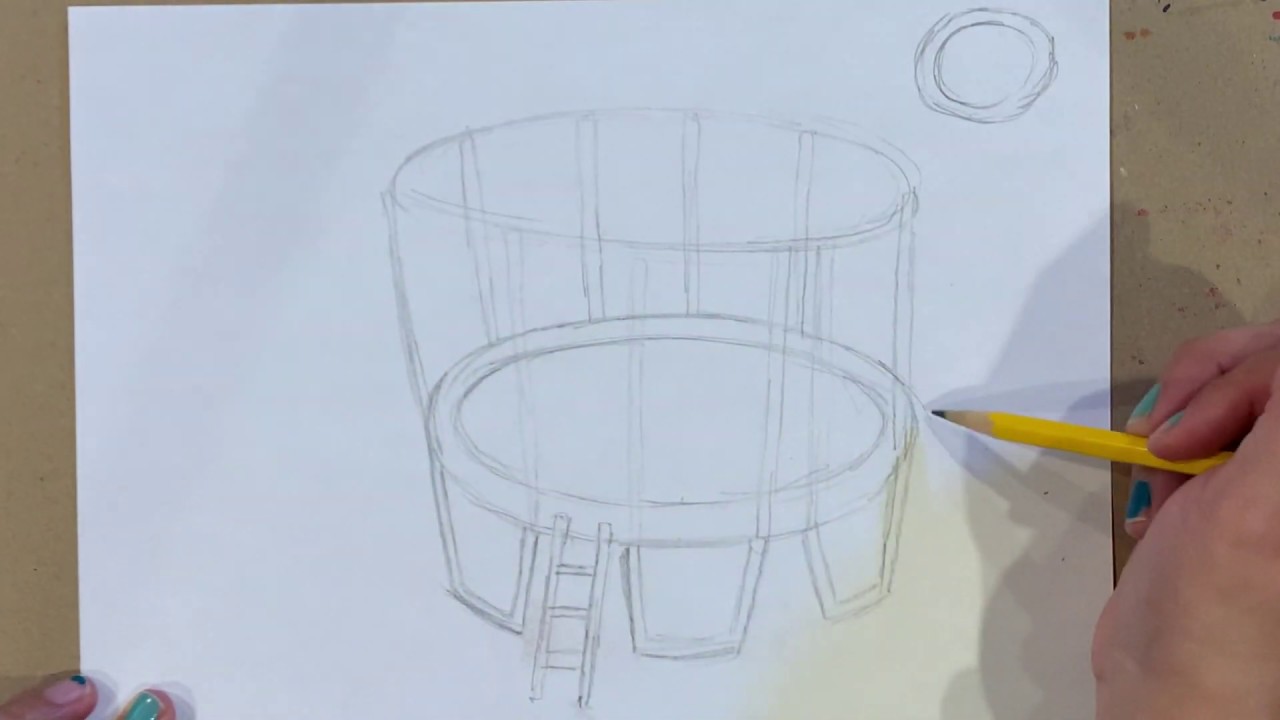
1. Start by sketching out the basic shape of the trampoline. For example, start with a large oval for the main part of the trampoline, and then add two smaller ovals for the ends.
2. Next, add in some details to make it look more realistic. For instance, draw curved lines around the edge of the trampoline to create its metal frame. You can also add springs or other connectors between the frame and the mat.
3. Finally, color in your drawing using light and dark shades to give it some dimensionality. Trampolines are typically blue or green, so feel free to use these colors or go for something else entirely!
How Do You Draw a Simple Swimming Pool?
Assuming you would like a tutorial on how to draw a swimming pool:
Things You’ll Need
-Pencil
-Paper
-Eraser
-Ruler or Measuring Tape
Instructions
1.Draw a rectangle. This will be the perimeter of your pool.
The longer sides will be the length, and the shorter sides will be the width. To make sure your rectangle is symmetrical, use a ruler or measuring tape to measure from the midpoints of each side to opposite corners. When you have finished drawing your rectangle, erase any extra lines inside of it so that only the perimeter is visible.
2!Add details to your pool. Start by drawing a line down the middle of your lengthwise side (this will be the diving board).
Then, add stairs coming down into the pool on one end.
How Do You Draw a Parasailing?
Assuming you would like a step-by-step guide on how to draw a parasailing:
1. Begin by drawing a large oval shape in the center of your page. This will be the parachute.
2. Next, draw two smaller ovals near the top of the first oval. These will be the people who are parasailing.
3. To finish up, add some lines coming down from the sides of the parachutes to represent the cords that are holding everything up!
How Do You Draw a Puma?
Assuming you would like a step by step guide on how to draw a puma:
1. Begin by drawing the head. Draw a large oval shape for the puma’s head and then add two small triangles for the ears.
2. Next, draw the body. Start with a long, curved line for the back and then add two shorter lines for the front legs. Finish up by adding a short, curved line for the tail.
3. To finish your drawing, add some details such as fur patterns and whiskers. You can also color in your drawing if you like!
Conclusion
In this blog post, the author provides a step-by-step guide on how to draw a trampoline. The author begins by drawing a rectangle in the center of the paper. Next, the author adds two curved lines at the top and bottom of the rectangle.
After that, the author draws four lines evenly spaced out from each other across the middle of the rectangle. Finally, the author adds a few details to finish off the drawing.