When you think about a trampoline, you might picture a small, circular device with a mesh surface. However, there is more to a trampoline than meets the eye. In order to set up and use a trampoline safely, you need several tools and accessories.
Here is a list of what you will need:
-A level spot in your yard: You will need to find a flat, level spot in your yard for the trampoline. If your yard is not level, the trampoline will not be stable and could tip over.
-Anchoring supplies: In order to keep the trampoline in place, you will need to anchor it down. This can be done with sandbags, cinder blocks, or stakes driven into the ground.
-A ladder: You will need a ladder to get on and off the trampoline safely.
Make sure the ladder is tall enough so that you can reach the center of the trampoline without having to stretch too much.
-A safety net: A safety net encloses the jumping area of the trampoline and prevents people from falling off. This is especially important if you have young children who will be using the trampoline.
-Padding: The metal frame of the trampoline can be padded with foam pads or mats.
If you’re planning on adding a trampoline to your backyard, there are a few things you’ll need to consider. First, you’ll need to make sure you have enough space. A typical trampoline is about 10 feet in diameter, so you’ll need an area that’s at least 20 feet wide and 20 feet long.
You should also avoid placing the trampoline near any trees or other obstacles that could damage it.
Once you’ve found the perfect spot for your trampoline, it’s time to start gathering the necessary tools and materials. You’ll need:
– A level surface: This is absolutely essential for setting up your trampoline. If your ground isn’t level, the entire structure will be unstable and dangerous. Use a laser level or string level to make sure your site is flat before proceeding.
– Shovels: You’ll need two shovels – one for digging the holes for the posts, and one for excavating the pit around the perimeter of the trampoline.
– Posts: Most trampolines come with metal posts that must be driven into the ground. Make sure you have a sledgehammer or post driver that’s big enough to handle these posts.
– Braces: Once the posts are in place, you’ll need to add braces to further stabilize them. These can be purchased at most hardware stores.
– The mat: This is the part of the trampoline where you actually bounce!
It’s typically made from heavy-duty nylon or polypropylene fabric and attaches to the frame with springs.
How to Set Up A Trampoline
How to Build a Trampoline
Are you planning on purchasing a trampoline? Perhaps you’re wondering how much work goes into building one. Trampolines are not only great exercise equipment, but they can be a fun addition to any backyard.
Here is a detailed guide on how to build a trampoline.
The first thing you will need to do is purchase a trampoline kit. These can be found at most sporting goods stores or online.
Once you have your kit, unpack it and lay out all of the pieces. Take a look at the instructions that came with your kit and familiarize yourself with the process.
Next, you will need to assemble the frame of the trampoline.
This is typically done by attaching the legs to the mainframe using bolts and washers. Once the frame is together, it’s time to start stretching out the springs. Most kits will come with 96 springs, so this part may take some time.
Once all of the springs are in place, it’s time to attach them to the jumping mat. There should be hooks on both sides of each spring – make sure these are properly secured before moving on. The next step is to secure the safety pad around the outside edge of the trampoline frame.
This will help protect anyone who may fall off while using it.
Now that everything is in place, it’s time for a test bounce! If everything feels sturdy and secure, then your trampoline is ready for use!
Enjoy hours of bouncing fun in your very own backyard!
How to Put a Trampoline Together by Yourself
If you’re planning on putting a trampoline together by yourself, there are a few things you’ll need to keep in mind. First, make sure that you have all of the necessary tools and materials. You’ll need a drill, screwdriver, measuring tape, and level.
You’ll also need the trampoline itself, of course, as well as the spring set.
Once you have everything gathered together, take a moment to read through the instructions that came with your trampoline kit. This will give you a good idea of what needs to be done and in what order.
It’s always better to be safe than sorry, so if anything seems confusing or unclear don’t hesitate to ask someone for help before proceeding.
Now it’s time to get started! Begin by attaching the legs to the frame of the trampoline using the screws provided.
Make sure that each leg is level with the others before moving on. Once all four legs are in place it’s time to add on the safety enclosure netting. Start at one corner and work your way around until the entire perimeter is covered.
Finally, attach the springs to their corresponding hooks on the frame and stretch them out evenly around the edge of the trampoline bed. That’s it – you’re done!
How to Put a Trampoline Together With Net
If you’re looking to get a trampoline with a net for your backyard, there are a few things you need to know before making your purchase. Here’s a quick guide on how to put a trampoline together with net so you can start enjoying some outdoor fun!
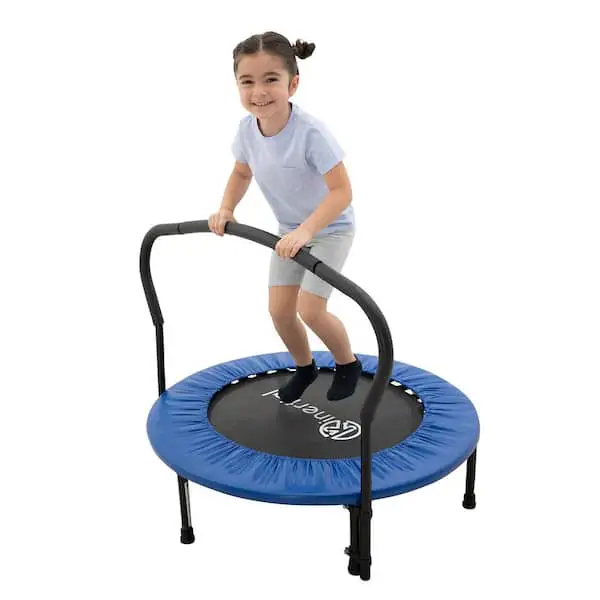
When picking out a trampoline, make sure to find one that’s the right size for your needs.
A small trampoline might be great for younger kids, while a larger one would be better suited for older children and adults. Once you have the perfect trampoline picked out, it’s time to set it up!
Follow the instructions that come with your purchase, but generally speaking, setting up a trampoline is relatively simple.
Start by assembling the frame and then attaching the springs. Once the frame is complete, stretch out the mat and secure it onto the frame.
Now it’s time to add on the netting.
Make sure all of the hooks are in place and then stretch out the netting over top of the entire structure. Secure it in place and give everything a final once-over to make sure everything looks good before letting anyone jump on!
How to Put a 10Ft Trampoline Together
A 10ft trampoline is a great addition to any backyard. They are perfect for kids and adults alike, and provide hours of fun and exercise. But before you can start bouncing around, you need to put your trampoline together.
Here’s how:
1. Start by laying out all of the components of your trampoline. This includes the frame, springs, mat, and pads.
Make sure that everything is in good condition and that there are no missing parts.
2. Next, attach the springs to theframe using the clips provided. Be sure to do this step carefully, as the springs are under a lot of tension and can cause serious injury if not handled properly.
3. Once all of the springs are attached, it’s time to put on the mat. Start at one end of the frame and stretch the mat over it until it’s taut. Then do the same at the other end oftheframe untilthe entire surface is covered .
4 Finally , securethemattoframebytyingitdown withtheropesprovided . Onceeverythingis tightandsecured , yourtrampolineisreadyforuse !
Trampoline Assembly Instructions Pdf
If you’re looking for a great trampoline that’s easy to assemble, we’ve got just the thing. Our trampoline assembly instructions are simple and straightforward, so you’ll be up and jumping in no time. Plus, our PDF format makes it easy to download and print out, so you can keep it handy for reference.
Our trampoline assembly process is quick and easy, but there are a few things to keep in mind before you begin. First, make sure you have all the necessary tools on hand. You’ll need a Phillips head screwdriver, a hammer, and pliers.
Next, take a look at the area where you’ll be assembling the trampoline. Make sure it’s level and free of debris that could trip you up or damage the equipment.
Now that you’re ready to get started, follow these simple steps:
1. Attach the legs to the frame using the supplied bolts and nuts. Tighten everything securely with your wrench or pliers.
2. Affix the spring pad around the edge of the frame using zip ties or Velcro strips ( depending on model).
Make sure it’s tight and even all around. 3 . Hang springs onto hooks around outside of frame 4 .
Assemble safety enclosure according to manufacturer’s instructions 5 .Test bounce by gently jumping in center of mat 6 . That’s it!
You’re ready to enjoy hours of fun bouncing away on your new trampoline!
Trampoline Setup Cost
Are you looking for a fun activity for your family? A trampoline is a great option! But before you purchase one, you’ll need to factor in the cost of setup.
Here’s what you need to know about trampoline setup cost.
The average cost to set up a trampoline is between $100 and $200. This includes delivery and installation.
Some companies may charge extra for certain features or services, so be sure to ask about all fees upfront.
One of the biggest factors in determining the final cost will be the size of the trampoline. A larger trampoline will obviously cost more to deliver and install than a smaller one.
Other factors that can affect price include whether or not the company offers any discounts, and if they have any special promotions running at the time of purchase.
Assuming all things are equal, it’s generally cheaper to buy and set up a trampoline during the off-season (fall/winter). That’s because demand is lower at those times, so companies are often willing to offer discounts in order to generate business.
So if you’re flexible on timing, it pays to wait for a good deal!
Now that you know more about trampoline setup cost, start shopping around and get ready for some backyard fun!
Trampoline Assembly Service
If you’re looking for a professional trampoline assembly service, you’ve come to the right place! Here at our company, we have years of experience in assembling all types of trampolines – from small round ones to large rectangular ones. We know exactly how to put them together so that they’re safe and secure for everyone to use.
We understand that not everyone has the time or ability to assemble a trampoline on their own, which is why we offer our services. We’ll come to your home or business and get the job done quickly and efficiently. Plus, we’ll make sure that everything is tight and secured before we leave.
Safety is always our top priority, so you can rest assured knowing that your trampoline will be assembled correctly when you choose us. Give us a call today to schedule your appointment!
Spring Puller for Trampoline
A spring puller for a trampoline is an essential piece of equipment if you want to keep your trampoline in top shape. A spring puller helps to remove the old, worn-out springs from your trampoline so that you can replace them with new ones. This process is important because it helps to ensure that your trampoline remains safe and functional for years to come.
If you’re not familiar with how to use a spring puller, don’t worry – it’s actually quite simple. Just follow these steps and you’ll be able to get the job done in no time:
1) Start by removing the safety pad from your trampoline.
This will give you easy access to the springs.
2) Use the spring puller tool to grab onto one end of a spring.
3) Apply pressure to the handle of the tool until the spring pops out of its housing.
Repeat this step for all of the springs on your trampoline.
4) Once all of the old springs have been removed, take a moment to inspect the frame of your trampoline for any damage or wear and tear. If everything looks good, proceed to step five.
If not, make sure to repair or replace any damaged parts before continuing.
5) Now it’s time to install the new springs! Simply place one end of a spring into its housing on the frame and then use the spring puller tool (or your hands) to stretch it out until the other end snaps into place.
Repeat this process for all of the new springs until they are all installed properly.

Credit: simpletrampoline.com
Does Trampoline Come With Tools?
No, trampolines do not come with tools. You will need to purchase them separately.
How Do You Set Up a Trampoline?
A trampoline can provide hours of fun and exercise for people of all ages. Setting up a trampoline is a relatively easy process that can be completed in just a few minutes. Here are the steps you need to follow to set up your trampoline:
1. Choose a level spot in your yard for the trampoline. Make sure there are no trees, power lines or other obstacles nearby that could pose a safety hazard.
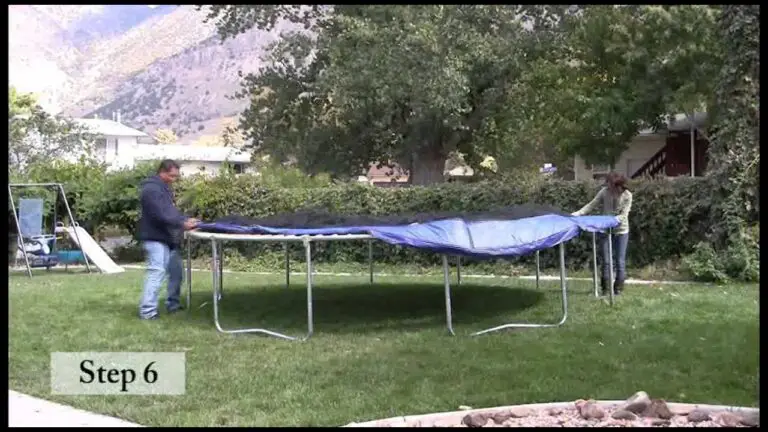
2. Unfold the trampoline and place it on the ground in the selected spot.
If you have an oval-shaped trampoline, make sure it is positioned so that the longest side is perpendicular to any slope in your yard. This will help prevent the trampoline from tipping over if someone jumps on it too hard.
3. Assemble the frame according to the manufacturer’s instructions.
Be sure to Tighten all bolts and screws securely before moving on to the next step.
4. Stretch out the spring cover and hook it onto the frame at each corner (there should be 8 hooks total). Then, pull the cover tight and secure it with its Velcro straps or ties.
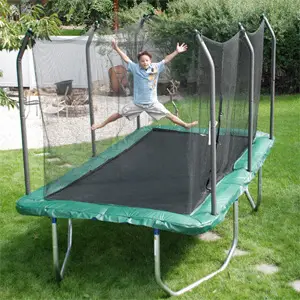
5 . Hang the safety enclosure netting from the top of the frame, making sure that it hangs evenly around all sides. Attach The netting to The hooks at each corner of The frame using The provided zip ties or carabiners .
Again , make sure everything is pulled tight And secured before letting anyone near The Trampoline .
6 . Inspect The entire setup To make Sure That there Are no gaps between The netting And The Frame , And That all Hooks , Bolts ,And Screws Are tightened securely .
Now you ’ re ready to start jumping !
How Long Does It Take to Put Together a Trampoline?
It takes on average about 20-30 minutes to assemble a trampoline. The time it takes can be affected by the size and type of trampoline, as well as how many people are helping with the assembly. It is generally recommended to have two people help with the assembly, as it can be difficult to do alone.
How Do You Assemble a 14Ft Trampoline?
Assuming you have all the tools and materials required, assembling a 14ft trampoline is not a difficult task. Here are the steps you need to follow:
1. Unfold the trampoline frame and place it on level ground.
If you’re using a square or rectangular trampoline, make sure the four corners are equidistant from each other.
2. Place the spring pad over the frame, making sure all of the holes line up. Use zip ties to secure the spring pad in place.
3. Attach the springs to theframe, starting with the longest ones first. Hook one end of each spring into a hole onthe outer edge ofthe frame, then stretchthe springto its full lengthand hookthe otherendinto another holeon an inner partof theframe ( nearestto whereyou attachedthe first end).Repeatthis process forall ofthe springsuntil they’reall securelyattachedto both parts ofthe frame.
4. Once all ofthe springshave beenattached,place themain matover topof thistrampolineassembly so thatits holeslineup withthose onthe frameandspringpadbelow it.Usesecuringstrapsor ropes to tieit downat severalpointsaroundits perimeterso it doesn’tslip offduring use.
Conclusion
A trampoline is a great addition to any backyard, and it can provide hours of fun for the whole family. But before you can start bouncing around, there are a few things you need to do to set up your new trampoline. In this blog post, we’ll walk you through everything you need to get started, from choosing the right spot for your trampoline to assembling it and getting it ready for use.
By the end, you’ll be ready to start enjoying your new trampoline in no time!