Assuming you would like tips on how to put a net on a trampoline:
First, you will need to purchase a net that is the right size for your trampoline. Once you have the net, it’s time to install it.
Begin by attaching one end of the net to the frame of the trampoline. Make sure that the hooks are facing inwards so that they can be properly secured. Next, stretch the net across the entire circumference of the trampoline and attach it to the other side of the frame.
If necessary, use zip ties or another method of securing the netting in place. And that’s it! You’ve successfully installed a safety net onto your trampoline.
If you’ve ever wondered how to put a net on a trampoline, wonder no more! It’s actually pretty simple. Here’s what you’ll need:
– A trampoline with an enclosure
– A net that’s designed for your specific trampoline model
– zip ties or other fasteners
First, take the net and drape it over the top of the enclosure. Make sure that the opening of the net is facing downwards. Then, use the zip ties or other fasteners to attach the net to the inside of the enclosure frame.
Start at one corner and work your way around, making sure that the net is taut and secure. Once you’re finished, give the entire setup a shake to make sure everything is secure – and that’s it! You’re now ready to enjoy hours of safe bouncing fun.
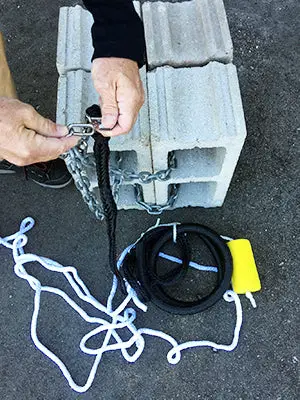
How to Install a New Replacement Trampoline Net (Attaching the Bottom Rope)
How to Put a Net on a 14Ft Trampoline
If you have a 14ft trampoline, you may want to consider putting a net around it. This will provide additional safety for those using the trampoline and can help prevent injuries. Here are some tips on how to put a net on a 14ft trampoline:
1. First, you will need to purchase a net that is specifically designed for a 14ft trampoline. Make sure the net has an opening that is large enough to fit over the frame of your trampoline.
2. Once you have your net, lay it out flat on the ground next to the trampoline.
3. Start by attaching one side of the netting to the top of the trampoline frame with zip ties or similar fasteners. Work your way around the entire perimeter of the frame, attaching the netting as you go.
4. Once all sides of the netting are attached to the frame, stretch it out over the center of the trampoline and secure it in place with more zip ties or fasteners.
5. That’s it! Your 14ft trampoline is now safely enclosed with a protective netting.
Trampoline Net Inside Or Outside
When you purchase a trampoline, one of the most important decisions you will need to make is whether to put the trampoline net inside or outside of the frame. There are pros and cons to both choices, so it’s important to understand all of your options before making a decision.
If you choose to put the trampoline net inside of the frame, one of the main benefits is that it will be better protected from weather conditions.
This means that your net will last longer and won’t need to be replaced as often. Additionally, having the net inside can provide a bit more stability for jumpers since it’s not as likely to blow around in the wind.
However, there are also some drawbacks to putting the net inside of the frame.
For one thing, it can be more difficult to install since you’ll need to thread it through all of the metal bars. Additionally, if jumpers land on the edge of the trampoline, they could potentially get tangled in between the bars and hurt themselves. If safety is your top priority, then an internal net may not be ideal.
If you decide to put the trampoline net outside of the frame, there are also both benefits and drawbacks to consider. One advantage is that it’s much easier to install since you don’t have thread it through any bars. Additionally, an external net provides more padding onthe edges ofthe trampoline which can help reduce injuries if jumpers happento land off-center.
However, one downside is that an externalnet ismore susceptibleto damage from weather conditions like strong winds or hail storms. Over time, this typeofnetting willneedtobereplacedmore often than aninternalnet would require . Ultimately ,the decisionofwhethertoput thenetinside oroutsideoftheframeis up totrampolineownerand what their prioritiesare .
Zoomster Trampoline Net Instructions
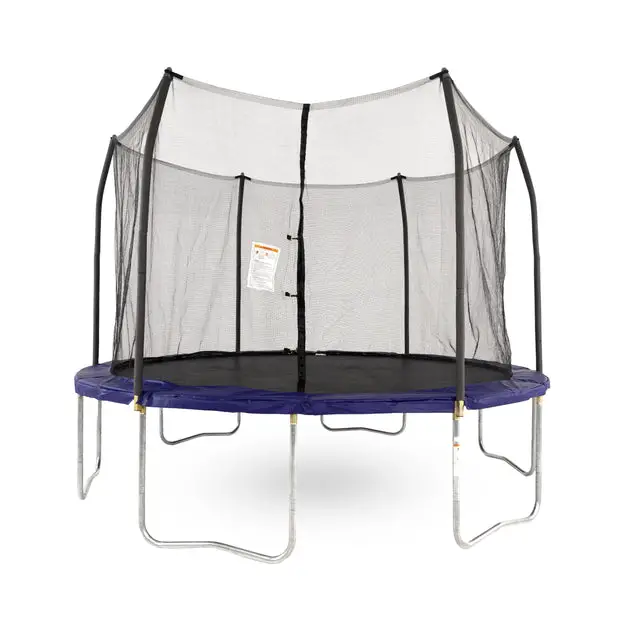
If you’re looking for a great trampoline that will provide endless hours of fun, the Zoomster is a great option. It’s easy to set up and take down, and it comes with a net enclosure that will keep everyone safe while they’re bouncing around. Here are some instructions on how to assemble the Zoomster trampoline net:
1. Start by attaching the top ring of the net enclosure to the top of the trampoline frame. Make sure that the hooks are facing inwards so that they can be engaged with the poles.
2. Next, take each pole and insert it into one of the holes at the base of the trampoline frame.
There are eight poles in total – four on each side.
3. Once all of the poles are in place, stretch out the netting and attach it to the bottom ring of the enclosure. Make sure that all of the hooks are engaged so that there are no gaps in coverage.
4. Finally, secure all ofthe clips at different intervals aroundthe circumferenceof thenettingto ensurethatit’s properly securedto The Trampoline Frame And That There Are No Gaps In Coverage .
How to Replace Trampoline Net
If your trampoline net has seen better days, it’s probably time to replace it. Here’s how to do it:
1. Remove the old netting from the frame.
This is usually done by unscrewing the clamps that hold it in place.
2. Measure the new piece of netting to make sure it’s the right size.
3. Attach the new netting to the frame, using clamps or other fasteners.
Make sure it’s tight and secure.
4. Test out the new netting by bouncing on the trampoline!
How to Put a Trampoline Together
Putting together a trampoline is not as difficult as one might think. With a few simple steps, most people can have their trampoline assembled in no time. Here are the basic steps on how to put a trampoline together:
1. Read the instructions that come with your trampoline. This may seem like an obvious first step, but it is important to make sure you understand the manufacturer’s assembly instructions before beginning.
2. Lay out all of the components of your trampoline on a level surface.
This will help you keep track of everything and ensure that nothing gets misplaced during assembly.
3. Begin by attaching the legs to the frame of the trampoline using the bolts provided in your kit. Make sure that each leg is securely fastened before moving on to the next step.
4. Once all of the legs are in place, it’s time to start attaching the springs to the frame. Again, follow the instructions carefully and make sure each spring is properly secured before moving onto the next one. Depending on the size and type of trampoline you have, there may be anywhere from 24-48 springs that need to be attached.
5 . The final step is to stretch out and securethe mat overthe top ofthe frame and springs usingthe strapsor other methodspecifiedin yourassemblyinstructions . Make suretoleave some slackinthe mat sothatthe jumpershave some “give”when they landon it .
And withthat , yourtrampolineis readyfor use!
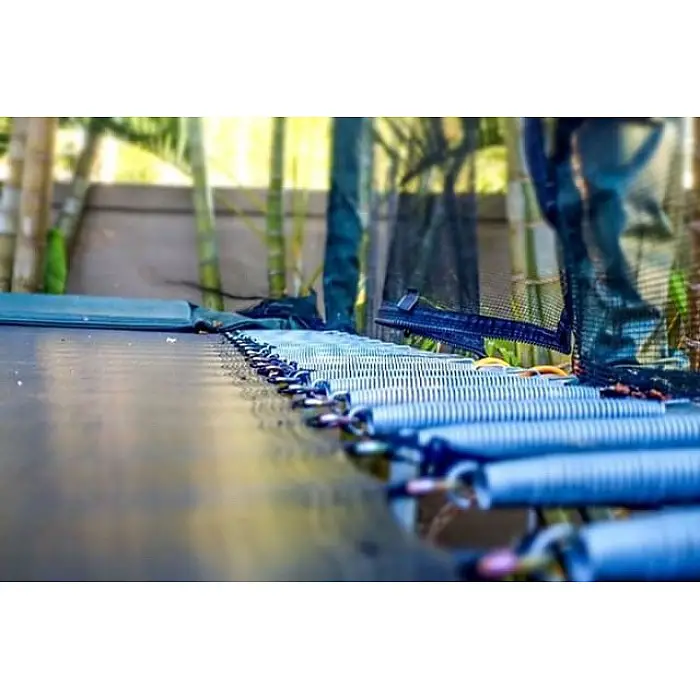
Trampoline Netting
When it comes to trampoline safety, netting is one of the most important features. A good quality net will keep users safe from falling off the trampoline and injuring themselves. It’s important to choose a net that is made from durable materials and is properly installed.
Here are some things to keep in mind when choosing a trampoline net:
– Make sure the netting is made from strong, durable material. Some nets are made from weaker materials that can tear easily.
– The net should be installed properly. Make sure it is tight against the sides of the trampoline and has no gaps.
– Choose a net with a large opening at the top.
This will make it easier for users to get on and off the trampoline safely.
– Make sure there are no sharp edges on the netting. Any rough edges could cause injury if someone falls onto them.
Can You Add a Net to Any Trampoline
Most people believe that you can only add a net to a round trampoline, but this isn’t the case! You can actually add a net to any type of trampoline, provided that it has the right kind of frame. The main reason why people don’t put nets on square or rectangular trampolines is because they’re not as stable.
However, if you have a good frame and you’re confident that your trampoline can handle the weight, then go for it!
Adding a net to your trampoline is a great way to keep everyone safe while they’re bouncing around. It’s also a good way to keep the leaves and other debris out of your yard.
If you live in an area with a lot of trees, then having a net can save you hours of cleaning time every fall!
How to Install Upper Bounce Trampoline Net
Installing an Upper Bounce Trampoline Net is a great way to keep your family safe while enjoying your trampoline. Here are the simple steps to follow to properly install your net:
1. Assemble the trampoline frame according to the manufacturer’s instructions.
Be sure that all bolts and nuts are tight and that the frame is level.
2. Spread the trampoline mat over the frame and secure it with the spring clips. Again, be sure that all clips are tight so that there is no chance of the mat coming loose during use.
3. Attach one end of the upper bounce trampoline netting to the top ring of the trampoline frame using zip ties or bungee cords. Work your way around the entire circumference of the top ring, attaching the netting securely as you go.
4. Once you have reached the other end of the netting, tuck it under itself and secure it with another zip tie or bungee cord.
This will create a nice, finished look and prevent any gaps in coverage.
5. That’s it! Your Upper Bounce Trampoline Net is now installed and ready for use!

Credit: www.youtube.com
How Do You Attach Net on Trampoline?
If you’re looking to add a net to your trampoline, there are a few things you’ll need to do. First, you’ll need to purchase a net that is compatible with your trampoline. Once you have the net, you’ll need to follow these steps:
1. Lay the net out on the ground and position it so that it’s centered on the trampoline.
2. Begin attaching the top of the net to the frame of the trampoline using zip ties or similar fasteners.
3. Once the top of the net is secure, start attaching the sides of the netting to the frame.
Again, use zip ties or similar fasteners for this step.
4. Once all four sides of the netting are attached, double check all of your work to make sure everything is secure before allowing anyone to jump on the trampoline.
Does a Trampoline Net Go on the Inside Or Outside?
A trampoline net can go on the inside or outside of the trampoline. If you have an indoor trampoline, it is recommended that you put the net on the inside so that dirt and debris does not get on the mat. An outdoor trampoline can have the net on the inside or outside, depending on your preference.
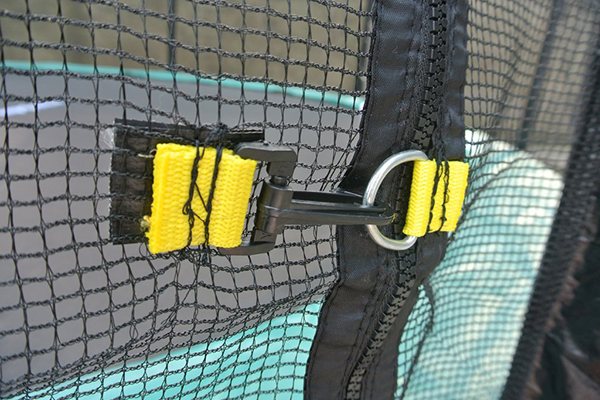
What Holds the Net Up on a Trampoline?
Assuming you are talking about a rectangular trampoline, the net is attached to the frame on all four sides. On each side, there are hooks or loops that the netting attaches to. The tension of the net keeps it pulled taut and prevents it from sagging in the middle.
How Do You Put a Net on a 12 Foot Trampoline?
Assuming you would like tips on how to put a net on a 12 foot trampoline:
First, you will need to purchase a net that is specifically designed for a 12 foot trampoline. You can find these nets at most sporting goods stores or online.
Once you have the net, follow these steps:
1. Lay the trampoline flat on the ground and remove any debris from the surface.
2. Position the net around the edge of the trampoline, making sure that it is evenly distributed.
3. Secure the net to the trampoline using zip ties or bungee cords. Start by attaching the top of the net to the top of the trampoline frame, then work your way around until all sides are secure.
4. Test the stability of the net by bouncing on it lightly before allowing anyone to use it.
Conclusion
If you have a trampoline, you may want to consider adding a net around it. This will help keep people safe while using the trampoline and will also help prevent any damage to the trampoline itself. Here are some tips on how to put a net on a trampoline:
1. Make sure that the net is the right size for your trampoline. You don’t want it to be too small or too large.
2. Attach the netting to the top of the trampoline frame using zip ties or other similar fasteners.
3. Make sure that the net is tight so that there are no gaps where someone could fall through.
4. Test out the net by bouncing on the trampoline yourself or having someone else bounce while you hold onto the sides of the netting.