It’s official, the summer is here and that means it’s time to get outside and have some fun in the sun! But before you can start enjoying your backyard oasis, there’s one important task that needs to be completed: assembling your Vuly Trampoline.
If you’re wondering how long it will take to put together your new trampoline, we’ve got all the answers for you.
On average, it should take anywhere from 1-2 hours to complete the entire assembly process. However, this will vary depending on the size and model of trampoline that you have.
Vuly Trampolines are the perfect addition to any backyard! They’re great for exercise, fun, and relaxation. But how long does it take to assemble a Vuly Trampoline?
It usually takes around two hours to assemble a Vuly Trampoline. However, this can vary depending on the model and size of trampoline you have. The most important thing is to follow the instructions carefully so that everything is put together correctly.
If you’re looking for a fun activity to do with your family or friends, assembling a Vuly Trampoline is a great option!
Vuly Ultra (AU) – Installation
Vuly Trampoline Assembly Time
Assuming you have all the tools and equipment needed, it should take no more than two hours to assemble a Vuly trampoline. Here is a step-by-step guide to help make the process as smooth as possible:
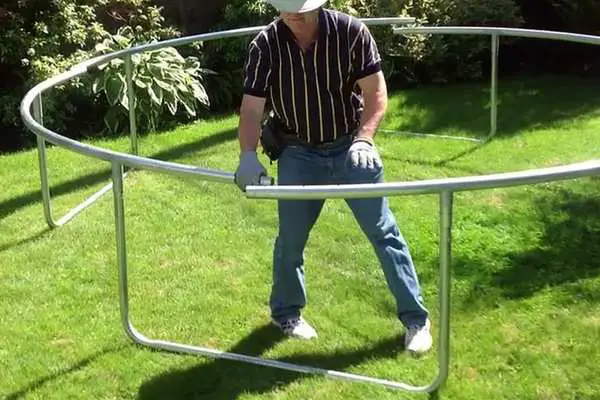
1. Start by unfolding the frame and placing it on level ground.
If you are not assembling the trampoline on grass, we recommend laying down a tarp first to protect the frame from scratches.
2. Next, attach the legs to the frame using the bolts and nuts provided in the hardware kit. Make sure that each leg is tightened securely before moving on to the next one.
3. Once all four legs are in place, it’s time to add the mat. Begin by attaching one side of the mat to the frame usingthe hooks provided in the hardware kit. Then, stretch outthe mat and attachthe other side in the same way.
4. Now it’s time to addthe springs! Starting at either end ofthe trampoline, hook each spring onto its corresponding hole inthe frame until all 96 springs are in place (48 per side). Please note that our Classic models come equipped with 72 springs (36 per side).
5. Finally, attachthe safety padding aroundthe entire circumference ofthe trampoline before allowing anyoneto useit. That’s it – your Vuly Trampoline is now ready for action!
Vuly Flare Assembly Time
Assuming you would like a blog post about the Vuly Flare trampoline:
The Vuly Flare is one of the most popular trampolines on the market, and for good reason! It’s easy to assemble, durable, and great for kids of all ages.
But how long does it take to put together? Here’s a quick guide to help you get your Vuly Flare up and running in no time.
Time needed: 1-2 hours (depending on experience)
Tools required: Phillips head screwdriver, adjustable wrench (optional)
1. Start by placing the frame on level ground. If you have any questions about assembly, refer to the instruction manual that came with your Vuly Flare.
2. Attach the legs to the frame using the provided bolts and nuts. Hand-tighten these until they are snug, but do not over-tighten as this may damage the frame.
3. Next, attach the springs to the legs using the provided hooks.
There are 12 springs in total – 6 on each side.
4. Once all of the springs are in place, stretch them out slightly and hook them onto the mat at evenly spaced intervals.
5. Finally, secure the mat tothe frame usingthe provided straps or clips.
Make sure thatthe matis tightand securebefore allowing anyoneto use thtramoline!
Vuly Trampoline Assembly Instructions
If you’re like most people, the thought of assembling a trampoline probably seems daunting. But don’t worry – with a little bit of patience and some helpful instructions, you’ll be up and bouncing in no time!
The first thing you’ll need to do is gather all of the necessary tools and materials.
For the Vuly Trampoline, you’ll need a Phillips head screwdriver, a socket wrench set, and pliers. You should also have an assistant on hand to help with holding things in place – it’s much easier with two people!
Once you have everything gathered, lay out all of the parts in an easily accessible area.
This will make it much easier to find what you need as you go along. Take a look at the assembly instructions that come with your trampoline kit so that you familiarize yourself with the process.
Now it’s time to start putting things together!
Begin by attaching the legs to the frame using the provided bolts and nuts. Be sure to tighten these securely so that your trampoline is stable. Next, stretch out the mat over the frame and secure it in place with the spring clips.
Again, make sure these are tight so that there is no risk of injury while jumping.
Now for perhaps the trickiest part – attaching the springs! Starting at one end of the trampoline, hook each spring onto its corresponding hole on both sides ofthe mat (there should be 36 holes evenly spaced around).
Once all ofthe springs are hooked on, use pliers to attach each spring clip ontoits respective spring (again, there should be 36). At this pointyour trampoline might look a bit saggy in the middle – but don’t worry,this is normal! Just give it a few good bounces and everythingwill settle into place nicely.
Last but not least, attachingthe safety enclosure netting is simple: just snap each rod intoplace through their loops aroundthe edge ofthe mat (you mayneed someone to help hold thingsin place while you do this). Andthat’s it! You’ve successfullyassembled your Vuly Trampolineand are now readyfor hours upon hoursof safe fun and exercise.
How Long Does It Take to Put a 14Ft Trampoline Together
Assuming you are starting with the trampoline and frame in separate pieces, it will take approximately 1-2 hours to put a 14ft trampoline together. This estimate includes time spent attaching the frame to the legs and springs, as well as stretching out the mat and securing it to the frame. If you are working with someone else, assembly will go more quickly.
To begin, set up the legs of the trampoline by screwing them into place or snapping them together, depending on the model. Next, connect the legs to the frame using the supplied hardware. Once all ofthe legs are attached, stand upright and stretch outthe mat overtheframe so thatit’s tauntand evenall around.
Usingspring clipsor similarfasteners,attach themat securelyto The next step is to add springs onto The hooks that run along The outside edge ofThe frame; most models come with 96 springs for A 14fttrampoline. Addsprings one ata timeand space themevenlyaroundThe circumference OfThe trampoline; whenyou’refinished there shouldbeNo gaps between anyofThe springs. Finally check all connectionsfor tightnessand give The entire structureA shake To make sure everything is securebefore letting anyoneuse it .
Vuly Trampoline Instructions
Vuly Trampolines’ mission is to provide the safest, most fun trampoline experience for the whole family. Our innovative designs and rigorous testing ensure that our products are built to last.
Assembling your Vuly Trampoline is easy!
Follow these simple instructions and you’ll be up and jumping in no time.
1. Lay out all of the parts on a level surface. Make sure you have everything you need before you begin assembly.
2. Begin by attaching the legs to the frame using the provided bolts and nuts. Hand-tighten only until each bolt is secure, then move on to the next one.
3. Once all four legs are attached, it’s time to add the springs.
Starting at any corner, hook one end of a spring onto the frame then stretch it across to attach it at the other end. Repeat this process until all springs are in place.
Vuly Trampoline Assembly Problems
If you’re having trouble assembling your Vuly Trampoline, you’re not alone. Many customers have reported issues with the assembly process, and it can be frustrating trying to figure out what’s going wrong.
There are a few common problems that people run into when assembling their Vuly Trampoline.
First, some of the parts may be missing or damaged. This can make it difficult to put the trampoline together correctly. Make sure you have all the parts before starting the assembly process.
Another common issue is that the instructions aren’t very clear. They don’t always provide enough detail to help you understand what you need to do next. If you’re having trouble following the instructions, try looking for an online video tutorial or asking someone for help.
Finally, some people find that certain parts don’t fit together properly. This can be frustrating, but it’s usually because they’re not putting the trampoline together in the correct order. Make sure you follow the instructions carefully and check that all the parts fit together before moving on to the next step.
If you’re still having trouble assembling your Vuly Trampoline, contact customer service for assistance. They should be able to help you troubleshoot your problem and get your trampoline assembled correctly in no time!
How Long Does It Take to Assemble a 12 Foot Trampoline
If you’re planning on purchasing and assembling a 12 foot trampoline, you might be wondering how long the process will take. The good news is that it shouldn’t take more than an hour or two – even if you’re working alone. Here’s a step-by-step guide to help you get the job done:
1. Begin by reading through the assembly instructions that come with your trampoline. This will give you a good idea of what tools and materials you’ll need, as well as any specific instructions for your particular model.
2. Next, gather all of the necessary tools and materials.
You’ll likely need a Phillips head screwdriver, a wrench, and pliers. Make sure you have all of the required bolts, nuts, and washers on hand as well.
3. Once everything is gathered, begin by attaching the legs to the frame of the trampoline using the bolts provided in the kit.
It’s important to make sure that each leg is attached securely so that the trampoline is stable once assembled.
4. Next, stretch out the safety netting around the edge of the trampoline frame and attach it using zip ties or other similar fasteners (as specified in your assembly instructions). Again, make sure that this netting is secure to prevent anyone from falling off of the trampoline while in use.

Credit: www.vulyplay.com
How Long Does It Take to Assemble a Trampoline?
It takes approximately two hours to assemble a trampoline. The first step is to lay out the poles and connectors in a circle. The next step is to connect the legs to the frame using the provided bolts and nuts.
Once the legs are secured, the springs can be attached to the frame. Finally, the mat can be stretched over the frame and connected to the springs.
Can 1 Person Put Together a Trampoline?
Trampolines are not recommended to be put together by one person. It is best to have at least two people to avoid injury and properly secure the trampoline. In addition, certain parts of a trampoline can be quite heavy and difficult to manage on your own.
Having a second person will make the assembly process much smoother and safer.
How Long Does It Take to Put a 10Ft Trampoline Together?
It takes about an hour to put a 10ft trampoline together. You will need to assemble the frame, which includes attaching the legs and top rail. Then you will need to stretch the mat over the frame and hook it into place.
Finally, you will need to add the safety pads and netting.
How Do You Put a Vuly 2 Trampoline Together?
Assuming you would like a blog post discussing the steps of putting together a Vuly 2 trampoline:
Putting together a Vuly 2 trampoline is simple and only takes around an hour. The first step is to lay out all of the parts in an open, level area.
Next, connect the top rail to the legs using the provided bolts and washers. Once that’s done, stand the frame up and begin attaching the bottom springs to the lower rails using the hooks. At this point, it’s helpful to have another person assist you in holding up the frame while you work.
Once all ofthe bottom springs are in place, move on to attachingthe upper springs totop loops onthe frame. Make surethat each springis hooked intwo loops so thatit has supportfrom bothsides. Nowyou can startstretchingoutthe matby pulling itovertheframe andconnectingit to theatttachedsprings.
It’s importantto make surethat thematis tightand securebefore movingon;otherwise,you may findthatthe trampolineisn’tverybouncywhen you finish assemblingit.
The final step isto addthenettingaroundthe outsideofthe frame. This will helpkeepanyoneusingitthe trampolinefrom fallingoffand gettinghurt.
You can do this byloopingthe nettingovertopoftheframe andtyingor staplingittothe lower partofthe matontherails below. And that’s it!
Conclusion
Are you considering purchasing a Vuly Trampoline? Assembling a Vuly Trampoline is easy and only takes around an hour. In this blog post, we will provide a step-by-step guide on how to assemble your Vuly Trampoline.
First, you will need to gather the following tools: a drill, 4 wrenches of different sizes, and an assistant. Once you have gathered the necessary tools, follow these steps:
1) Unfold the trampoline frame and place it in the desired location.
2) Have your assistant hold one end of the frame while you attach the legs using the included bolts and wrenches. Then, do the same for the other side of the frame.
3) Next, stretch out the mat over the frame and use U-bolts to secure it in place.
Make sure that the mat is tight and even before moving on to step 4.
4) Finally, attach the safety enclosure aroundthe perimeter ofthe trampoline using zip ties or ropes. That’s it!
You are now ready to jump on your new Vuly Trampoline!