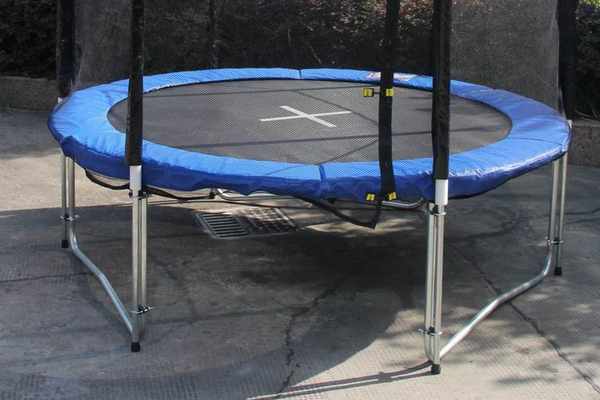
When the warmer weather hits, there is nothing better than spending time outdoors with the family. A great way to do this is by setting up a Springfree Trampoline in the backyard. Here are easy instructions on how to assemble your trampoline so that you can enjoy it all season long!
- Read all instructions before beginning assembly
- Lay out all of the trampoline parts in the order that they will be assembled
- Begin by attaching the bottom legs to the bottom frame using the bolts and nuts provided
- Next, add on the upper legs, again using the bolts and nuts to secure them in place
- The next step is to connect the top frame to the legs using the steel cables provided
- Make sure that you thread these through all of the pulleys before tightening them down
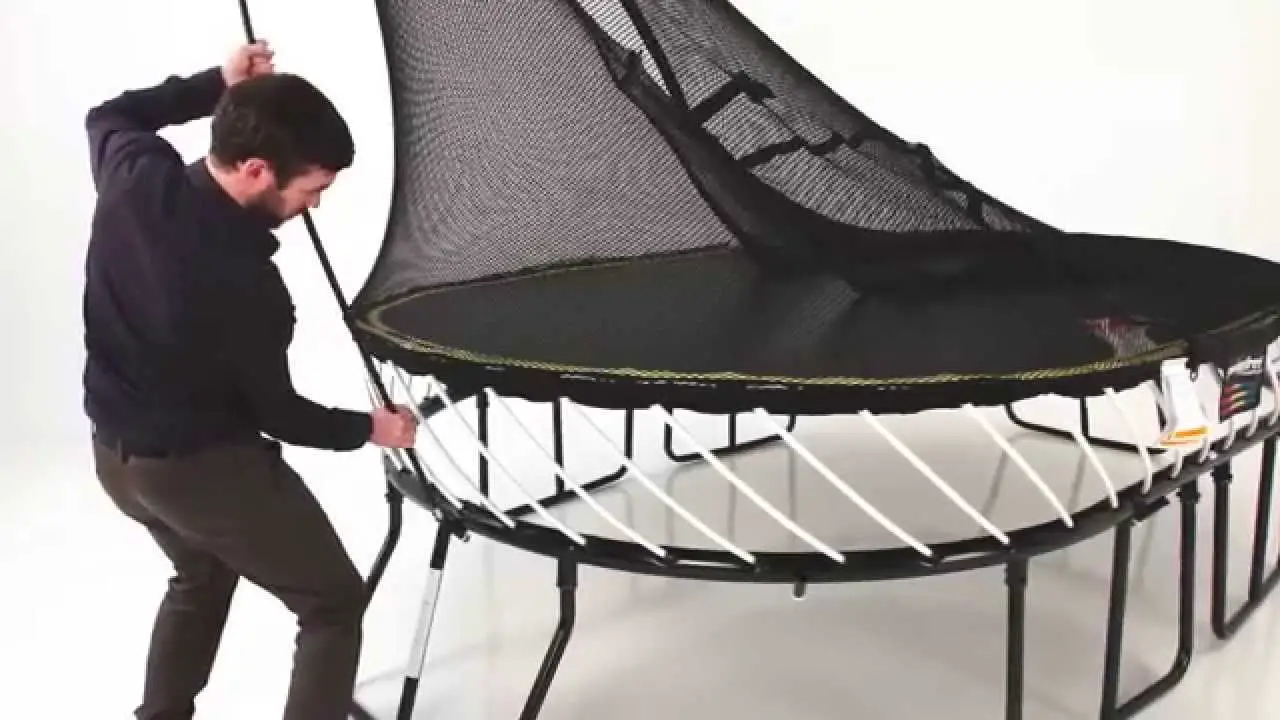
- 6 Now it’s time to add on the safety enclosure netting
- Start by screwing in the top ring around the perimeter of the trampoline frame
- Then, attach each individual section of netting to this top ring using zip ties or similar fasteners
- Work your way around until the entire enclosure is complete
Springfree Trampoline Installation: Assembling Frame
How Long to Assemble Springfree Trampoline
Assembling a Springfree Trampoline is simple and can be done in about an hour. But first, you’ll need to gather the following tools: a Phillips head screwdriver, a socket wrench set and an adjustable wrench. With these tools in hand, follow these assembly steps:
1. Unfold the trampoline frame and place it on level ground. If you’re assembling the trampoline indoors, make sure there’s plenty of clearance overhead.
2. Assemble the legs by inserting the tubes into the holes at the bottom of each upright leg.
Use the Phillips head screwdriver to tighten each bolt securely.
3. Next, stretch out the mat over the frame and secure it with 72 springs (included). Attach each spring hook to one of 72 eyelets around the edge of the mat.
Then stretch out and connect all 72 springs together at their meeting point in the center of the trampoline bed. This will give your trampoline its signature “bounce.”
4. Finally, install eithernet enclosure around entire perimeter of trampoline frame using included zip ties or rope (not provided).
Make sure all openings are secure before allowing anyone to use the trampoline..
How to Move a Springfree Trampoline
If you’ve ever owned a trampoline, then you know how difficult it can be to move. They’re large, unwieldy, and often times very heavy. But what do you do when you need to move your springfree trampoline?
Here are a few tips to help make the process as smooth as possible:
1. Find a friend or family member who can help you with the move. This will make things go much faster and easier.
2. If possible, disassemble the trampoline before moving it. This will make it much lighter and easier to handle. However, if you cannot disassemble it, don’t worry – it’s still possible to move it without taking it apart.
3. Use furniture dollies or other moving equipment to help transport the trampoline from one location to another. Again, this will make things go much faster and smoother.
4. Be careful when moving the trampoline – they’re delicate machines and can be easily damaged if not handled properly!
Springfree Trampoline Troubleshooting
If you’re having trouble with your Springfree Trampoline, there are a few things you can do to troubleshoot the issue. First, check the frame to make sure that all of the bolts are tightened. Next, check the mat to see if there are any rips or tears.
If there are, you’ll need to replace the mat. Finally, check the springs to see if they’re all intact and in good condition. If any of the springs are broken, you’ll need to replace them.
Springfree Trampoline Installation near Me
If you’re looking for springfree trampoline installation near me, there are a few things to keep in mind. First, make sure you find a reputable installer. There are many fly-by-night companies that will take your money and not do a good job.
Second, get multiple quotes. Don’t just go with the first company you find. Third, make sure the company you choose has experience installing springfree trampolines.
This is important because it’s a complicated process and you don’t want someone who doesn’t know what they’re doing working on your trampoline. Finally, ask around. Talk to your friends, family, and neighbors to see if they have any recommendations.
With these tips in mind, finding springfree trampoline installation near me should be a breeze!
Springfree Trampoline Installation Cost
If you’re considering purchasing a Springfree Trampoline, you may be wondering about the cost of installation. Here’s what you need to know.
The cost of installation for a Springfree Trampoline depends on several factors, including the size and model of trampoline you choose, as well as the location of where it will be installed.
Generally speaking, the larger the trampoline, the more expensive it will be to install. Additionally, if your chosen installation site is not level or has other special considerations, this can also impact the cost.
On average, most people spend between $200 and $500 on professional installation for their Springfree Trampoline.
However, there are some ways to save money on this expense. For example, many hardware stores offer free assembly and delivery services when you purchase a trampoline from them. Additionally, many Springfree dealerships have certified installers on staff who can often offer discounted rates.
To get an accurate estimate of what it will cost to have your Springfree Trampoline installed, we recommend contacting multiple dealerships or installer companies in your area for quotes. This way, you can compare prices and make sure you’re getting the best deal possible.
Springfree Trampoline for Sale
Are you looking for a safe and fun trampoline for your family? If so, then you need to check out Springfree Trampolines! Springfree is the world’s leading manufacturer of premium, safety-tested trampolines.
Their trampolines are built with your family’s safety in mind and are engineered to eliminate hazards associated with traditional spring-based trampolines.
What makes Springfree different from other brands?
First and foremost, their patented design eliminates dangerous springs and metal frames found on traditional spring-based trampolines.
This not only makes them much safer, but also provides a smoother jumping experience. Additionally, their unique soft edge mat extends over the entire frame of the trampoline, further reducing the risk of injury.
Springfree also offers a variety of sizes and models to choose from depending on your family’s needs.
Their smallest model, the Mini Rebounder, is perfect for kids or even adults who want to get in a quick workout at home. For larger families or those who want to host backyard parties, they offer several medium and large size options. And if you really want to go all out, they even have an XL Jumbo model that can accommodate up to 10 people at once!
No matter what size or model you choose, you can rest assured knowing that your family is safe on a Springfree Trampoline. So what are you waiting for? Give your family the gift of fun this holiday season with a Springfree Trampoline!
Credit: www.springfreetrampoline.co.uk
How Long Does It Take to Assemble a Springfree Trampoline?
Assuming you have all the required tools and materials, it should take no more than two hours to assemble a Springfree trampoline. This includes time for reading through the instruction manual and doing a dry run of the assembly process. Of course, your mileage may vary depending on your level of expertise and how cooperative your children are!
How Much Does It Cost to Assemble a Springfree Trampoline?
Assuming you would like an accurate estimate for the cost of assembling a Springfree trampoline, we reached out to the company for their most recent pricing information. As of 2019, it costs $199.99 for the company to assemble a small round trampoline measuring 8 feet in diameter, and $209.99 for a medium oval trampoline measuring 10 feet by 14 feet. For their largest model, a jumbo square trampoline measuring 16 feet by 16 feet, the assembly fee is $229.99.
These prices do not include the cost of the actual trampoline itself, which must be purchased separately.
Of course, you could always choose to forego professional assembly and put the trampoline together yourself. Springfree provides detailed instructions on their website along with video tutorials to help walk you through the process step-by-step.
They even offer a toll-free customer support line if you have any questions along the way. With all that said, depending on your level of expertise (and patience!), it could still end up costing you more in time and effort than it would to simply pay for professional assembly in the first place.
How Do You Assemble a Trampoline Frame?
Assuming you have all the necessary parts, tools and materials:
1. Begin by spreading out the trampoline mat on a level surface. Make sure there are no sharp objects that could puncture the mat.
2. Next, lay out the trampoline frame on top of the mat. Start with the circular base and work your way up, connecting each piece as you go.
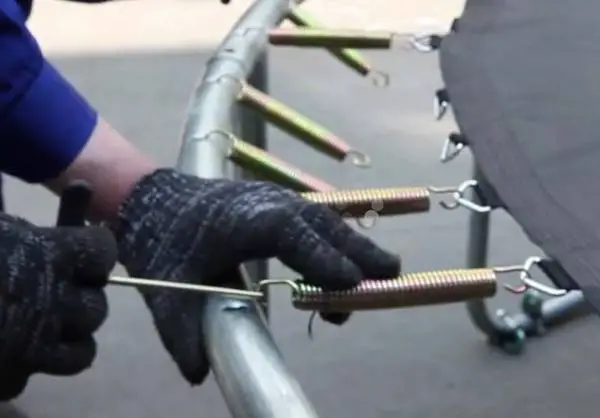
3. Once all the pieces are connected, it’s time to start attaching the springs.
On most trampolines, there are 96 springs (48 on each side). To attach them, hook one end of each spring onto the corresponding hole on the frame, and then stretch it across to hook onto the next hole until all 96 springs are in place.
4. Finally, give everything a once-over to make sure all connections are secure and tight before letting anyone jump on!
Where Do the Horizontal Rods Go on a Springfree Trampoline?
Assuming you are referring to the safety enclosure:
The horizontal rods on a Springfree Trampoline go into the ground. There are 4 of them, and they attach to the legs of the trampoline.
This provides extra stability and prevents the trampoline from tipping over.
Conclusion
The Springfree Trampoline is a great way to get active and have fun, but it can be a little tricky to assemble. This blog post gives some tips on how to put together your Springfree Trampoline so you can get started enjoying it as soon as possible.
First, make sure you have all the right parts and tools.
The most important part of the trampoline is the frame, so make sure all the poles are in good condition and fit together properly. The next step is to connect the spring system. This can be a little tricky, but following the instructions carefully will help ensure everything is connected correctly.
Finally, add the safety netting and mat, and your trampoline will be ready for use. With a little bit of effort, you’ll have your Springfree Trampoline assembled and ready to enjoy in no time!