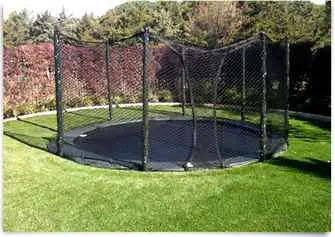
If you have a trampoline, you know the importance of having a good enclosure. Not only does it keep people from falling off, but it also protects the trampoline from weather and animals. Here is a guide on how to attach trampoline enclosure.
- First, you need to gather all the materials that you will need in order to attach the trampoline enclosure
- This includes the trampoline itself, the enclosure, and any tools that you may need
- Next, you will need to position the trampoline in the desired location
- Once it is in place, you can begin attaching the enclosure
- Start by attaching one side of the enclosure to the trampoline frame
- Use either zip ties or screws to secure it in place
- Repeat this step for the other side of the enclosure
- Finally, once both sides are attached, you can thenattachthe top ofthe enclosuredirectlyto themainframeof thtrampoline using either zip ties or screws again
- Make sure that everything is tight and secure before allowing anyone to use it
How To Assemble A Upper Bounce Trampoline & Safety Net Enclosure, Springs ETC. Step By Step Guide!
How to Put a Net on a 14Ft Trampoline
If you have a 14ft trampoline, you might want to consider putting a net around it. Doing so will provide additional safety for anyone using the trampoline. Here are some tips on how to put a net on a 14ft trampoline:
1. Measure the circumference of the trampoline frame and add 2 feet. This will be the length of your netting.
2. Cut the netting to the appropriate length and then attach it to the top of the trampoline frame using zip ties or other similar fasteners.
3. Once the netting is attached at the top, stretch it down over the sides of the frame and secure it in place with additional zip ties or fasteners.
4. Trim off any excess netting material and then test out your new safety feature by bouncing on the trampoline!
Trampoline Net Cords, Tie down Rope for Enclosure Nets
If you have a trampoline with an enclosure net, you know that one of the most important parts of the setup is the net cord. This cord is what ties the net to the frame of the trampoline and keeps it in place. Without a properly functioning net cord, your enclosure net could come loose and pose a serious safety hazard.
There are a few things to keep in mind when choosing a net cord for your trampoline. First, you’ll want to make sure that the cord is made from durable material that can withstand weather and wear-and-tear. Second, you’ll want to choose a cord that is the right length for your trampoline.
Most cords are available in lengths ranging from 15 feet to 50 feet. Finally, you’ll want to make sure that the cord has been tested and approved by a reputable third party (such as Underwriters Laboratories).
Once you’ve found the perfect net cord, it’s time to install it.
Start by tying one end of the cord around the center pole of your trampoline frame. Then, stretch the cord out so that it goes over top of the enclosure netting. finally, tie the other end of the cord around another point on your trampoline frame.
Once both ends are secure, give the entire setup a good tug to make sure that everything is tight and secure.
Now that you know all about Trampoline Net Cords, Tie down Rope for Enclosure Nets , be sure to use this information to keep your family safe while they enjoy some fun on their trampoline!
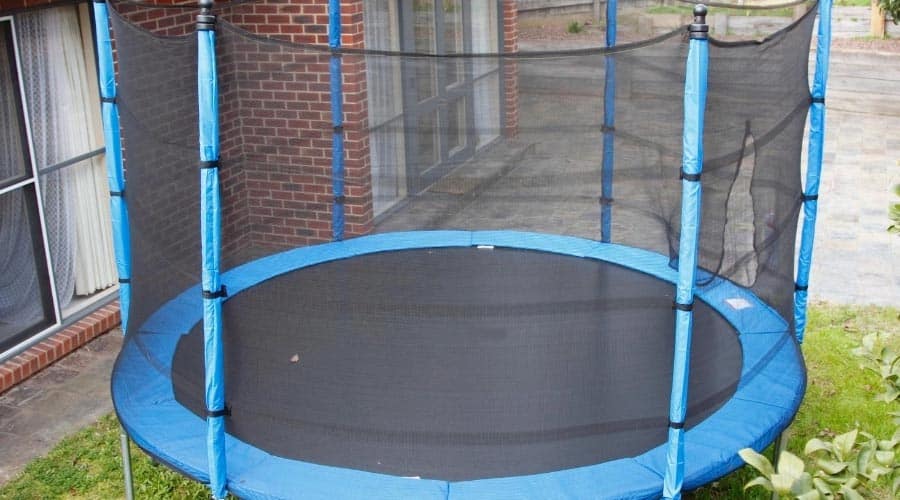
Trampoline Net Inside Or Outside
Most people believe that a trampoline net should be placed outside of the trampoline, but there are some benefits to having the net inside the trampoline. Here are a few things to consider when making your decision:
If you have small children, they may be more likely to fall off the trampoline if the net is on the outside.
Having the net on the inside can help to prevent this from happening.
If you live in an area with lots of wind, placing the net on the inside can help to keep it from blowing away.
Some people feel that having the net on the inside makes it more difficult to get onto the trampoline, but others find that it’s actually easier because you don’t have to step over anything.
Ultimately, it’s up to you where you place your trampoline net. Consider all of these factors before making a decision so that you can choose what will work best for you and your family.
How to Install Upper Bounce Trampoline Net
For those of you who have an Upper Bounce Trampoline, you may want to consider installing the Upper Bounce Trampoline Net. Not only will this net add an extra layer of safety for your family and friends, but it will also give you some peace of mind when the kids are playing on the trampoline. Here is a step-by-step guide on how to install the Upper Bounce Trampoline Net:
1. Begin by reading over the instruction manual that came with your trampoline. This will give you a good understanding of where all the parts are and how they fit together. It is important to follow the manufacturer’s instructions when assembling or disassembling any part of your trampoline.
2. Next, locate the upper frame poles around the outside edge of your trampoline frame. There should be eight of these poles total – four on each side.
3. Take one end of the Upper Bounce Trampoline Net and stretch it over two adjacent frame poles, so that half of the netting is on each pole.
Make sure that you leave enough slack in the netting so that it can be pulled tight later on.
4. Repeat Step 3 until all four sides of the trampoline frame have been covered with netting. At this point, you should have a lot of excess netting hanging down from the top edge of the frame.
5. To secure the netting in place, take one end of a zip tie and thread it through one hole in The Top Ring Clasp (this is a small metal ring that comes with your Upper Bounce Trampoline Net). Pull the zip tie until The Top Ring Clasp is snug against The Top Pole Cap (this is located at each corner on top of your trampoline frame). Repeat this process for all four corners.
Now pull on each side of The Top Ring Clasp until The Top Pole Cap pops out slightly from its socket – this indicates that The Top Ring Clasp is locked in place and won’t come loose easily.
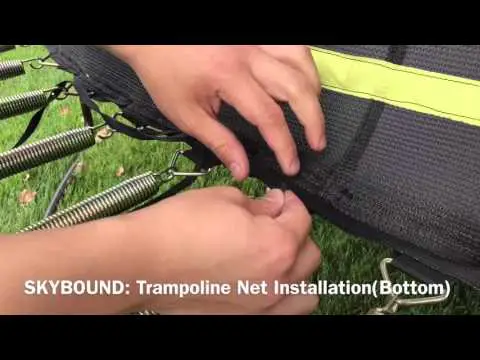
How to Install Skybound Trampoline Net
If you’re looking to install a trampoline net on your Skybound trampoline, then you’ve come to the right place. In this blog post, we’ll outline the entire process from start to finish, so that you can have your very own backyard fun zone up and running in no time.
First things first: make sure that you have all of the necessary tools and materials before getting started.
This includes the trampoline net itself, as well as straps or zip ties to secure it in place. You’ll also need a ladder (or someone tall enough to reach the top of the trampoline) to help with the installation process.
Once you have everything gathered, follow these steps:
1. Position the trampoline net around the outside of the frame, making sure that it’s evenly distributed.
2. Use straps or zip ties to secure the netting in place at various points around the frame. Make sure that they’re tight enough that there’s no give, but not so tight that they damage the frame.
3. Test out the stability of the net by bouncing on it lightly – if it feels secure, then you’re good to go! If not, adjust accordingly and try again until it feels safe and sturdy.
And that’s all there is to it!
With just a few simple steps, you can turn your Skybound trampoline into a fun-filled activity center for kids (and adults!) of all ages. So what are you waiting for? Get installing today!
Diy Trampoline Net
If you’re looking for a fun and easy DIY project, why not make your own trampoline net? It’s a great way to get the kids outside and active, and you can make it as big or small as you like. Plus, it’s a great way to save money on a trampoline!
Here’s how to do it:
1. Start by measuring the circumference of your trampoline. You’ll need about 1/2 yard of fabric for every foot of circumference.
So, if your trampoline is 10 feet in circumference, you’ll need 5 yards of fabric.
2. Cut the fabric into strips that are about 2 inches wide. The length of each strip will depend on the size of your trampoline, but they should be long enough to reach from one side of the trampoline to the other.
3. Tie the strips together at one end, then stretch them out over the trampoline frame so that they’re evenly spaced around the edge.
4. Once all of the strips are in place, tie them together at the top so that they form a netting. Trim any excess fabric, then enjoy your new DIY trampoline net!
Propel Trampoline Net Installation
If you’re looking to add a little extra fun to your backyard this summer, a trampoline is a great option! But before you can start bouncing around, you need to make sure the trampoline is properly set up. That includes installing the netting around the perimeter of the trampoline.
Here’s a step-by-step guide to help you get started:
1. Gather your materials. You’ll need the netting, zip ties, and scissors.
2. Unfold the netting and lay it out flat on the ground next to the trampoline.
3. Position the netting so that it evenly covers all of the metal springs on the outside of the trampoline frame.
4. Use zip ties to secure the netting in place at each spring location.
Make sure they are tight so that there are no gaps in between the metal frame and the netting.
5. Once all of the springs are covered, trim off any excess material from the zip ties with scissors. And that’s it!
Trampoline Net And Pole Replacement
Your trampoline net and pole play an important role in your safety while you’re enjoying some fun. But over time, they can become worn down and need to be replaced. Here’s what you need to know about replacing your trampoline net and pole.
When Should You Replace Your Trampoline Net And Pole?
You should replace your trampoline net and pole when they become worn or damaged. A hole in the netting can create a serious safety hazard, so it’s important to repair or replace it as soon as possible.
Likewise, a bent or broken pole can also pose a danger, so it’s best to fix it right away.
How Do You Replace A Trampoline Net And Pole?
If you have a hole in your netting, you can simply patch it up with some new material.
But if the damage is more extensive, you’ll need to replace the entire net. To do this, first remove the old netting from the frame of your trampoline. Then, measure out and cut a new piece of netting to fit the frame.
Attach the new piece of netting using zip ties or other similar fasteners.
For a bent or broken pole, replacement is usually necessary. Start by removing the old pole from the trampoline frame.
Then measure out and cut a new piece of PVC pipe to size (you can find PVC pipes at any hardware store). Finally, reattach the newpole totheframe using screwsandwashers(these items can also be found at hardware stores).
Credit: funintheyard.com
How Do You Put a Trampoline Enclosure On?
Assuming you have already assembled the trampoline frame and mat, here are the steps for adding the enclosure:
1. Unroll the enclosure netting and lay it flat on the ground. Make sure that the netted side is facing up.
2. Place the trampoline frame on top of the netting so that the edge of the frame lines up with the edge of the netting.
3. Starting at one end, begin wrapping the netting around the trampoline frame, pulling it tight as you go. Use zip ties or similar fasteners to secure the netting to itself and/or to parts ofthe frame as you work your way around.
4. Once you have reachedthe other end, again make sure thatthe netted side is facing up and then cut off any excessnetting with scissors or a sharp knife, being careful not to damage any partofthe trampolineframe in he process.
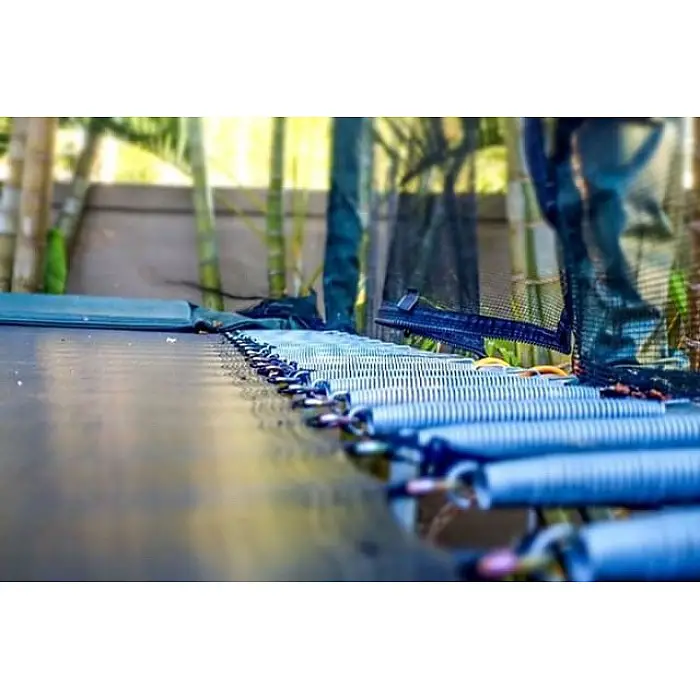
5a. If yourtrampoline camewith enclosuresprings (these will be U-shaped metal springs), place one springat each corner where two sectionsof frameworkmeet; these will helpto keep thenettingin placeandadd some additionalbounce toyourjumps!
Attachthese by hookingoneendofthespringoverapieceofframeworkand stretchingittothenextsectionofframeworkwhereyouwill do likewiseuntilthe springis snugly inplaceall along its length(usepliers if needed).
5b. Ifyourtrampolinewasnotpurchasedwithsprings,you can create loops with heavy-dutytwineorropebytyingknots ineachendandthensecuringtotheframewithzip tiesortension clips; placetheseloopsaroundtheperimeteratthejoiningsofframeworksectionsin ordertosecurethenettingin placewithoutdamagingit .
How Do You Secure a Safety Net on a Trampoline?
When it comes to setting up a safe and secure trampoline, there are a few key things you need to keep in mind. First of all, make sure that you choose a level spot for your trampoline. You don’t want it to be on any kind of incline, as this could potentially lead to accidents.
It’s also important to make sure that the area around the trampoline is clear of any obstacles or hazards.
Once you’ve found the perfect spot for your trampoline, it’s time to start thinking about securing it. One of the most important safety features of a trampoline is the safety net.
This netting surrounds the perimeter of the trampoline and helps to prevent anyone from falling off. When choosing a safety net, be sure to pick one that is made specifically for your model of trampoline. This will ensure proper fit and function.
In addition to a safety net, there are also other accessories you can purchase to help make your trampoline even safer. These include anchor kits, which help keep the entire structure securely in place; edge padding, which helps protect against falls; and weather covers, which can protect against sun and rain damage when not in use. By taking these extra steps, you can help create an enjoyable and safe experience for everyone who uses your trampoline!
How Do You Put on a Trampoline Padding?
Assuming you have a rectangular trampoline, the process of adding padding is as follows:
1. Unfold the padding and lay it out on the ground next to the trampoline. Make sure that the side with the hooks is facing up.
2. Place one end of the padding over one end of the trampoline frame, making sure that the hooks are facing down so they can be fastened to the frame.
3. Wrap the padding around the entire perimeter of the trampoline frame and secure it in place with Velcro straps or zip ties.
4. Once all sides are secured, flip over the trampoline so that it is right side up again and your new padding is in place!
How Do You Remove the Net from a Trampoline?
Assuming you want to know how to take the net down from a trampoline:
First, you will need to remove the safety pads that surround the trampoline. Once those are off, untie or unclip the net from the top of the trampoline.
You may need a ladder to reach the top if you have a taller model. Finally, fold up the net and store it away until you are ready to put it back up again.
Conclusion
Assuming you would like a summary of the blog post titled “How to Attach Trampoline Enclosure”:
The first step is to take the trampoline enclosure and put it over the trampoline frame. Make sure that the bottom of the enclosure is even with the ground all the way around.
If it is not, then use some washers or spacers to make it even. The next step is to take some zip ties and attach the upper part of the enclosure to the trampoline frame. Do this by putting the zip tie through one of the holes in the top of the enclosure and then through one of the legs on the trampoline frame.
Repeat this process until all four sides are attached. Once that is done, you can now attach the netting tothe zipper.