If you’re planning on purchasing and installing a trampoline, one of the most important things you’ll need to do is choose the right mat. The mat is what provides the surface for jumping, and it’s also one of the key safety features of the trampoline. Here are a few tips for choosing and installing a trampoline mat.
- Begin by measuring the area where you would like to place your trampoline mat
- It is important to have a level surface for optimal safety and performance
- Once you have determined the placement of your trampoline, mark the perimeter with chalk or another temporary marker
- Next, unroll your trampoline mat and lay it over the marked area
- If you are using a rectangular trampoline, make sure that the corners are aligned properly
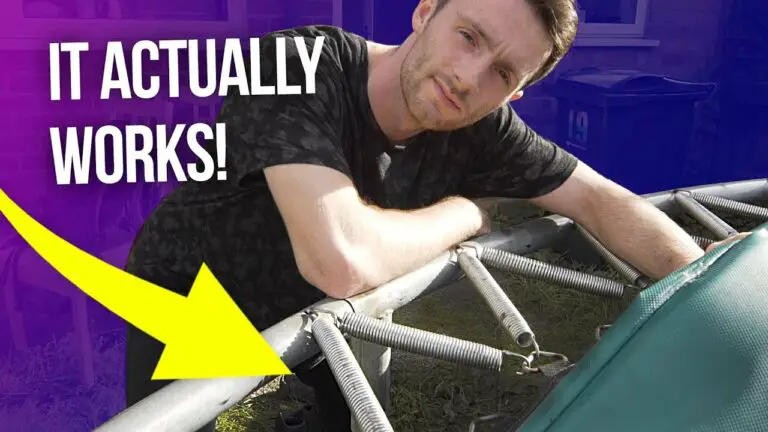
- Now it is time to start installing the springs that will attach your mat to the frame of the trampoline
- Begin by attaching one end of each spring to the corresponding hole on the outside edge of the mat
- Make sure that each spring is tight before moving onto the next one
- 5 Once all of the springs have been attached, flip over your trampoline so that the mat is facing upwards
- Now you can start connecting each spring to its respective hook on the frame of the trampoline
- Again, make sure that each spring is tight before moving onto hooking up the next one
How to install a mat on a trampoline
How to Measure Trampoline Mat
When you go to buy a trampoline, you need to make sure that you know how to measure the trampoline mat. This is important because you want to make sure that the mat will fit your trampoline frame properly. If it is too big or too small, it can cause problems with your jumping and landing.
Here are some tips on how to measure the trampoline mat:
1. First, you need to find out the dimensions of your trampoline frame. You can do this by measuring the width and length of the frame with a tape measure.
2. Next, you need to take these measurements and multiply them by two. This will give you the total square footage of the trampoline frame.
3. Now, you need to find out the dimensions of the trampoline mat itself.
You can do this by measuring the width and length of the mat with a tape measure as well.
4. Once you have both sets of measurements, you can now compare them side-by-side to see what size trampoline mat you need to purchase for your particular frame size.
How to Put a Rectangle Trampoline Mat on
Putting a rectangle trampoline mat on can be a bit tricky if you’ve never done it before. Here are some tips to help you get the job done:
1. Start by measuring the area where you want to put your trampoline.
This will help you determine what size mat you need.
2. Once you have your measurement, cut the mat to size. Make sure that the cuts are straight so that the mat will fit properly.
3. Next, take the time to clean and prep the surface where the mat will be placed. This will ensure that it sticks properly and doesn’t slip around when in use.
4. To attach the mat, use a heavy-duty adhesive or tape designed for outdoor use.
Apply it evenly around the perimeter of the trampoline frame and then place the mat onto of it. Press down firmly to secure it in place.
5. Finally, give everything a final inspection to make sure everything looks good and is secure before letting anyone jump on it!
How to Put a Trampoline Together
If you’re lucky enough to have a trampoline in your backyard, you probably can’t wait to get it set up so you can start bouncing around. But before you can start enjoying your new toy, you need to put it together. Here’s a step-by-step guide to help you get your trampoline up and running:
1. Lay out all of the parts in an open area. You’ll need the frame, the mat, the springs, and the safety enclosure (if you have one).
2. Assemble the frame according to the instructions.
This is typically done by connecting the various poles together with clamps or bolts.
3. Stretch out the mat over the frame and secure it with straps or hooks at each corner. Make sure that the mat is tight and has no wrinkles or folds.
4. Attach the springs to the mat using hooks or similar fasteners. The number of springs will depend on the size of your trampoline; consult your instruction manual for details on how many and where to attach them.
5. If you have an enclosure, now is when you’ll want to set it up around the perimeter of the trampoline (again, following assembly instructions).
Once everything is in place, give everything a final check before letting anyone bounce on it!
Trampoline Mat Replacement
A trampoline mat replacement is a great way to prolong the life of your trampoline and keep it looking like new. Over time, the mat will become worn and stretched, which can cause it to lose its shape and elasticity. This can lead to decreased performance and eventually holes or tears in the mat.
Replacing the mat is an easy process that anyone can do, and it will ensure that your trampoline continues to provide years of fun and exercise.
The first step is to remove the old mat from the frame of the trampoline. This can be done by taking off the safety pads and unscrewing the bolts that hold it in place.
Once the old mat is removed, you’ll need to clean off any rust or debris from the frame before attaching the new one. Next, stretch out the new mat over the frame of the trampoline and secure it in place with bolts. Finally, reattach the safety pads around The edge And That’s It!
Your Trampoline Is Ready For Use Again!
Trampoline Mat Replacement 14 Ft
If you’re in need of a trampoline mat replacement for your 14 ft. trampoline, you’ve come to the right place. At Trampoline Parts and Supply, we offer a wide selection of high-quality replacement mats that will have your trampoline looking and performing like new again in no time.
When it comes to choosing the right replacement mat for your 14 ft. trampoline, there are a few things to keep in mind.
First, be sure to select a mat that is made from durable materials that can withstand heavy use. Additionally, make sure the mat you select is the correct size for your trampoline frame – a too-small or too-large mat will not fit properly and could cause damage or injury.
Once you’ve found the perfect replacement mat for your 14 ft. trampoline, installation is quick and easy.
Simply remove the old mat from the frame and stretch the new one over top, securing it in place with the included straps or clips. That’s it! In just minutes, you’ll have your trampoline back up and running safely and smoothly.
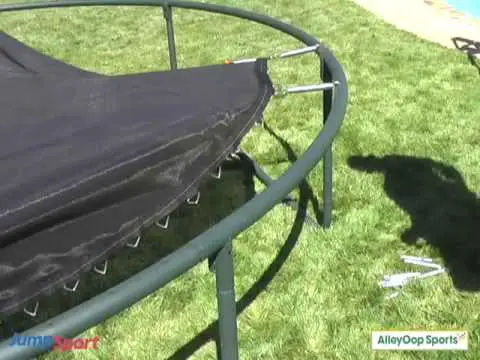
How to Install Trampoline Spring Cover
A trampoline spring cover is a great way to keep your kids safe while they’re playing on the trampoline. Here’s how to install one:
1. Start by measuring the circumference of the trampoline frame.
You’ll need this measurement to order the correct size cover.
2. Once you have the cover, lay it over the top of the frame and secure it in place with bungee cords or zip ties.
3. Make sure that the cover is tight and secure before letting your kids use the trampoline again.
How to Install Trampoline Springs Without Tool
If you’ve ever wondered how to install trampoline springs without using any tools, then this blog post is for you! We’ll walk you through the entire process, step-by-step, so that you can get your trampoline up and running in no time.
First things first: gather all of the materials you’ll need.
This includes the trampoline frame, the springs, and a spring installation tool (if you have one). If you don’t have a spring installation tool, don’t worry – we’ll show you how to improvise with what you have on hand.
Next, it’s time to start attaching the springs to the frame.
If you’re using a spring installation tool, simply follow the instructions that came with it. If not, no worries – just make sure that each spring is securely fastened to the frame before moving on.
Once all of the springs are attached, it’s time to start jumping!
Remember to take things slow at first and gradually work your way up to more intense jumping. And that’s it – congrats on successfully installing your trampoline springs without using any tools!
Replacement Trampoline Mat 12Ft
A trampoline mat is one of the most important parts of your trampoline. It provides a safe and sturdy surface for you to bounce on, and it also protects you from falls. If your mat is old or damaged, it’s time to replace it with a new one.
Here’s what you need to know about replacement trampoline mats 12ft.
When shopping for a replacement mat, make sure to measure your trampoline first. You’ll need to know the exact dimensions of your frame in order to find a mat that fits properly.
Once you have the right size, you can start looking at different materials.
The most common material for trampoline mats is polypropylene. This synthetic fiber is strong and durable, making it ideal for outdoor use.
However, polypropylene can be susceptible to UV damage if left in direct sunlight for too long. If you plan on using your trampoline outdoors, look for a mat that’s been treated with UV protection.
Another popular option is PVC-coated polyester.
This material is also strong and durable, but it’s more flexible than polypropylene. That means it will conform better to uneven surfaces, making it ideal for indoor use. PVC-coated mats are also more resistant to UV damage than their polypropylene counterparts.
No matter what material you choose, make sure the mat is thick enough to provide adequate cushioning. A good rule of thumb is to look for a mat that’s at least 1 inch thick (2-3 cm). Anything thinner than that may not offer enough protection in case of a fall.
Once you’ve found the perfect replacement mat, take some time to install it correctly on your frame. Make sure all hardware is tightened securely before letting anyone jump on the trampoline!
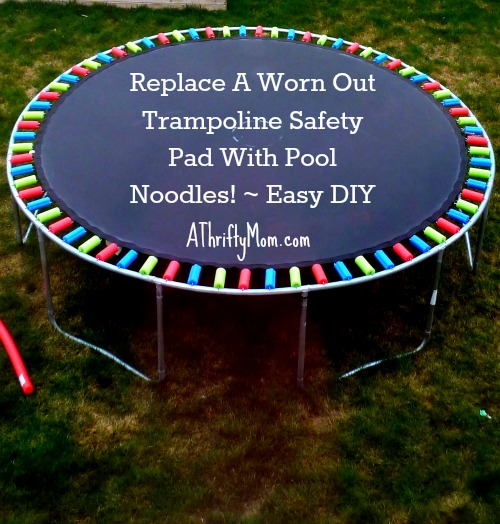
Credit: athriftymom.com
What Order Do You Put the Springs on a Trampoline?
When you are putting the springs on a trampoline, you will want to make sure that you put them on in an alternating pattern. This means that you will start with a spring at the top left corner and then put one at the bottom right corner. You will continue this pattern until all of the springs are in place.
It is important to make sure that the springs are tight so that they can provide the best possible support for jumping.
How Do You Attach a Trampoline Pad?
If you’ve ever seen a trampoline in person, you know that they have a thick pad around the perimeter. This is there for two reasons: to keep jumpers safe, and to keep the trampoline itself from tearing. The padding is usually made of foam, and it’s attached to the frame of the trampoline with either velcro or springs.
To attach the padding, start by putting the pad over the top of the trampoline frame. If there are any holes in the pad, line them up with the legs of the frame so that they don’t overlap. Once the pad is in place, use either velcro strips or springs to secure it to the frame.
For velcro, cut strips that are long enough to wrap around both the edge of the padding and the leg of the frame, then adhere them together. For springs, hook one end ontothe edge ofthe padding and stretch it overto loop aroundthe legofthframe beforesecuringitinplacebyhookingtheotherendontothefirstspring.
Repeat this process until all sides ofthepaddingareattachedtotheframe.
How Do You Put a Spring And Mat on a Trampoline?
Assuming you already have the trampoline set up and just need to add the spring and mat:
1. Spread out the mat on the ground near the trampoline. Make sure it is centered so there will be an equal amount of mat on each side of the frame when it is finished.
2. Put springs around edge of mat, attaching them to hooks on top of frame (if your model has this). Some models will have straps instead which go under the mat and over the frame. Follow instructions that came with your particular trampoline.
3. Once all springs or straps are in place, flip over entire assembly so that mat is now on top of frame and springs/straps are underneath.
How Do You Put a Trampoline Base On?
Assuming you have already purchased your trampoline and it is time to set it up, here are the steps you need to follow in order to put the base on correctly.
1. First, find a level spot in your backyard or wherever you will be setting up the trampoline. It is important that the ground is level so that the trampoline stands evenly and does not wobble.
Use a shovel to even out any areas that seem raised or lowered compared to the rest of the surface.
2. Once you have found a level spot, lay out the circular base piece on top of it. If there are any holes or cracks in the base, now is the time to patch them up with concrete or another sturdy material.
3. Next, begin attaching each of the metal legs to the base using bolts and nuts. Make sure that each leg is screwed in tightly so that it cannot move around or come loose over time.
It is also important that all of the legs are attached at equal lengths; if one leg is shorter than another, it will cause an imbalance and make the whole structure unsafe.
4. Finally, once all four legs are securely attached, double check that everything is tightened down before letting anyone use the trampoline!
Conclusion
Installing a trampoline mat is a relatively easy process that can be completed in just a few minutes. The first step is to lay the mat out on the ground in the desired location. Once the mat is in place, the next step is to secure it to the frame of the trampoline using either zip ties or velcro straps.
After the mat is secured, you will need to install the spring system onto the frame. This can be done by attaching each spring to its corresponding hole on the frame and then securing them with either zip ties or bolts. Finally, you will need to test out your new trampoline by jumping on it a few times to make sure everything is secure and functioning properly.