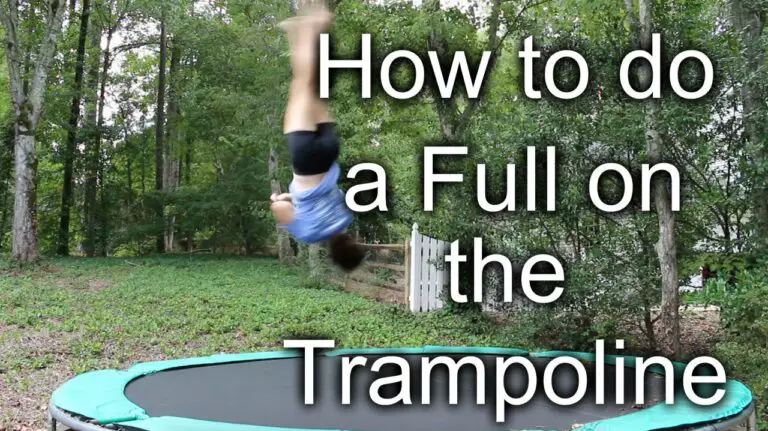
Do you want to add excitement to your wrestling matches? Do you want a place where you can really let loose and show off your skills? A trampoline wrestling ring might be just what you need.
This unique type of ring can add a new level of excitement to your matches. It can also give you a place to really show off your skills. If you’re looking for a way to take your wrestling to the next level, a trampoline wrestling ring might be the answer.
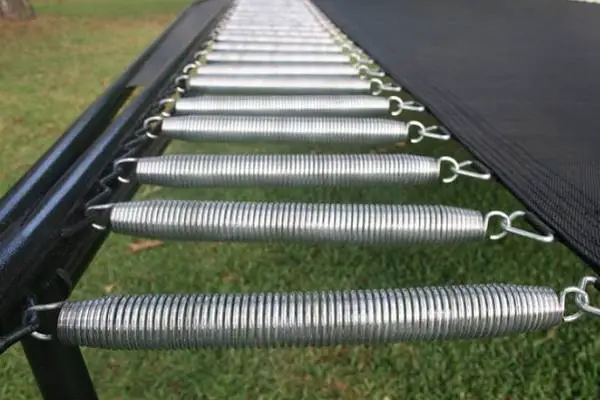
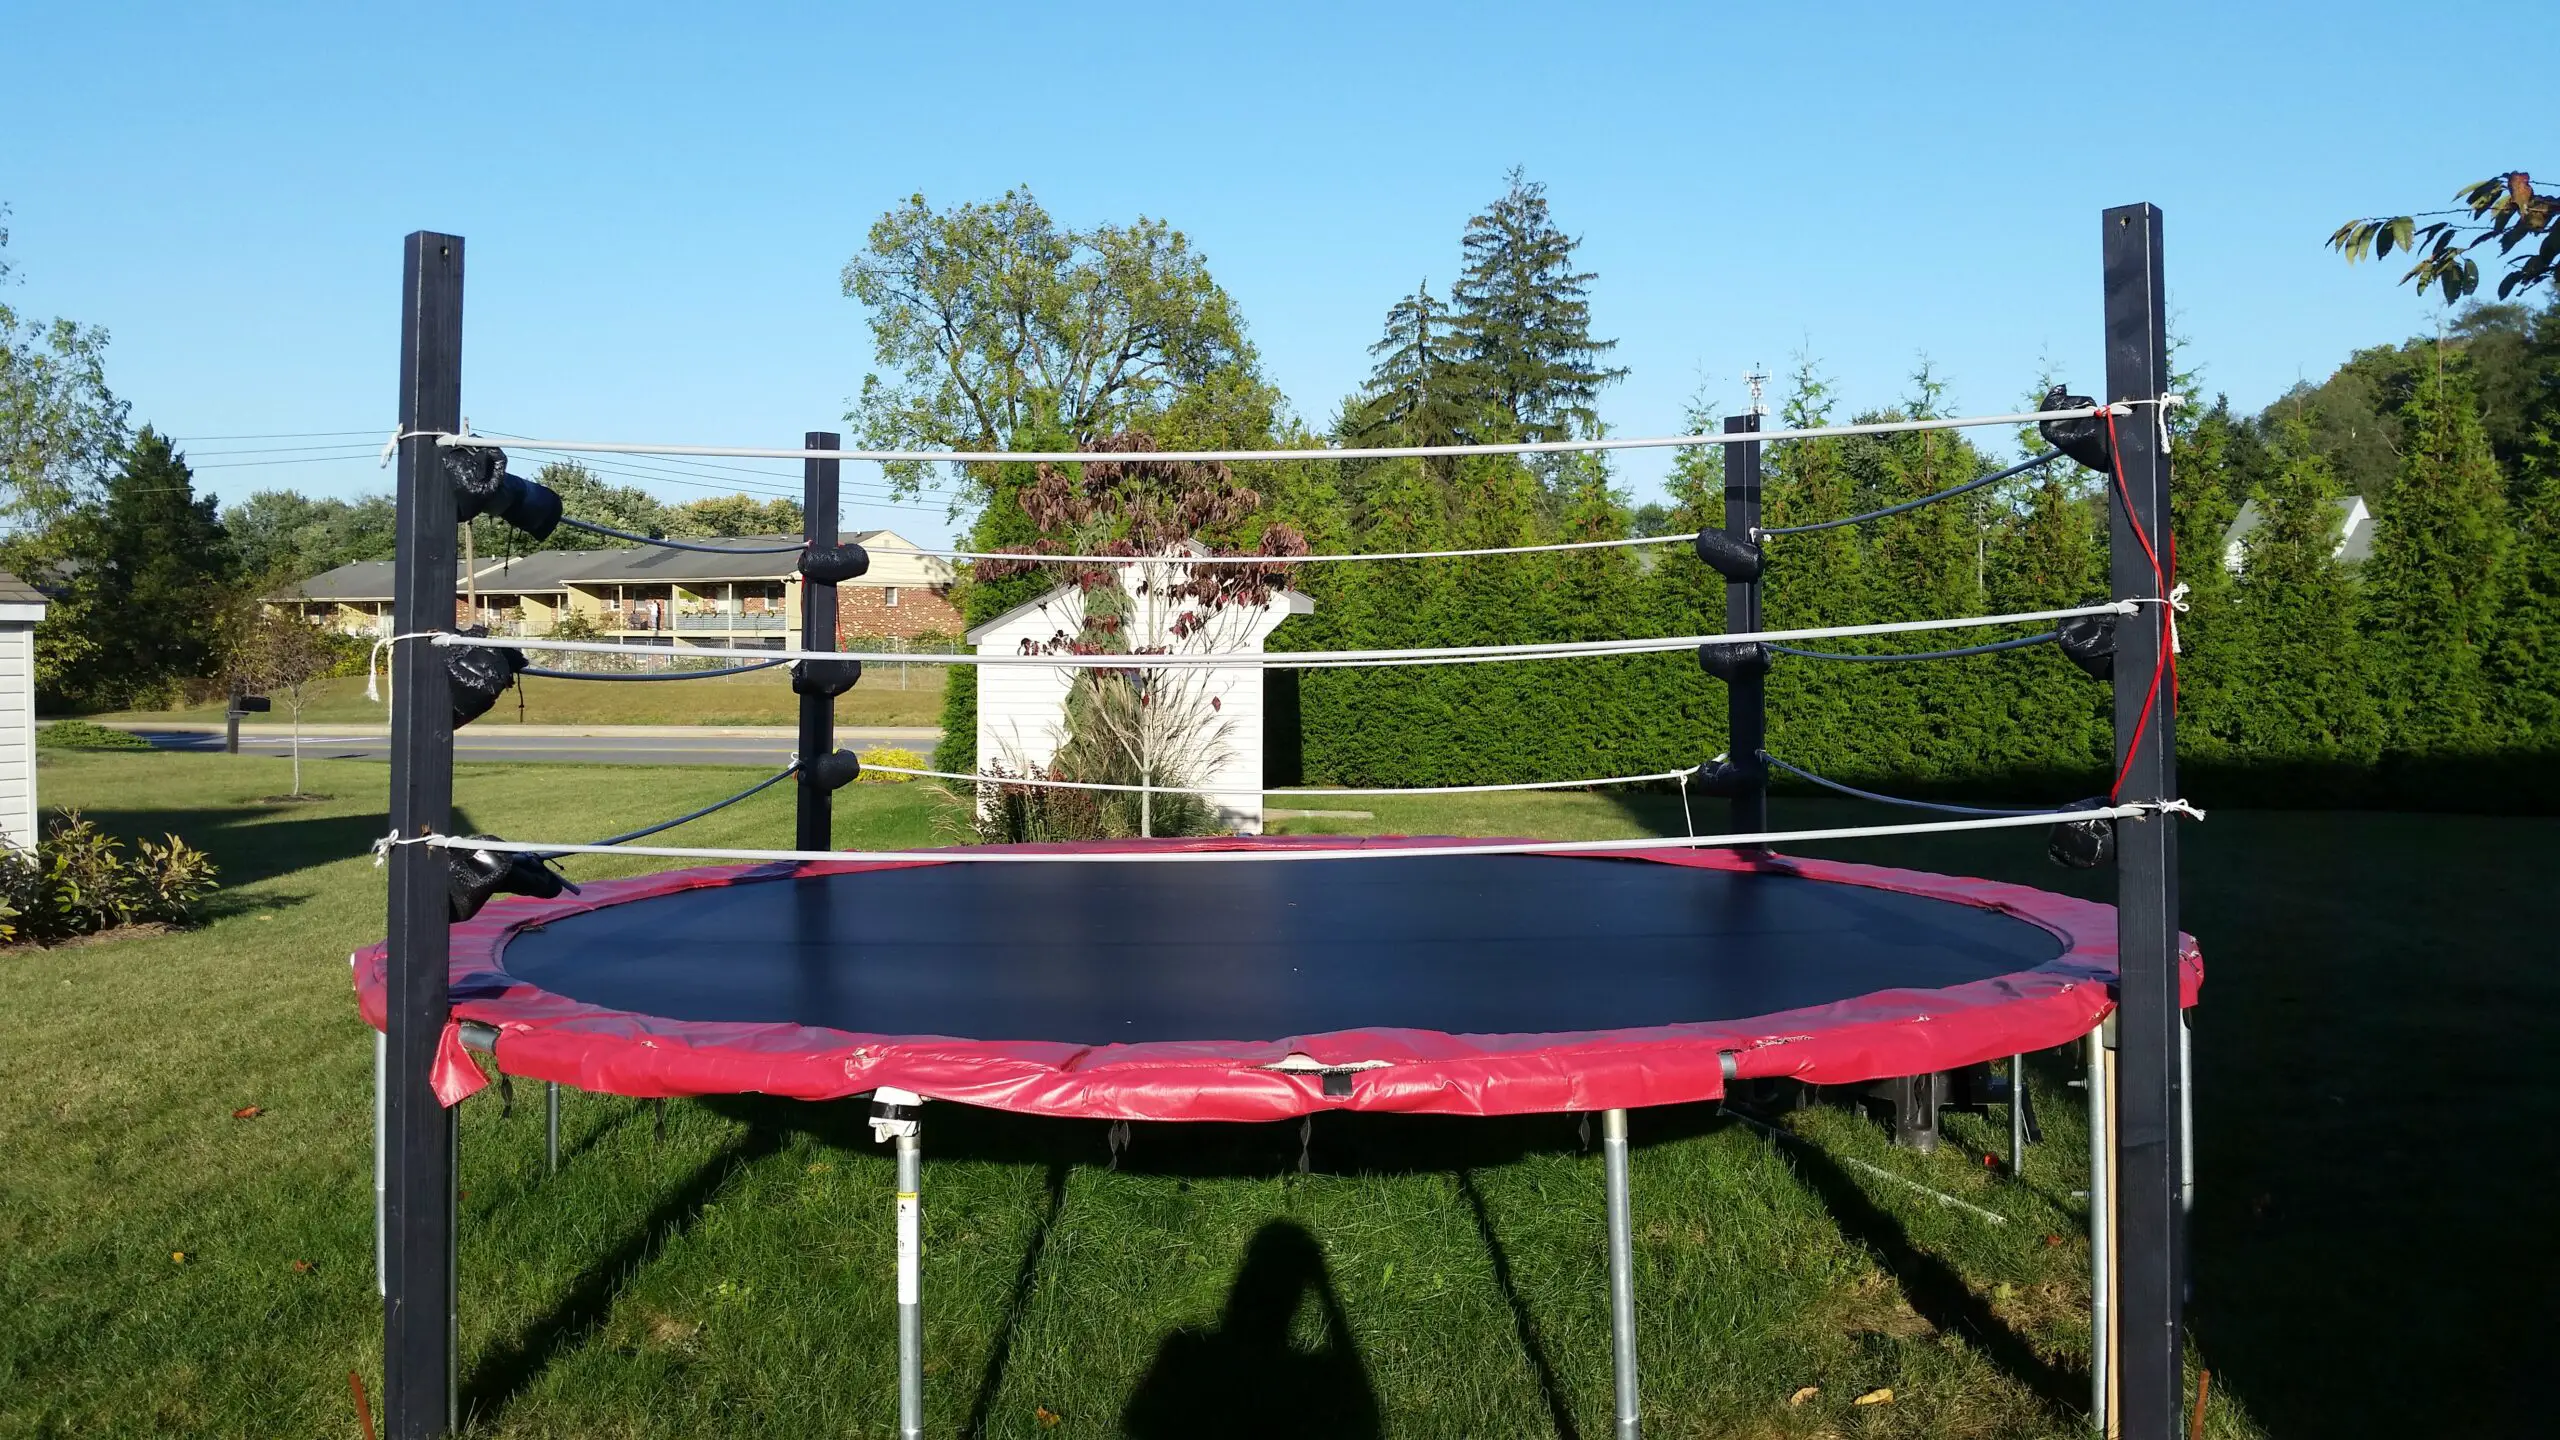
- Find a trampoline that is the right size for your ring
- You will need one that is at least 14 feet in diameter
- Set the trampoline up in an open area where you have plenty of room to work
- Cover the entire surface of the trampoline with a wrestling mat or something similar
- Make sure that it is securely fastened so that it will not move around while you are wrestling on it
- Place four posts around the edge of the trampoline, evenly spaced out
- These can be made from PVC pipe or anything else that is sturdy and will support your weight when you are wrestling on the ring
- Attach ropes or webbing to the posts, using either knots or clips depending on what you are using for your posts
- The ropes should be at least 6 feet off of the ground so that there is plenty of space for wrestlers to move around inside of the ring
- Test out your new ring by getting in and wrestling with someone!
TURN YOUR TRAMPOLINE INTO A PRO WRESTLING RING FOR CHEAP
Wrestling Ring Ropes
Wrestling ring ropes are an important part of the sport. They help keep the wrestlers safe and provide a place for them to grab onto when they are trying to escape from their opponent. There are typically four ropes that surround the ring, and they are all connected to turnbuckles at each corner.
The rope closest to the wrestlers is called the “barricade,” while the outermost rope is referred to as the “apron.” The other two ropes in between are known as the “top” and “bottom” ropes.
The top rope is usually higher than the bottom rope, and this is where most aerial maneuvers take place.
The bottom rope is often lower to the ground, and it’s common for wrestlers to use it as a launching point for attacks. The barricade rope is there to keep fans from getting too close to the action, and it’s also used by wrestlers when they want to quickly climb out of the ring.
Each rope has its own purpose, but they all work together to create a safe environment for wrestling matches.
Without these ropes, matches would be much more dangerous and could even injure or kill participants. That’s why it’s so important that they’re always well-maintained and replaced whenever necessary.
How to Make a Wrestling Ring
Are you a fan of professional wrestling? Do you want to be a wrestler? Or do you just want to have some fun and build something cool with your friends?
If you answered yes to any of these questions, then learning how to make a wrestling ring is the perfect project for you!
Building a wrestling ring is not as difficult as it may seem. With a little bit of planning and some basic carpentry skills, you can construct a functional and safe wrestling ring in your own backyard.
Here’s what you need to know to get started:
1. Choose the right location for your wrestling ring. Ideally, you should build your ring on a level piece of ground that is free from obstacles such as trees, rocks, or fences.
The area should also be large enough to accommodate the size of the ring ( typically 16’x16′ ) and allow wrestlers plenty of room to move around.
2. Gather the necessary materials. To build a basic wrestling ring, you will need 8 – 10 4×4 posts ( pressure-treated lumber is best ), approximately 50 2x4s , plywood , screws , nails , rope , and padding .
You may also want to purchase or rent scaffolding or ladders if you do not have access to them already.
3. Build the frame of the ring using the 4×4 posts and 2x4s . Cut the lumber to size and assemble the frame using nails or screws .
Be sure that all joints are secure before moving on.
4. Cover the frame with plywood . Cut pieces of plywood so that they fit snugly against each side of the frame; use screws or nails to fasten them into place .
For extra durability, reinforce corners and other high-stress areas with additional strips of wood .
5. Install padding around the edge of the plywood platform . This will help protect wrestlers when they are tossed out ofthe ring during matches . There are several typesof commercial padding available specifically for this purpose; choose an option that best suits your needs and budget . Many people optfor simple foam mats covered in vinyl ; however, more expensive options suchas spring-loaded mats are also available . Whatever typeof padding you choose, be sureto attach it securely so that it does not move during matches . 6add ropes aroundthe perimeterof the platformto createa definedborder forwrestlers staywithinduring matches..
Diy Trampoline Ring
If you’re looking for a fun and challenging workout, a trampoline ring is a great option. Not only does it provide a great cardio workout, but it also helps tone your muscles and improve your coordination.
A trampoline ring is essentially a large circle made of either metal or PVC pipe that’s attached to a standard trampoline.
The ring itself is usually about 10 feet in diameter, but the size will vary depending on the brand and model.
To use the ring, simply stand inside of it and start jumping. As you jump, the ring will rotate around you, providing resistance with each rotation.
This resistance helps to tone your muscles and burn calories quickly.
One of the great things about a trampoline ring is that it’s relatively inexpensive and easy to set up. You can find them online or at most sporting goods stores.
Plus, they’re easy to store away when not in use.
If you’re looking for an enjoyable way to get fit, consider adding a trampoline ring to your workout routine!
Square Trampoline
Are you looking for a new and exciting way to get fit? If so, then you may want to consider purchasing a square trampoline. Square trampolines are becoming increasingly popular among fitness enthusiasts due to their many benefits.
Here are just a few of the reasons why you should consider investing in a square trampoline:
1. They provide an excellent workout.
If you’re looking for a workout that is both challenging and fun, then a square trampoline is perfect for you.
Not only will you get your heart rate up, but you’ll also burn calories and tone your muscles. What’s more, because square trampolines are so much fun to use, you’ll be more likely to stick with your workout routine long-term.
2. They’re great for all ages and abilities.
Whether you’re young or old, fit or not so fit, anyone can enjoy using a square trampoline. They’re also perfect for families as everyone can join in on the fun.
3. They’re easy to set up and take down.
Square trampolines are very easy to set up and take down, which makes them convenient for those who don’t have a lot of space in their home or garden. All you need is a flat surface on which to place the trampoline and you’re good to go!
Wwe Trampoline
If you’re a fan of WWE, then you’ve probably seen the trampoline that’s often set up in the ring. But what exactly is this trampoline for?
The WWE trampoline is primarily used for one thing: to help wrestlers perform aerial maneuvers.
Essentially, it gives them a little extra height and momentum so they can pull off impressive moves like flips and twists.
Of course, the trampoline isn’t just used for show. It actually serves a very practical purpose in helping to keep wrestlers safe.
Performing high-risk stunts without a safety net can obviously be dangerous, so the trampoline provides an added layer of protection.
Interestingly, the WWE trampoline wasn’t originally intended for wrestling at all. It was actually designed for acrobatic performances during intermissions at live events.
However, it didn’t take long for wrestlers to realize its potential and start using it in their matches.
So there you have it! The next time you see a wrestler flying high in the ring, remember that they’re not just putting on a good show – they’re also staying safe thanks to the trusty WWE trampoline.

Credit: www.gettrampoline.com
How Do You Make a Homemade Wrestling Ring?
Building a homemade wrestling ring is a challenging but rewarding process. Here are some tips to get you started:
1. Choose your materials carefully.
The most important part of your wrestling ring is the canvas, so make sure to choose a heavy-duty fabric that can withstand a lot of wear and tear. You’ll also need sturdy ropes and posts to support the structure.
2. Build the frame first.
Start by building a rectangular frame out of wood or metal pipes. Make sure the frame is stable and secure before moving on to the next step.
3. Attach the canvas.
Once the frame is complete, stretch the canvas over it and staple or sew it in place around the edges. Be sure to leave some slack in the fabric so it can absorb impact when wrestlers land on it during matches.
4.(Optional) Add padding around the edge of the ring for extra protection.
How Do You Make a Homemade Toy Wrestling Ring?
Assuming you would like a step by step guide on how to make a homemade wrestling ring:
What You’ll Need:
4 – 2x4s, 8ft long
2 – 2x4s, 4ft long
1/2 in. plywood, 4 x 8 ft. sheet
1 1/2 in. deck screws
Construction adhesive
Jigsaw with fine-tooth blade for cutting curves in plywood (optional)
Instructions:
1. To build the frame of the ring, start by screwing together two of the 8-foot-long 2x4s with three of the 4-foot-long 2x4s, using 3-inch deck screws driven every 6 inches.
This will create an outer perimeter for the ring that’s 8 feet wide by 12 feet long. Then complete the square frame by adding two more 8-footers to the inside of the first pair of boards, creating a 6-foot opening in the middle of the frame. Screw these boards into place as well.
At this point you should have a big open rectangle made up of four 2x4s screwed together at each corner.
If your plywood isn’t already cut to size, use a circular saw to rip it down to fit snugly inside this frame—you want it to be flush with the outside edges all around. Once it’s cut to size, set it inside the frame and trace along each outer edge with a pencil so you know where to make your cuts later on.
Also mark out any spots where support beams from underneath might get in the way—you’ll need to cut notches around these areas so everything fits together nicely later on.
Use a jigsaw fitted with a sharp blade designed for cutting curves (not just straight lines) to carefully cut out your traced line on top of the plywood piece—be extra careful not to veer off course as you follow your line around each curve. When you’re finished making all your cuts, sand down any rough edges with medium-grit sandpaper until everything is nice and smooth all around; then wipe away any wood dust before proceeding to Step 2 .
If desired, paint or otherwise decorate your plywood surface however you like at this point—just keep in mind that whatever finish you choose will likely be subject to wear and tear as wrestlers grapple and tumble around on top of it during matches!
How is a Wrestling Ring Constructed?
A wrestling ring is a raised platform surrounded by ropes, with turnbuckles at each corner. It is usually covered in foam padding and canvas, and has a spring floor to absorb the impact of wrestler’s moves.
The dimensions of a regulation wrestling ring are 20 feet wide by 20 feet long, with a minimum height of 18 inches and a maximum height of 24 inches.
The ring ropes are generally 1.5 to 2 inches in diameter, and are tied together at the top with knots to create loops. The bottom rope is then wrapped around a metal ring or pipe called the “ring post”.
The floor of the wrestling ring is typically made up of two layers.
The first layer is plywood, which provides rigidity and support. The second layer is made up of springs, which help reduce the impact of moves on the wrestlers’ bodies and also provide some give when wrestlers are bounced off the ropes or thrown to the mat.
Canvas is stretched over the plywood and held in place with staples or nails.
Then, foam padding is added on top of that for extra cushioning. Finally, the whole thing is covered with vinyl or another type of durable material.
How Do You Make a Rope for a Wrestling Ring?
In order to make a rope for a wrestling ring, you will need the following materials:
-1/2 inch (1.3 cm) diameter rope, at least 30 feet (9.1 m) long
-Tape measure
-Scissors
-Lighter
Instructions:
1. Measure out the length of rope you will need. For a standard wrestling ring, you will need two lengths of rope that are each 30 feet (9.1 m) long.
2. Cut the rope to the desired length using scissors.
3. Use a lighter to carefully singe the ends of the rope to prevent fraying.
4. Tie each end of the rope securely around one of the ring posts, making sure that the ropes are taut and even with each other. You can knot them or use another type of fastener like zip ties.
Conclusion
Wrestling is a tough and dangerous sport, but it can be a lot of fun too. If you’re looking to add a bit of excitement to your wrestling matches, why not try trampoline wrestling?
Trampoline wrestling is a great way to get some air time and show off your moves.
It’s also a lot of fun for the spectators. If you’re interested in setting up your own trampoline wrestling ring, here’s what you need to do:
1. Buy or build a trampoline.
You’ll need one that’s big enough to fit two wrestlers comfortably.
2. Set up the trampoline in an open area away from any obstacles. Make sure there’s plenty of space around it so that wrestlers can safely land after performing stunts.
3. Choose two wrestlers who are willing to put on a good show for the crowd. They should be evenly matched in size and strength so that the match is fair and exciting.
4. Have the wrestlers put on their grappling gear and get ready to rumble!
Trampoline wrestling is all about showmanship, so make sure they put on a good performance for the fans.