A trampoline net is a great way to keep your family and friends safe while they enjoy bouncing around on the trampoline. Here are some tips on how to set up a trampoline net: 1. First, you will need to purchase a trampoline net.
You can find these at most sporting goods stores or online. 2. Next, you will need to attach the net to the trampoline frame. Most nets come with instructions on how to do this.
3. Finally, you will need to secure the netting to the ground so that it does not blow away in the wind. You can do this by staking it down or by weighting it down with sandbags or other heavy objects. By following these steps, you can easily set up a safe and fun environment for everyone to enjoy!
- Place the trampoline in an open area with level ground, making sure there is at least 3 feet of clearance on all sides
- Unfold the legs of the trampoline and lock them into place
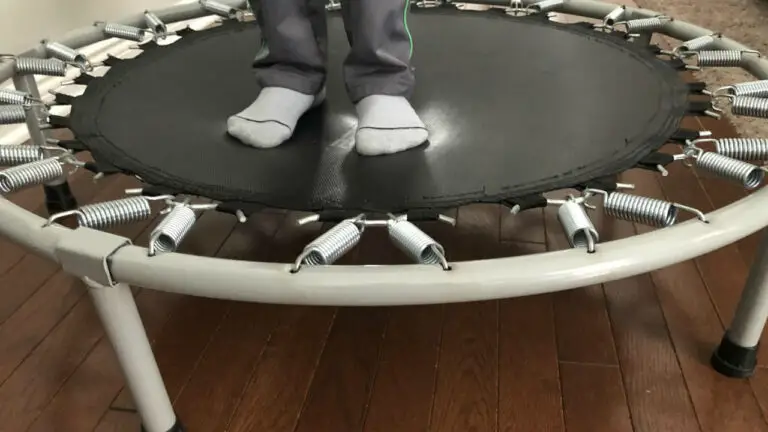
- Attach the spring pad to the frame of the trampoline, starting at the bottom and working your way up
- Make sure all clips are securely fastened
- Hang the trampoline netting from the top of the frame, attaching it to each hook or loop around the perimeter
- Make sure the netting is taut and free of any gaps or holes
How to Set Up A Trampoline
How to Put a Net on a 14Ft Trampoline
Assuming you would like a step-by-step guide on how to put a net on a 14ft trampoline:
First, you will need to gather the following materials:
-a 14ft trampoline
-a trampoline net
-spring clips (these usually come with the net)
Now that you have all of the necessary materials, follow these steps:
1. Unfold and lay out your trampoline on a flat surface. Make sure there are no objects nearby that could potentially damage the trampoline.
2. Lay the trampoline net out on the ground next to the trampoline.
Familiarize yourself with how the net attaches to the frame before proceeding.
3. Begin attaching one side of the net to the frame of the trampoline using spring clips (or whatever method is specified bythe manufacturer). Work your way around entire circumference of the frame untilthe entire net is attached.
4. That’s it!
How to Install Upper Bounce Trampoline Net
If you’re looking for a great way to keep your kids safe while they’re playing on the trampoline, then you should consider installing an Upper Bounce Trampoline Net. This netting will attach to the top of the trampoline and will provide a barrier that will prevent your children from falling off. Not only is this netting durable and strong, but it’s also UV resistant so it won’t fade in the sun.
Installing this netting is a relatively easy process, but there are a few things you’ll need to do to make sure it’s done properly.
First, you’ll need to gather all of the necessary tools and materials. You’ll need a ladder, pliers, scissors, and a drill.
You’ll also need the Upper Bounce Trampoline Net itself. Once you have everything gathered, set up the ladder next to the trampoline so that you can reach the top easily.
Next, take the time to measure out where you want the netting to go.
It’s important that you get accurate measurements so that the netting fits properly and doesn’t leave any gaps. Once you have your measurement, mark those spots with chalk so that you know where to drill holes later on.
Now it’s time to start drilling holes into the trampoline frame.
Be careful not to drill too close to the edge or else you could damage the frame itself. Start by drilling four holes at each of your marked spots aroundthe perimeter ofthe trampoline frame . Drill slowly and evenly untilyou’ve createda hole big enoughto fit oneofthe metal hooksthat come withthe Upper BounceTrampoline Net .
Repeatthis step for eachofyour marked spotsuntilallofthe holeshavebeen drilled .
Once allofthe holeshave been drilled ,it’s time tomove ontothe nextstep , whichis attachingthe metalhooksto their designatedholes . To do this ,simply takeoneofthe metalhooksandinsertittothroughoneofthedrilledholesfrom underneaththetrampolineframe .
Then ,usingsomepliers oryour fingersifthey’restrongenough ,bendoverabouthalfaninchofthetipofthemetal hooksoit pointsbacktowardsunderneaththetrampolinethroughthelayersofnettingand fabricbefore exitingoutthroughtoplayer again .
How to Put a 14Ft Trampoline Together
If you’re looking for a fun activity to do with your family and friends, a 14ft trampoline is a great option! But before you can start jumping around, you’ll need to put it together. Here’s how:
1. First, lay out all of the parts in the area where you’ll be assembling the trampoline. This will make it easier to find everything you need as you’re working.
2. Next, attach the legs to the frame using the bolts provided.
Make sure that the legs are evenly spaced out so that the trampoline is stable when assembled.
3. Once the legs are attached, it’s time to add on the mat. Start by attaching one end of the mat to the frame, then stretch it out and attach the other end.
Make sure that there are no gaps between the mat and frame so that everyone stays safe while jumping.
4. Finally, add on the safety netting around the edge of the trampoline. This will help keep anyone from falling off while they’re jumping around.
Now your 14ft trampoline is ready for use!
12 Ft Trampoline Assembly Instructions
Assuming you would like a blog post on how to assemble a 12-foot trampoline:
If you’ve just purchased a 12-foot trampoline, congratulations! You and your family are sure to enjoy many hours of fun and fitness on your new backyard toy.
But before you can start bouncing, you’ll need to assemble the trampoline. Fortunately, assembling a 12-foot trampoline is relatively easy and can be done in an afternoon with a little help from a friend or family member.
Here are step-by-step instructions for assembling your 12-foot trampoline:
1. Lay out all of the parts in an open area. Make sure you have all of the necessary parts before beginning assembly.
2. Assemble the legs first.
Spread the legs out evenly around the perimeter of the circular trampoline frame and bolt them into place using the provided hardware.
3. Next, attach the spring pad around the edge of the frame. This will provide cushioning for jumpers and protect them from injury if they happen to fall off of the trampoline.
4. Now it’s time to install the springs. Starting at one end of the trampoline, hook each spring into place on both the frame and adjacent spring until you’ve installed all 96 springs (48 on each side). Be careful not to overstretch or damage any ofthe springs while attaching them – they should be tight but not too tight.
5a.) If your model includes a safety enclosure, now is when you’ll want to install it accordingto manufacturer’s instructions before proceeding to step 6b.) below; otherwise, skip aheadto step 6b.
). 5b.) For models without an enclosure: Proceed directlyto step 6b.).Attach top rail system accordingtocodediagramandtightenall bolts securely(toprailshouldbesecurelyfastenedtotheframeatallconnection points). 6a.) For models with an enclosure: Install uprightsinto corner socketsaccordingtocodediagramand hand tighten only until all uprights are inplace; then go back and check that each nut/boltis secureandretightenasneeded (do not overtighten as this may result in strippingofthreads orotherdamage).
Trampoline Assembly Instructions Pdf
If you’re planning on getting a trampoline, you need to make sure that you know how to assemble it properly. After all, a trampoline is a big investment, and you don’t want it to go to waste. Luckily, we’ve got you covered.
Here are detailed instructions on how to assemble your trampoline, courtesy of Trampoline Assembly Instructions PDF.
First and foremost, make sure that you have all the tools and materials that you need before starting the assembly process. This includes the frame, mat, springs, padding, and any other parts that came with your specific model of trampoline.
Once you have everything gathered up, lay out the frame on level ground in your backyard or wherever else you plan on putting it.
Next, start attaching the springs to the frame using the hooks provided. Make sure that each spring is hooked into two adjacent holes so that they’re evenly distributed around the perimeter of the frame.
Once all of the springs are hooked in place, stretch them out so that they’re taunt but not too tight – this will ensure a good bounce when someone jumps on the trampoline later on.
Now it’s time to attach the mat to the frame using the straps provided (or tie-downs if your model didn’t come with straps). Start at one corner and work your way around until all four corners are securely fastened down.
Again, make sure that everything is nice and taunt but not too tight – otherwise jumping will be uncomfortable and won’t provide as much of a bounce.
At this point, your trampoline should be fully assembled! All that’s left to do is give it a test jump or two (just to make sure everything is working properly) and then enjoy hours upon hours of fun bouncing around in your very own backyard!
Trampoline Set Up Service
If you’re looking for a professional trampoline set up service, look no further! At our company, we pride ourselves on providing top-notch customer service and quality workmanship. We have years of experience setting up trampolines, so you can rest assured that your trampoline will be safely and securely installed.
10Ft Trampoline Instructions
A 10ft trampoline is a great investment for any family. Here are simple instructions on how to set it up and take care of it.
First, find a level spot in your yard to place the trampoline.
Once you have found the perfect location, unpack all of the parts from the box and lay them out in front of you. Next, follow the instructions that come with the trampoline to assemble it. Once it is fully assembled, test it out by jumping on it yourself!
Now that your trampoline is all set up, be sure to teach your kids how to properly use it. Show them how to jump safely and not too high. Also, make sure they understand that they need to stay away from the springs and frame while someone else is jumping.
Finally, take care of your trampoline by regularly checking for damage and making repairs as needed. Additionally, be sure to store it away during bad weather conditions like heavy snow or strong winds. With proper care, your 10ft trampoline will provide years of fun for your family!
Trampoline Assembly Problems
If you’ve ever had the misfortune of trying to assemble a trampoline, then you know the pain and frustration that can come with it. Trampoline assembly is no joke, and if you’re not careful, you can easily end up with a broken bone or two.
There are a few common problems that people run into when assembling trampolines.
First, the legs are often times too long or too short. This can make it difficult to get the trampoline level, which is important for safety. Second, the frame itself can be flimsy and bent out of shape, making it hard to put together.
Third, the springs are usually very tight, making it tough to stretch them out and hook them onto the frame.
These problems can be frustrating, but there are ways to avoid them. First, make sure you measure the area where you’ll be setting up your trampoline before you buy one.
That way, you’ll know what size to look for and won’t have any issues with legs that are too long or short. Second, try to find a sturdier frame that’s less likely to bend during assembly. Finally, use gloves when attaching the springs – this will help protect your hands from getting pinched or scraped by the tight coils.
With a little bit of preparation and attention to detail, assembling a trampoline can be much easier than it seems at first glance. Just take your time and follow directions carefully and you’ll be bouncing in no time!

Credit: www.wikihow.com
Should Trampoline Net Be Inside Or Outside?
If you’re wondering whether your trampoline net should be inside or outside the frame, there are a few things to consider. For starters, an outdoor net will be more durable and weather-resistant than an indoor one. And if you live in an area with high winds, it’s important to keep the netting as close to the ground as possible to prevent it from blowing away.
That said, there are some advantages to having an indoor trampoline net. First, it can provide a bit of extra warmth on cold days. And if you have small children or pets, an indoor net can help keep them safe from harm.
How Do You Set Up a 14Ft Trampoline Net?
Assuming you have already assembled the trampoline frame, setting up the net is relatively straightforward. First, make sure that the frame is level and secure before attempting to install the net. If the frame isn’t level, it could cause the net to sag or tear.
Next, unfold the net and position it around the perimeter of the trampoline. Make sure that the hooks on the top of the net are positioned over the top edge of the trampoline frame. Once all of the hooks are in place, begin tightening them until they’re snug against the frame.
Once all of The hooks Are tightened, use The zip ties To secure The bottom Of The Net To The bottom Of The Trampoline Frame. Start By threading a zip tie through one Of The holes In The Net And Pulling It Tight Against The Frame.
What Order Do You Put the Springs on a Trampoline?
When you are ready to put the springs on your trampoline, it is important to follow a specific order. This will ensure that your trampoline is balanced and can provide a safe and enjoyable experience for users. The order in which you should attach the springs is as follows:
1. Start by attaching the spring at the very top of the trampoline frame.
2. Work your way around the perimeter of the frame, attaching one spring at a time.
3. Be sure to alternate between attaching a spring at the inside edge of the frame and then attaching a spring at the outside edge of the frame.
4. Once all springs have been attached, check to make sure that they are all tight and secure before use.
Can You Set Up a Trampoline by Yourself?
It’s definitely possible to set up a trampoline by yourself, but there are a few things to keep in mind. First, it’s important to choose a level spot for your trampoline. If the ground is uneven, it could throw off your balance while you’re jumping and lead to an injury.
Second, make sure you have all the necessary tools before you start – this includes things like screws and bolts. Putting together a trampoline can be tricky, so it’s important to follow the instructions carefully. Finally, once your trampoline is set up, test it out yourself before letting anyone else use it.
This will help ensure that it’s safe and ready for fun!
Conclusion
A trampoline net is a great way to keep kids safe while they’re playing on the trampoline. Here’s how to set one up:
1. Attach the netting to the trampoline frame using zip ties or Velcro strips.
Make sure that the netting is tight and secure so that it doesn’t come loose while kids are using the trampoline.
2. Once the netting is attached, stretch it out over the entire trampoline surface. Use your hands to smooth out any wrinkles or bubbles in the material.
3. Finally, secure the bottom of the netting to the ground with stakes or weights so that it doesn’t blow away in windy weather.
Now your trampoline is ready for safe, fun use!