It’s a valid question with a definite answer, and that answer is yes! One person can absolutely put together a trampoline. In fact, it’s not as difficult as you might think.
With a little bit of time and patience, you can have your very own trampoline assembled and ready to use in no time at all.
Sure, one person can put together a trampoline. It might take a little longer than if two people were working on it, but it can be done. The key is to follow the instructions carefully and take your time.
With a little patience, you’ll have that trampoline assembled in no time!
How To Build A Trampoline Set Up A Trampoline By Yourself
How to Put a Net on a 14Ft Trampoline
If you have a 14ft trampoline, you will need a net to keep everyone safe while they’re bouncing around. Here’s how to put a net on a 14ft trampoline:
1. Begin by attaching the top straps of the netting to the hooks or loops on the upper part of the trampoline frame.
If your trampoline doesn’t have any hooks or loops, you can create your own by tying rope or bungee cord around the frame.
2. Once the top of the net is attached, stretch it down towards the bottom of the trampoline and attach it there using more hooks or loops (or rope/bungee cord).
3. Make sure that the net is taut and secure all around before letting anyone use the trampoline.
Test it out by giving it a few bounces yourself!
How Long Does It Take to Put a Trampoline Together
If you’re looking for a fun activity to do with your family or friends, a trampoline is a great option. But before you can start bouncing around, you need to put it together. So how long does it take to put a trampoline together?
The answer varies depending on the type of trampoline and the number of people assembling it. For example, an round trampoline with an enclosure can take up to two hours to assemble, while a smaller square trampoline may only take 30 minutes.
If you’re putting the trampoline together by yourself, it will obviously take longer than if you have help.
And if you’ve never assembled a trampoline before, it may take a little longer as well. But in general, most people should be able to get their trampoline set up within an hour or so.
Once your trampoline is assembled, be sure to read all the safety instructions before letting anyone bounce on it.
With proper care and maintenance, your trampoline will provide years of fun and exercise for everyone in your family!
How to Put a 14Ft Trampoline Together
Assuming you have already purchased your 14ft trampoline, here are the steps to take in order to put it together:
1. Unfold the trampoline and place it on a level surface. If you are placing the trampoline outdoors, make sure it is not placed on any grass or soft ground as this will cause the trampoline to be unstable.
2. Take out all of the parts from the box and lay them out around the circumference of the trampoline. This includes 8 legs, 2 sets of U-shaped brackets, 72 V-rings, and 96 springs.
3. Start by attaching 4 legs to each set of U-shaped brackets using the supplied bolts and washers.
Make sure that each leg is tightened securely before moving on to the next one.
4. Once all 8 legs are attached, fit them onto the circular frame of the trampoline making sure that each hole lines up with a corresponding hole on the frame.
5. Next, take one V-ring and hook it over two adjacent springs (as shown in diagram below).
Do this for all 72 V-rings until they are evenly distributed around all ofthe springs..
|—–| |—–| |—–| |—–|
| | | | | | | |–|–|–|
|–|–|–| |–|–|–| |–|–|–| |–|–|| || ||
|| Trampoline || Spring V-Ring Frame
Attach Diagram Legs
Ring goes over Finally…
Trampoline Set Up Instructions
Most people think of trampolines as being just for kids. But, setting up a trampoline can be great fun for adults too! Here are some instructions on how to set up a trampoline:
1. Choose the perfect spot for your trampoline. You’ll want to find an open area that’s level and free from any obstacles. Avoid placing your trampoline near trees, fences or other structures that could damage it.
2. Once you’ve found the perfect spot, lay out the mat on the ground and assemble the frame according to the manufacturer’s instructions.
3. When the frame is assembled, stretch out the mat over top of it and secure it in place with the spring clips. Then, attach the safety netting around the outside of the frame (if desired).
4. Finally, give your new trampoline a test bounce to make sure everything is secure and ready to go!
Tools Needed to Put Together a Trampoline
Are you looking for a fun backyard activity? Why not try setting up a trampoline! A trampoline is a great way to get some exercise, have fun, and spend time with family and friends.
But before you can start bouncing around, there are a few things you need to do first. Here is a list of the tools needed to put together a trampoline:
1. Trampoline frame – this is the structure that will hold up the mat and springs.
Make sure to choose a sturdy frame that is rated for the weight limit of thetrampoline.
2. Trampoline mat – this is what you will bounce on. Choose a mat that is made from durable material and has good stitching to prevent tearing.
3. Springs – these attach the mat to the frame and provide the bounciness forthe trampoline. Make sure to select springs that are compatible with yourframe and mat size.
4. Anchors – these keep the trampoline in place so it doesn’t tip over ormove around while in use.
If possible, choose anchors that can be driveninto the ground for extra stability.
5 . Ladder – this helps you get on and off the trampoline safely without havingto jump (which can damage the mat).
How to Put a Trampoline Together With Net
Putting together a trampoline with a net can be a fun and challenging task for the whole family. Here are some tips on how to do it:
1. Read the instructions carefully before starting.
This will help you understand the process and avoid any potential mistakes.
2. Lay out all of the parts in an open area. This will help you identify each piece and make sure that you have everything you need.
3. Begin by attaching the legs to the frame using the bolts provided. Make sure that they are tightened securely.
4. Next, stretch out the mat over the frame and secure it in place with the spring clips or bands.
Again, make sure that these are tightened properly so that the mat doesn’t come loose during use.
5. Now it’s time to install the netting around the perimeter of the trampoline. Start at one end and work your way around, attaching it to the frame with zip ties or hooks as needed.
Be sure that there are no gaps in the netting so that users don’t fall through while jumping!
12 Ft Trampoline Assembly Instructions
Assuming you would like a blog post discussing how to assemble a 12-foot trampoline:
Assembling a trampoline can seem like a daunting task, but with careful instructions it can be easy and even fun! Here are detailed instructions on how to assemble a 12-foot trampoline.
Before beginning, make sure you have all the necessary tools and parts. You will need: the frame and legs, the mat, the springs, the spring pad, and the enclosure netting. Once you have everything gathered, find a level spot in your yard to set up the trampoline.
Next, begin by attaching the legs to the frame. Make sure that each connection is secure before moving on. Once all of the legs are in place, addthe mat onto the frame and stretch it out tight.
Then, connectthe springs onto the hooks aroundthe edge of themat. Be careful notto overtighten or loosen them too much – just get them snugged in so that they won’t come undone easily.
Now it’s time forthe spring padand thenetting.
Fittheringofthespringpadoverthematspringsand line upthe hook-and-loop fasteners aroundthe edge; then simply attachthenettingtothefastenersin ordertosecureitintoplace. Andthat’sit!Younowhavea brand new12-foottrampolinereadyforjumpingfun!
Trampoline Assembly Instructions Pdf
If you’re looking for trampoline assembly instructions, you can find them online in PDF form. There are a few things to keep in mind when assembling your trampoline. First, make sure that all of the parts are accounted for and that you have the correct tools.
Next, follow the instructions carefully so that you don’t miss any steps. And finally, take your time to ensure that everything is done properly.
Assembling a trampoline can be daunting, but as long as you have the instructions and all of the necessary parts, it’s not too difficult.
Just be sure to take your time and follow each step carefully.

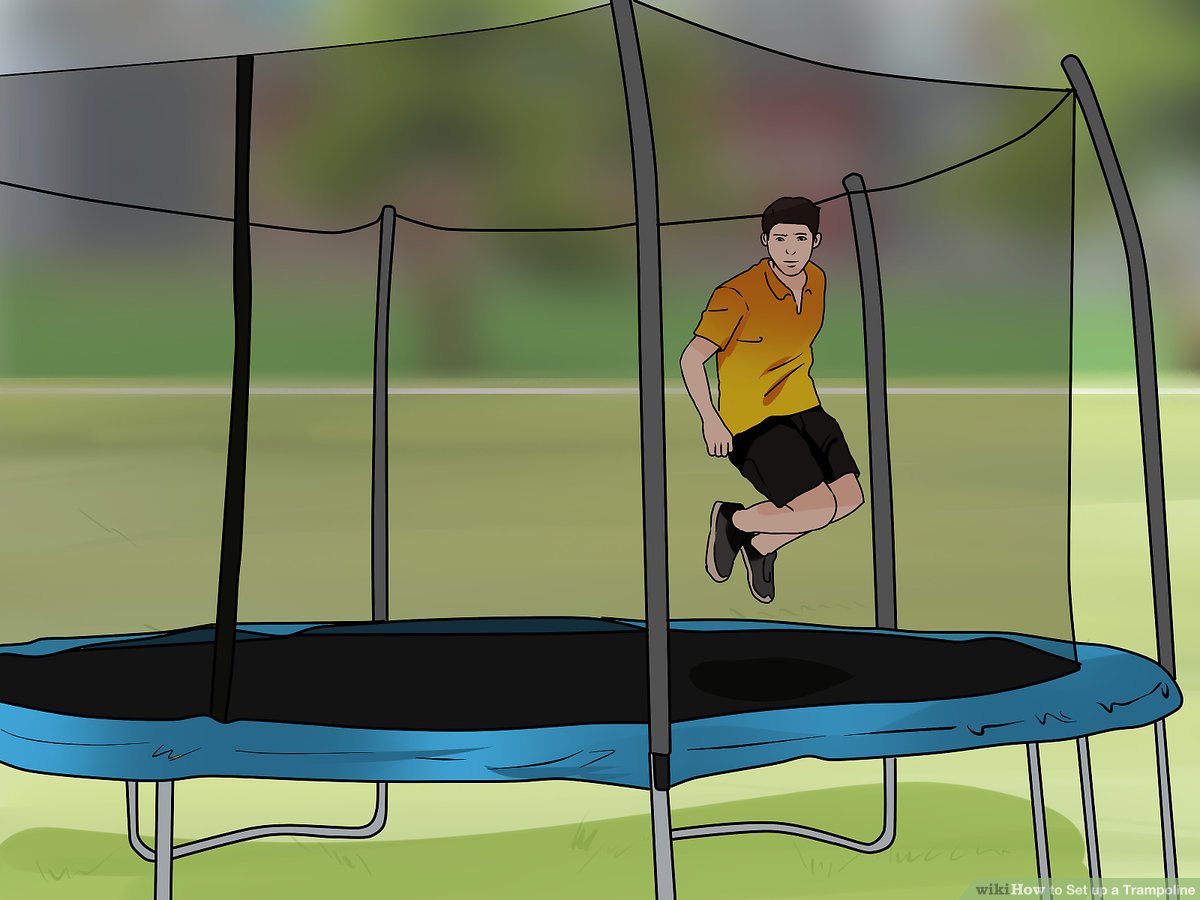
Credit: www.wikihow.com
How Do You Assemble a Trampoline by Yourself?
If you’re planning on purchasing and assembling a trampoline by yourself, there are a few things you’ll need to keep in mind. First, make sure to read the instructions that come with your trampoline carefully. It’s important to familiarize yourself with the process before beginning, as this will help ensure a smooth assembly.
Once you have the instructions handy, gather all of the necessary tools and materials. You’ll need wrenches of various sizes, pliers, screws and bolts. Make sure you have everything you need within reach before beginning assembly.
Now it’s time to begin putting together your trampoline! Start by attaching the legs to the main frame using the bolts and screws provided. Once all of the legs are attached, move on to connecting the safety netting around the perimeter of the trampoline.
This is an important step in ensuring user safety, so take your time and be sure that everything is properly secured.
Finally, attach any remaining accessories such as ladders or anchor kits according to the manufacturer’s instructions. And that’s it!
With careful assembly and following all safety precautions, you should now have a fully functioning trampoline that’s ready for use.
How Long Does It Take to Put a Trampoline Together by Yourself?
Assuming you have all the necessary tools and equipment, it should take no more than an hour to put a trampoline together by yourself. This task can be broken down into a few simple steps:
1. Assemble the frame: This is typically the most time-consuming step, as you will need to connect all the poles and make sure they are securely in place.
Be sure to follow the instructions carefully.
2. Attach the springs: Once the frame is assembled, you can then attach the springs. Again, following the instructions carefully will ensure this process goes smoothly.
3. Install the mat: The final step is to install the mat onto the frame and stretch it out so that it’s taunt. Make sure all of the hooks are properly in place before testing out your new trampoline!
What Do I Need to Put a Trampoline Together?
Assemble your trampoline according to the manufacturer’s instructions. This will usually involve spreading out the mat on the ground and attaching the frame using U-bolts or similar fasteners. The frame will then need to be secured with either springs or bungee cords.
Once everything is in place, you can test your trampoline by jumping on it lightly.
How Long Does It Take to Put a 6Ft Trampoline Together?
Assuming you are referring to a round, 6-foot diameter trampoline and not an enclosure:
It will take approximately 30-45 minutes to assemble a 6-foot round trampoline. This time frame can be shortened or lengthened depending on the number of people working on the project and their level of experience.
The following instructions are based off the Upper Bounce Easy Assemble Round Trampoline model which can be found here: https://www.upperbounce.com/p-27-round-trampoline-easy-assemble.aspx.
Before beginning, it is important to have all necessary tools and parts readily available. You will need a Phillips head screwdriver, a drill, pliers, scissors, and spring hook (provided in the kit).
In addition to these tools, you should also have access to an assistant for certain steps during assembly as well as during installation of the mat and springs.
The first step is creating the base for your trampoline by attaching 8 legs to the circular perimeter using 32 screws (4 screws per leg). Once the legs are in place, you will then add 16 curved braces around the outside edge; 8 short braces in between each set of legs (4 on each side) and 8 longer braces that connect opposite legs (4 on each side).
These braces provide additional stability for your trampoline later on. With all 16 braces in place, you should now have what looks like an upside down metal bowl – this is what will serve as the foundation for your jumper surface later.
Next comes adding 72 U-bolts around the edge of this “bowl” at even intervals; 36 outer bolts along the straight edges connecting two adjacent legs and 36 inner bolts placed directly across from those outer bolts but along the curve where three legs meet.
Once all 72 U-bolts are in place, it is time to start attaching springs. Each spring has hooks at either end; one end hooks onto an outer U-bolt while the other end hooks into an inner U bolt directly across from it (i.e., if spring #1 hooks onto outer U bolt #1 then its other end must hook into inner U bolt #37 which is directly across and 3 spots over from where it hooked onto bolt #1).
Conclusion
In today’s blog post, we’ll be discussing whether or not one person can put together a trampoline. We’ll go over the pros and cons of trying to do this yourself, as well as some tips on how to make the process easier.
On the plus side, attempting to put together a trampoline by yourself can be a fun challenge.
It’s also a great way to save money, as you won’t have to pay for professional assembly. However, there are some drawbacks to consider. For example, it may take you longer to assemble the trampoline than it would if you had help.
Additionally, you may not end up with a perfectly level or stable trampoline if you don’t have someone to help hold things in place while you’re working.
If you do decide to try assembling a trampoline by yourself, there are a few things you can do to make the process easier. First, make sure you have all the tools and parts you need before getting started.
Second, take your time and read all the instructions carefully before beginning. And third, ask for help from a friend or family member if things start to get too difficult – they may be able to hold something in place or give you an extra hand when needed.