Setting up a trampoline may seem like a daunting task, but it can be easily done in less than an hour with two people. Before you start, make sure you have all the necessary tools and materials. Once you have everything ready to go, follow these simple steps and you’ll have your trampoline set up in no time.
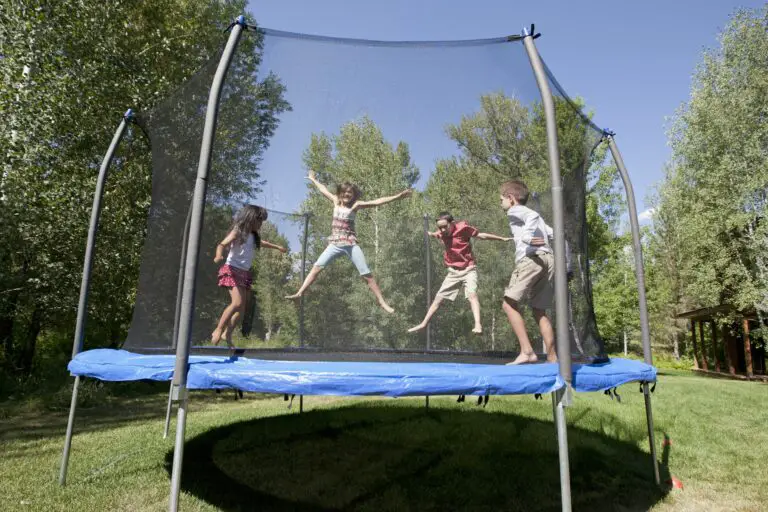
A trampoline is a great way to get some exercise, have fun, and spend time with family and friends. But how long does it take to set up a trampoline?
It depends on the type of trampoline you have.
If you have a round trampoline, it will take about 15 minutes to set up. If you have a rectangular trampoline, it will take about 20 minutes to set up. Either way, setting up a trampoline is not a difficult task and can be done relatively quickly.
Once your trampoline is set up, make sure to check all the connections and bolts to ensure everything is tightened and secure. Then, enjoy your time bouncing around!
How To Build A Trampoline Set Up A Trampoline By Yourself
How Long Does It Take to Put Up a 14Ft Trampoline
It takes about an hour to put up a 14-foot trampoline. This includes setting up the frame, attaching the jumping mat, and securing the safety enclosure. Once everything is in place, you and your family can enjoy hours of fun and exercise on your new trampoline!
How Long Does It Take to Put a 12Ft Trampoline Together
When you buy a 12ft trampoline, it will come in a box with all the necessary parts and instructions. It should take no more than two hours to put together, and often much less time than that. Here is a step-by-step guide to help you get your new trampoline assembled quickly and easily:
1. Lay out all of the parts in an open area. Make sure you have everything you need before getting started.
2. Begin by attaching the legs to the frame of the trampoline using the bolts provided.
Hand-tighten these as much as possible.
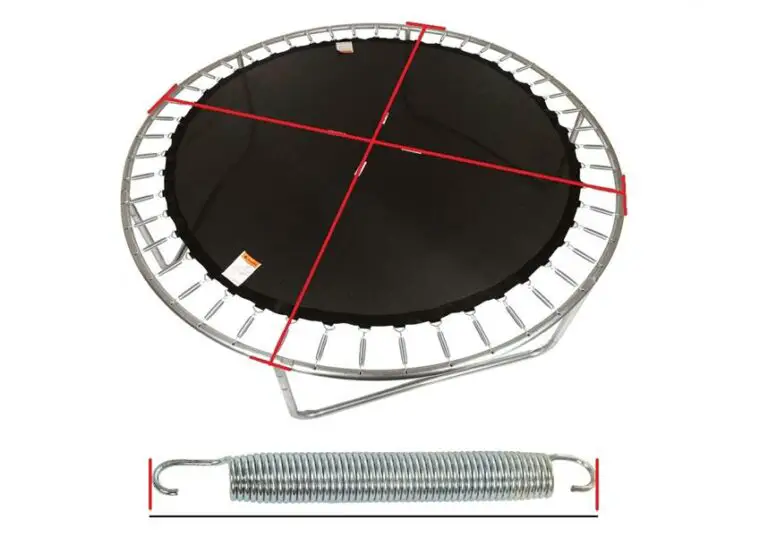
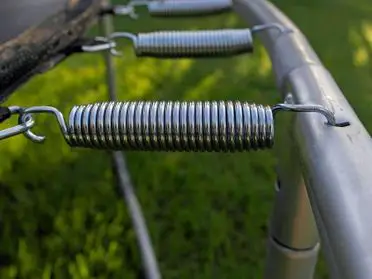
3. Next, stretch out the mat over the frame and secure it with the spring hook at each corner. Make sure the mat is pulled taunt so there are no wrinkles or creases.
4. Finally, attach the safety enclosure around the outside of the trampoline using either zip ties or cord locks (depending on what type came with your particular model). Once again, hand-tighten these as much as possible to ensure a secure fitment.
5. That’s it!
Your new 12ft trampoline is now assembled and ready for use!
How Long Does It Take to Put a 10Ft Trampoline Together
Assuming you have all the necessary tools and parts, it should take no more than an hour to put a 10ft trampoline together. Here is a step-by-step guide to help you get the job done:
1. Lay out all the parts in an open area.
Make sure you have everything you need before getting started.
2. Begin by attaching the legs to the frame. Use the bolts and nuts provided in the kit to secure them in place.
3. Next, stretch out the mat over the frame and pull it tight. Secure it with the spring clips that come with the trampoline.
4. Finally, attach the safety netting around the outside of the trampoline, making sure it is taut and secure.
Once everything is in place, your 10ft trampoline should be ready for use!
How Long Does It Take to Put a 8Ft Trampoline Together
If you’re looking for a fun way to get some exercise, a trampoline is a great option. But before you can start bouncing around, you need to put it together. So how long does it take to assemble a 8ft trampoline?
Assuming you have all the necessary parts and tools, it should take about an hour to put together a basic 8ft trampoline. This includes attaching the frame, springs, and mat. If you’re adding any additional features like a safety net or padding, that will add some time to the process.
Of course, putting together a trampoline is not always easy. If you’ve never done it before, it may take longer than an hour as you figure out how everything goes together. And if you run into any problems along the way, that can also add to the assembly time.
But once you get the hang of it, setting up a 8ft trampoline is relatively quick and easy. And then you’ll be ready to enjoy all the fun and exercise that comes with owning your very own trampoline!
Trampoline Set Up Instructions
Assuming you would like set up instructions for a rectangular trampoline:
First, find a level spot in your yard to place the trampoline. It is important that the ground is level so the trampoline will be stable.
If you have grass, it is best to remove it in the area where the trampoline will go so there is no chance of the mat becoming damaged.
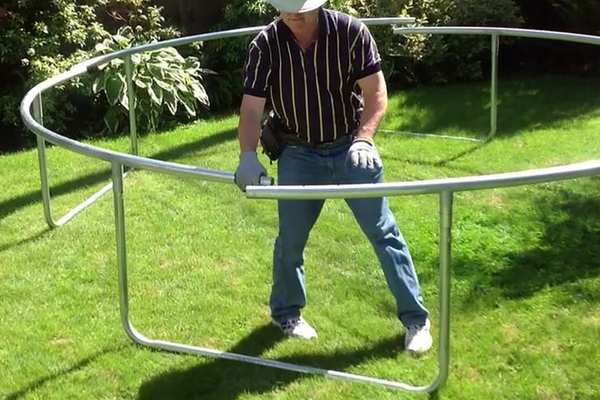
Next, lay out all of the parts of the trampoline in order so you know what goes where. The frame will be made up of several curved metal bars that connect in the middle with bolts.
There should also be U-shaped legs with foot pads that screw into them.
Now it’s time to start putting the frame together. Begin by attaching two opposite sides of the frame together with bolts, making sure that all of the connections are tight.
Then do the same with the remaining two sides. Once all four sides are connected, it’s time to attach the legs. Screw each leg into a corner until they are secure and then double check all of your connections to make sure everything is tight and secure.
Now it’s time for probably the most difficult part – spreading out and attachingthe mat ontotheframe. Start by pulling one sideof themat overtheframeand staplingit down abouteveryfoot orso alongtheedge usingheavy dutystaplesand astaplerdesignedforoutdooruse(otherwise theywillrust quickly).
Trampoline Setup Cost
The average cost to set up a trampoline is between $200 and $300. This price includes the cost of the trampoline, installation, and delivery. The exact cost will depend on the size and type of trampoline you choose.
If you need help finding a reputable installer in your area, contact your local recreation center or parks department.
How Long Does It Take to Put a 15 Foot Trampoline Together
It takes about an hour to put a 15 foot trampoline together. This includes time for unpacking the parts, reading the instructions, and attaching the springs. It is important to have two people assemble the trampoline, as some of the parts are heavy and difficult to handle alone.
Once all of the parts are in place, you can start jumping!
How to Set Up a Trampoline Net
If you’ve ever wanted to add a little extra excitement to your backyard trampoline, then you may want to consider adding a trampoline net. Not only will this provide a safe boundary for jumpers, but it can also help keep wayward balls and other projectiles from escaping the premises. Here’s how to set up a trampoline net in just a few simple steps.
First, you’ll need to purchase a trampoline net that is specifically designed for your model of trampoline. Make sure to measure the circumference of your trampoline before ordering so that you get the right size. Once the net arrives, simply follow the instructions for installation.
In most cases, this will involve attaching the netting to the upper frame of the trampoline using hooks or straps.
Once the net is installed, you’ll need to secure it at ground level so that it doesn’t blow away in strong winds. This can be done by anchoring down each corner post with heavy-duty stakes or by filling sandbags and placing them on top of each leg.
Now all that’s left to do is enjoy some safe and fun jumping!

Credit: www.wikihow.com
Can 1 Person Put Together a Trampoline?
Yes, one person can put together a trampoline. It is not recommended, however, as it is much more difficult and dangerous to do so. Trampolines are meant to be assembled by two or more people for safety reasons.
If you insist on putting one together by yourself, be sure to follow all instructions carefully and use extreme caution.
How Do You Assemble a 12Ft Trampoline?
Assuming you have already purchased your trampoline, follow these steps to get it set up in your backyard:
1. Lay out the trampoline mat on a flat surface. If you are setting up the trampoline on grass, make sure to lay down a tarp first to protect the mat from getting wet or muddy.
2. Assemble the frame by connecting the poles together. Make sure that all the connections are tight and secure.
3. Attach the spring pads around the edge of the frame, making sure that they are evenly spaced out.
4. Place the trampoline mat over top of the frame and attach it to the spring pads usingthe hooks or straps provided.
5. Once everything is secured, stretch out each spring before bouncing onthe trampoline to test it out!
How Do You Assemble a 14Ft Trampoline?
Assuming you have all the necessary parts and tools, assembling a 14-foot trampoline is a fairly straightforward process that should take no more than an hour or two. Here are the basic steps:
1. Lay out all of the trampoline parts in their respective positions.
This will help you visualize how everything goes together and also identify any missing pieces.
2. Begin by attaching the legs to the mainframe using the provided bolts and nuts. Make sure each leg is secured tightly before moving on to the next one.
3. Next, affix the jump mat to the frame using spring hooks or similar fasteners. Be sure to stretch it tight so there’s no slack when someone jumps on it later.
4. Finally, connect the safety enclosure netting to the frame using zip ties or other suitable hardware.
How Long Does It Take to Assemble a Springfree Trampoline?
Assuming you have all the tools and parts needed, it should take no more than 2 hours to assemble a springfree trampoline. This include time for reading through the instructions carefully and taking breaks in between steps.
Before starting, make sure you have enough space to lay out all the parts and that you have access to an electrical outlet.
You will also need a Phillips head screwdriver, a measuring tape, and a wrench.
1) Start by attaching the legs to the bottom of the frame using the bolts and nuts provided. Make sure that each leg is tightened securely.
2) Next, connect the top rails to the legs using the T-joints. Again, use the bolts and nuts provided and make sure everything is tightened properly.
3) Now it’s time to add on the safety pads.
These go overtop of the frame and help protect jumpers from injury. There should be Velcro straps already sewn into the pads – simply line them up with corresponding holes onthe frame and secure them in place. If needed, additional zip ties can be used at strategic points aroundthe perimeter ofthe safety pad (underneath) to keep it extra secure.
4) The next step isto installthe mat ontoframebyloopingitovertopandtyingittightlyinplace with eitherspringclipsor VELCRO® brandfasteners(both areincluded). It’sa good idea touselessthanhalfofthespring clipsprovided soyoucan savethemforlater ifneeded (forexample: ifyou everneedtoremovethemattofoldupthetrampolineforstorage). SpringfreeTrampolinealso recommendsthatyoutiesthemattotheframeinseveralplacesusingknotsratherthanclipssoitislesslikelytomovearoundduringuse;thisiscompletelyoptional though!
IMPORTANT:Make sureto leaveatleast2 feetofspacebetweenthe edgeofthematandthenearestobjectbeforeyoubeginjumping!Thiswillcreatea “safe zone” incaseyoushouldfalloffthetrampoline duringuseand avoidhittinganyhard objectsnearbywhich couldresultin serious personal injury!
Conclusion
A trampoline can be a great addition to any backyard, providing hours of fun for kids and adults alike. But before you can start bouncing, you need to set up the trampoline. So how long does it take to set up a trampoline?
The answer depends on the type of trampoline you have. If you have a pre-assembled trampoline, it will only take a few minutes to set up. However, if you have a kit that needs to be assembled, it will take longer – anywhere from 30 minutes to an hour or more.
Either way, setting up a trampoline is not a difficult task and can be done by most people with little effort.