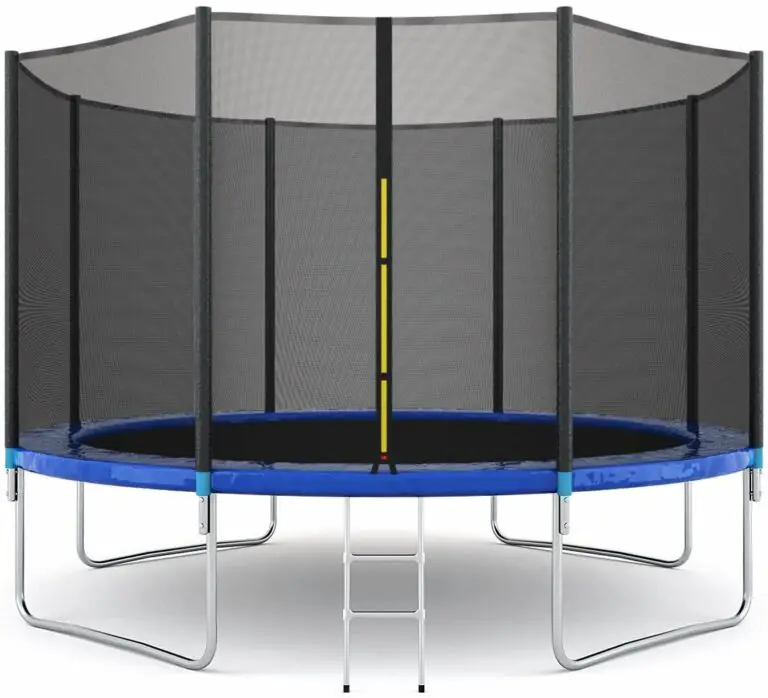
If you are lucky enough to have a 14ft trampoline in your backyard, then you know how much fun they can be. But before you can start bouncing around, you need to assemble the trampoline. Here is a step by step guide on how to do just that:
1. Firstly, lay out all of the parts of the trampoline in the area where you will be assembling it. This will make it easier to find everything and put it together correctly.
2. Next, take the time to read through the instructions that came with your trampoline.
This will give you a better understanding of how everything goes together and what order you should do things in.
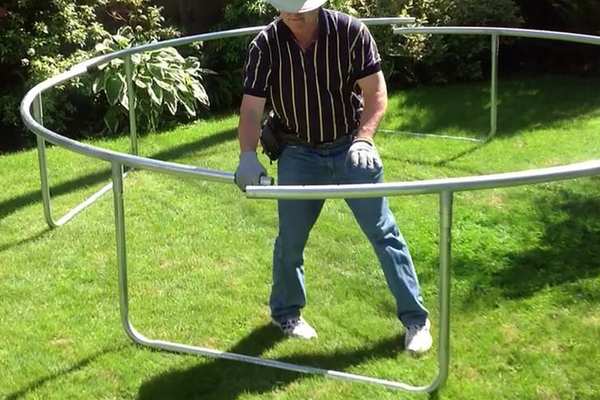
3. Once you have a game plan, start by attaching the legs to the frame of the trampoline using the bolts provided. Make sure that these are tightened well so that the legs are secure and won’t move around when someone is jumping on the trampoline.
4. The next step is to add on the safety netting which goes around the edge of the trampoline. You will need to stretch this out and attach it to hooks on the top part of the frame. Again, make sure that this is done securely so that there is no risk of anyone falling off while they are using it.
- Unfold the trampoline and place it in the desired location
- Place the safety enclosure around the outside of the trampoline
- Assemble the legs of the trampoline and attach them to the frame
- Attach the springs to the frame of the trampoline
- Test the trampoline by jumping on it to make sure everything is secure and there are no loose parts
Propel 14 FT Trampoline Assembly|Setup.
Trampoline Assembly Instructions Pdf
If you’re looking for detailed instructions on how to assemble a trampoline, you’ve come to the right place! Here at Trampoline Assembly Instructions Pdf, we provide clear and concise step-by-step guides that will make assembly a breeze.
Our team of experts have years of experience in trampoline assembly, so you can rest assured that our instructions are accurate and easy to follow.
Plus, we offer support should you need any assistance along the way.
So what are you waiting for? Get started today and have your trampoline assembled in no time!
Jumpzylla Trampoline Instructions
Assuming you would like a blog post discussing the instructions for setting up a Jumpzylla trampoline:
Jumpzylla Trampoline Instructions
Are you excited to get your very own Jumpzylla trampoline?
Whether you’re setting it up for the first time or putting it away for storage, these instructions will come in handy. Read on to learn everything you need to know about your new trampoline.
First things first, let’s talk about safety.
Be sure to read all of the warnings and safety information that came with your Jumpzylla trampoline before attempting to set it up or use it. Once you’ve done that, take a look at the following instructions so you can be sure you’re using your trampoline correctly and safely.
Now that we’ve got that out of the way, let’s move on to setup!
The first thing you’ll need to do is find a level spot outdoors where you want to put your trampoline. Once you’ve found the perfect spot, lay out the frame pads around the perimeter of where the trampoline will go. Next, connect the outer legs of the frame together using the provided bolts and nuts.
After that, it’s time to connect the upper part of the frame to the legs. Start by attaching two opposite legs together using the cross beam. Then do this with remaining two legs until all four are attached at each corner.
Now take a look at your work – make sure everything is level and secure before moving on.
If everything looks good so far, it’s time to add on those springs! Grab one spring and hook one end onto an outside hole on one ofthe lower sections ofthe frame leg,.
Then stretchthe spring acrossto aframe holeon an adjacentframe legand hookit intoplace.. Repeatthis processuntilallofthespringsare inplaceand evenlydistributedaroundthetrampolineto provideequalbounceacrossitsurface.. Finally,placeeitherthematorthe enclosurenettingovertopoftheframeandyou’regoodtojump!
Trampoline Setup Instructions
Assuming you would like instructions on how to set up a trampoline:
First, you will need to find a level spot in your yard to set up the trampoline. It is important that the ground is level so the trampoline will be stable.
Once you have found a good location, clear away any debris or objects that might be in the way.
Next, lay out the base of the trampoline on the ground. Make sure that all of the legs are facing outward and evenly spaced.
If there are any gaps between the legs and frame of the trampoline, it could lead to instability and injuries.
Now it’s time to start assembling the trampoline according to the instructions that came with it. If you don’t have these handy, you can usually find them online from the manufacturer’s website.
Start by connecting together all of the frame pieces and then attaching them to the legs. At this point, you should also add any padding or covers for extra safety.
Once everything is put together, it’s time to test it out!
Have someone else help hold ontothe trampoline while you bounce around a bit to make sure everything is secure and there are no wobbles or instability issues. And that’s it – now you’re ready to enjoy some safe fun on your new trampoline!
16 Ft Trampoline Assembly Instructions
If you’re lucky enough to have a 16 ft trampoline in your backyard, you probably can’t wait to get it set up so you can start jumping! Here are detailed instructions to help you with the assembly process.
1. Unfold the trampoline and place it on level ground.
If possible, choose an area that is soft and free of debris.
2. Once the trampoline is unfolded, locate the eight legs. These will be inserted into the holes around the outside of the frame.
Make sure that each leg is securely fastened before moving on.
3. Next, it’s time to connect the springs. There are 96 springs in total, and they must be connected to the hooks around the edge of the frame.
This may take some time, but it’s important to make sure that each spring is properly secured.
4. Once all of the springs are in place, stretch them out so that they are taunt (but not too tight). This will ensure a good bounce when using the trampoline.
5 . Finally, attach the safety netting around the perimeter of the trampoline using zip ties or similar fasteners . This will help keep jumpers safe while usingthe trampoline .
Now your 16 ft trampoline is ready for use! Enjoy hours of fun and exercise by yourself or with friends and family members .
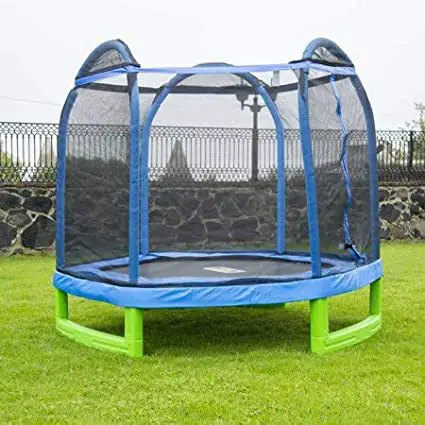
Agame 14Ft Trampoline Instructions
In this blog post, we will provide detailed instructions on how to assemble an Agame 14Ft Trampoline. This trampoline is a great addition to any backyard and will provide hours of fun for the whole family!
tools needed for assembly: Phillips head screwdriver, socket wrench set
1. First, lay out all of the parts in the order that they will be assembled. This will make the process go much smoother and faster.
2. Next, using the Phillips head screwdriver, attach the legs to the frame.
Be sure to tighten each bolt securely.
3. Now it’s time to connect the jumping mat to the frame using the provided straps and buckles. Once again, make sure everything is tight and secure before moving on.
4. The next step is to add the safety padding around the edge of the trampoline. This padding is essential in preventing injury while jumping. Simply Velcro it into place around the entire circumference of the trampoline frame.
12 Ft Trampoline Assembly Instructions
Assuming you would like a blog post discussing how to assemble a 12-foot trampoline:
Assemble your trampoline easily with these simple steps! With a few tools and some help, you’ll have your new 12 ft. trampoline up in no time.
Start by laying out all of the parts on a level surface. Be sure to put the mat and frame together before attaching the springs – this will make the process much easier. Once everything is laid out, it’s time to start attaching the springs.
If you’re working alone, it’s best to start with the four corner springs first. Attach each spring to the corresponding hole on the frame, making sure that they are all facing the same direction. Once all four corners are done, move on to attaching the side springs.
There should be eight in total, so evenly space them out around the circumference of the frame.
Now it’s time for the final step: attachingthe mat totheframe usingthe strapsprovidedincluded inyour assembly kit. Beginbyloopingoneendofthe strap throughthematthenpullitup throughtheframeand loopitbackthroughthemattotheotherside.
Do thisforall16 loopsaroundthe perimeterofthemat until it issnuglysecuredtoframe! Allthat’slefttodo nowistestityour handiworkbyjumpingonin!
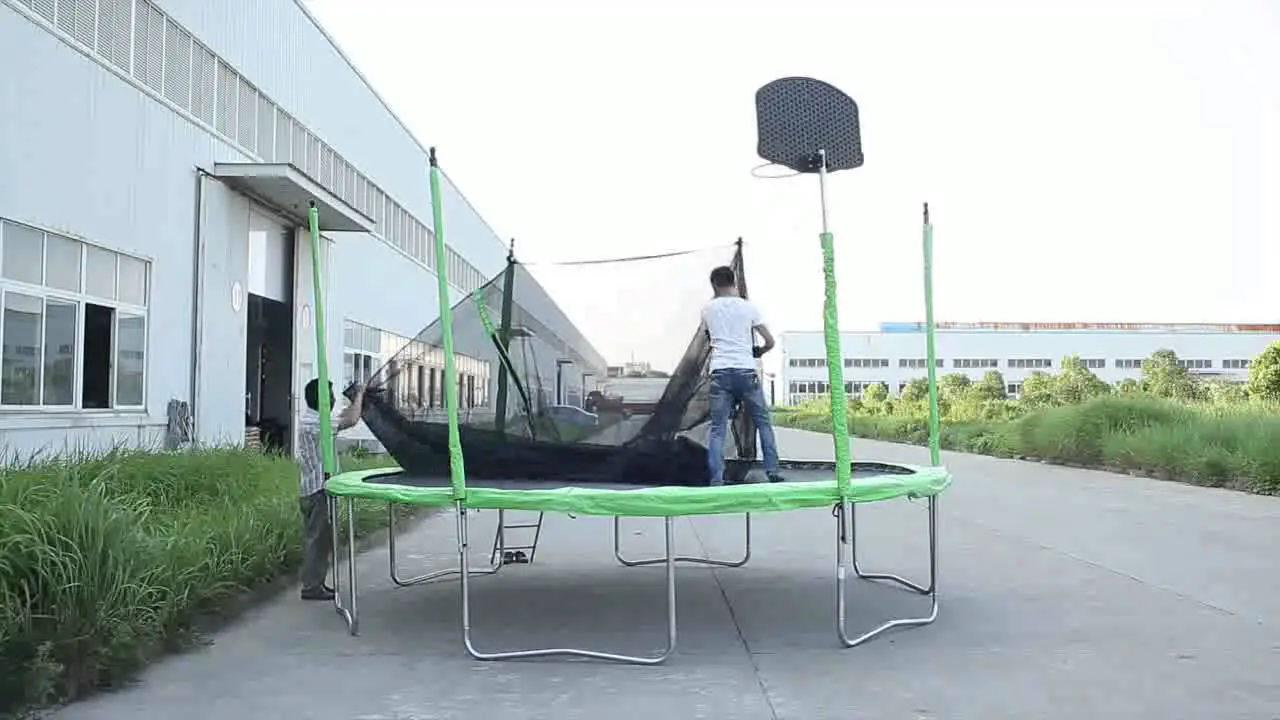
Airzone 14 Ft Trampoline Assembly
The Airzone 14 Ft Trampoline Assembly is a great way to get your kids active and outside. This trampoline features a heavy duty steel frame that can support up to 250 lbs, making it perfect for family fun. The Airzone 14 Ft Trampoline Assembly also comes with a safety net enclosure so you can feel confident letting your kids play.
This trampoline is easy to assemble with the included instructions, and will provide hours of fun for the whole family!
Yorin Trampoline Instructions
Assuming you would like a blog post about the Yorin Trampoline:
The Yorin Trampoline is a great way to get some exercise and have fun at the same time. It is easy to set up and take down, and it can be used indoors or outdoors.
Here are some instructions on how to use the Yorin Trampoline:
1. First, find a level spot on which to set up the trampoline. Make sure there are no sharp objects nearby that could puncture the trampoline mat.
2. Spread out the legs of the trampoline and push down on the frame until it clicks into place.
3. Attach the bungee cord to the hooks on each leg of the trampoline. The cord should be tight, but not so tight that it pulls the legs inward.
4. Place the mat over the frame of the trampoline and secure it with Velcro straps. These straps should also be tight, but not too tight, in order to avoid damaging the mat.
5a).
For indoor use, position your Yorin Trambopline in front of a wall or other solid surface..b). For outdoor use, make surethe area aroundthe Yorin Tramboplineis clear of obstaclesbefore jumpingon it.
.c) If usingwith children present, an adultshould always supervisejumping activities.
Credit: www.gettrampoline.com
How Long Does It Take to Assemble a 14Ft Trampoline?
It takes anywhere from 45 minutes to an hour to assemble a 14ft trampoline. This timeframe can be shortened or lengthened depending on the number of people working on the project and their level of expertise. Generally, it is recommended that two people work together to assemble a trampoline, as this will help to speed up the process.
How Do You Set Up a Trampoline Step by Step?
Assuming you would like a blog post discussing how to set up a trampoline:
Most trampolines come with an easy-to-follow instruction manual that will walk you through the process step by step. However, if you’ve lost your manual or are setting up a used trampoline, here are the general steps you’ll need to follow:
1. Choose a level spot in your yard for the trampoline. You’ll want to make sure there are no trees, bushes or other objects nearby that could interfere with the safety netting. If possible, it’s also best to choose an area that’s not too close to your house or other buildings.
2. Clear away any rocks, sticks or other debris from the area where the trampoline will be placed.
3. Lay out all of the parts for the trampoline in the order they will be assembled. This includes the frame, mat, springs and safety netting (if applicable).
4. Begin assembling the frame according to your instruction manual (or following these general instructions if you don’t have one). Make sure all of the connections are secure and tighten any nuts or bolts as needed.
5. Once the frame is complete,Attachthe mattoit usingthe spring clips provided (or followingthe manufacturer’sinstructions).
6. Installthe safety nettingaroundthe outsideoftheframe(again, followingmanufacturer’sinstructions)beforeattachingthesprings toreinforceitand provideadditionalsupportforjumpingon themat . 7 . Finally , add any additional accessorieslike laddersoranchorsbeforelettinganyoneonto theatrampleasure .
Can One Person Assemble a Trampoline?
Yes, one person can assemble a trampoline. The process is relatively simple and does not require any special tools or expertise. Trampolines come with an instruction manual that outlines all of the necessary steps for assembly.
Additionally, there are many online video tutorials available that can provide further guidance. Most importantly, be sure to take your time and follow all safety precautions while assembling the trampoline.
How Do You Assemble a Trampoline Easily?
Assuming you have all the necessary parts and tools, assembling a trampoline is actually quite easy. Here are the steps:
1. Lay out the trampoline frame on level ground.
If you’re using a rectangular trampoline, make sure the frame is oriented in a diamond shape.
2. Attach the legs to the frame using the provided bolts and nuts. Hand-tighten these as much as possible.
3. Install the spring system by hooking each spring onto the corresponding V-ring on the frame. Make sure that all of the springs are facing inwards towards the center of the trampoline.
4. Once all of the springs are attached, stretch them out evenly around the circumference of the trampoline frame and hook them ontothe outermost set of V-rings.
Again, hand-tighten these as much as possible.
5. Installthe safety pad overthe springs, securing it in place with velcro strips or similar fasteners. Make sure that there are no gaps betweenthe pad andthe frame where someone’s body could come into contact with a spring underneath.
Conclusion
This blog post offers step-by-step instructions for assembling a 14ft. trampoline. The author begins by noting the importance of reading the instruction manual thoroughly before beginning assembly.
Next, they advise gathering all of the necessary tools and materials in one place. With everything ready, the author walks through each step of assembly, from attaching the legs to putting on the safety padding. Throughout, they offer helpful tips and caution against common mistakes.
Following these steps should result in a safe and functional trampoline that will provide hours of fun for kids and adults alike.