A 6ft trampoline is a great way to get some exercise, have some fun, and entertain the kids. They are relatively easy to assemble, but there are a few things you need to know before you start. First, you will need to gather all of the parts and tools that you will need.
Second, you will need to find a level spot in your yard where you can set up the trampoline. Third, you will need to follow the instructions that come with the trampoline. And fourth, if you have any questions or problems along the way, don’t hesitate to ask for help from a friend or family member.
- Unfold the trampoline and place it on a level surface
- Insert the legs into the holes at the corners of the frame
- Secure the legs in place by tightening the bolts with a wrench or ratchet
- Attach the spring padding around the edge of the frame, securing it in place with hooks or velcro straps
- Stretch out each spring and hook it onto the corresponding hole on the frame
- Make sure that all of the springs are evenly tensioned
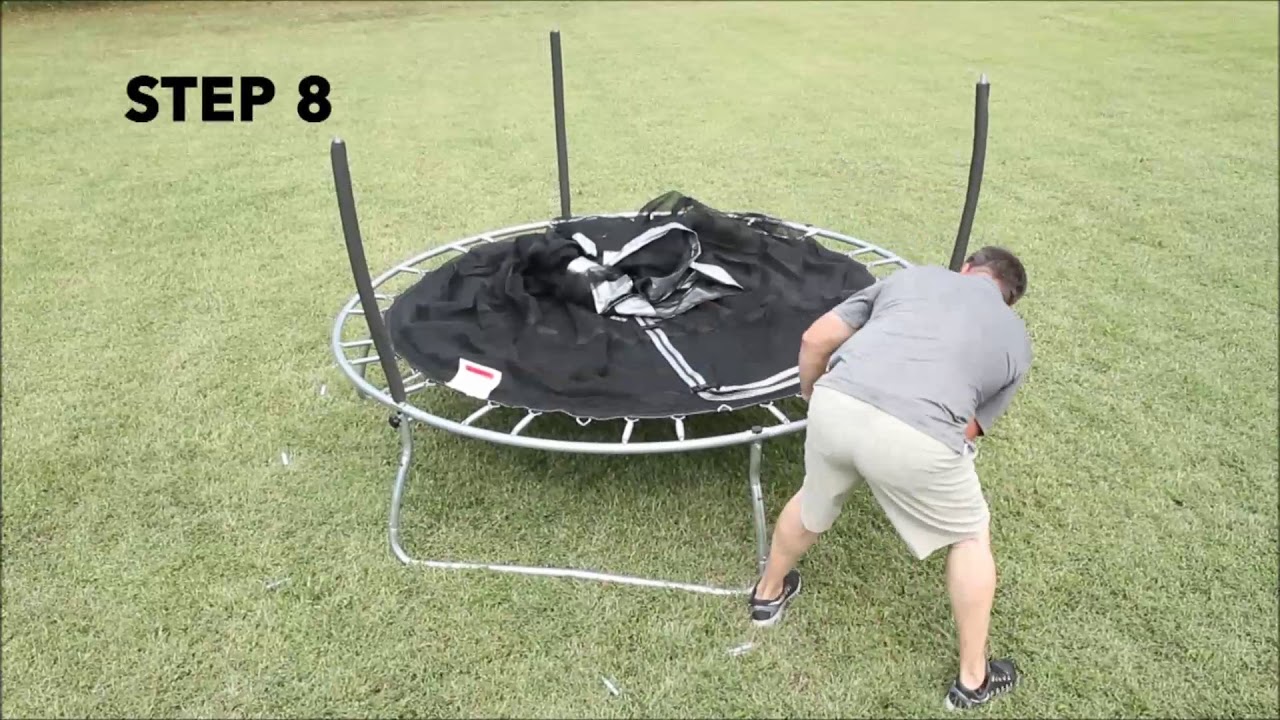
- Place the safety enclosure around the outside of the trampoline, attaching it tothe frame with hooks or velcro straps
Toy Park 6ft Trampoline Assembly Video
Trampoline Assembly Instructions Pdf
If you’re looking for trampoline assembly instructions, you can find them in the PDF format on our website. This document provides step-by-step instructions on how to assemble your trampoline, so you can get started enjoying it as soon as possible.
Assembling a trampoline is a relatively straightforward process, but there are a few things to keep in mind.
First, make sure that all of the parts are accounted for and that you have the necessary tools. Next, follow the instructions carefully to avoid any potential problems. And finally, take your time – rushing through the assembly process could result in an unsafe trampoline.
With these tips in mind, consult the PDF instructions and get started on assembling your new trampoline today!
14 Ft Trampoline Assembly Instructions
If you’re looking for a great workout or just want to have some fun, a 14 ft. trampoline is a great addition to your backyard. But before you can start jumping, you need to assemble it! Here are detailed instructions on how to put together a 14 ft. trampoline:
1. First, lay out all of the parts in an open area. You should have the following:
-14ft round trampoline frame
-6 springs
-6 spring hooks
-6 legs with foot pads
-Trampoline mat
– safety pad
-Ladder
If any of these parts are missing, do not attempt to assemble the trampoline and contact the manufacturer.
2. Lay out the frame on its side and attach the legs using the curved brackets. Make sure that the legs are evenly spaced out and that the brackets are tightened securely.
3. Next, take the safety pad and lay it over top of the frame, tucking it in around the edges of the frame so that it’s snug.
4. Now it’s time to attach the springs! Starting at one end of the frame, hook each spring onto one of the holes aroundthe edge oftheframeand then clipitontooneofthespringhooksonthelegs(youmayneedanotherpersontohelpholdthespringsinplace).
Don’tforgettoplaceaspringintheverycenteroftheroundframe!Repeatthisprocessuntilallofthespringshareattachedandsecuredbyhooksonthelegs.
5 . Now comesthetrickypart–placingthemattopoftheringofframeso thatit’sstretchedoutnicely withoutanywrinklesordipsinthematerial . Itcanbehelpfultohaveanotherpersonholdupthemattoforma”dome”whileyouslideeachspringintoitscorrespondingholearoundthematt’sedge . Onceallsixspringsareinplace , holddownthemattatonesideoftheframeandusethetie down straps (includedwithmosttrampolines)tocompletetheinstallationbywrappingthemoverthetopoftheentiresetupandtyingthemsecurelytooneoftheframe’slegs .
How to Assemble a Trampoline
If you’re looking for a fun way to get some exercise, a trampoline is a great option. They’re relatively inexpensive and easy to set up, making them a popular choice for many people. But before you can start jumping around, you need to know how to assemble a trampoline.
The first thing you’ll need to do is gather all the necessary parts. This includes the frame, mat, springs, and enclosure net (if desired). Once you have everything, lay out the frame on level ground and begin attaching the legs.
Next, add the mat and springs, making sure they’re evenly distributed around the perimeter of the frame. Finally, attach the enclosure netting (if using) and give everything a final once-over to make sure nothing is loose or missing.
Now it’s time to start jumping!
Just remember to use caution when doing so and always supervise children while they’re using the trampoline. With a little bit of care and practice, you’ll be bouncing around like a pro in no time!
Sportspower Trampoline Instructions
Assuming you would like a blog post about the Sportspower Trampoline Instructions:
The Sportspower Trampoline Instructions are pretty simple and straightforward. First, you will need to assemble the trampoline.
This can be done by following the instructions that come with the trampoline. Once the trampoline is assembled, you will need to put the mat on the ground and secure it with the straps that are provided. Next, you will need to take the springboard and hook it onto the frame of the trampoline.
Make sure that it is tight and secure before moving on. Now, you are ready to start jumping! Remember to always jump in the center of the mat and avoid landing on your knees or stomach.
Have fun!
Bluerise Trampoline Instructions
Assuming you would like a blog post about the instructions for setting up a Bluerise trampoline:
“How to Assemble Your Bluerise Trampoline”
Setting up your own personal trampoline in the comfort of your home is now possible with the easy-to-assemble Bluerise trampoline.
Whether you’re looking to get fit, have some fun, or both, this guide will show you how to put together your new toy in just a few simple steps.
Before starting assembly, lay out all of the parts on a flat surface in the order that they will be used. This will make things go more smoothly and help you keep track of what goes where.
The first thing you’ll want to do is attach the legs to the frame using the included bolts and washers. Once all four legs are in place, it’s time to start working on the jumping mat.
To do this, first tie the strings that come attached to each corner of the mat onto their corresponding hooks on the frame.
Make sure these are pulled tight so that there’s no slack when someone jumps on later. Next, stretch out the spring around the edge of theframe and hook it onto each eyelet until it’s fully secure. Now your mat should be nice and taught – time to give it a test jump!
If everything feels good, then congratulations – you’ve successfully assembled your new Bluerise trampoline!
8Ft Trampoline Assembly Instructions
If you’re looking for a fun activity to keep the kids entertained, or if you just want to get some exercise yourself, a trampoline is a great option. But before you can start jumping around, you need to assemble it! Here are step-by-step instructions for assembling an 8-foot trampoline.
1.Lay out all of the parts in the area where you will be assembling the trampoline. Make sure you have all of the necessary parts and tools.
2.Begin by attaching the legs to the frame.
Use the bolts and nuts provided in the kit to secure the legs in place.
3.Next, attach the springs to the frame. There are typically 96 springs included with an 8-foot trampoline kit – 48 of them will go on each side of the frame.
Start at one end and work your way around until all of the springs are in place.
4.Now it’s time to stretch out the mat over top of the frame and secure it in place with spring hooks (included). Start at one end and pull tight as you work your way around until all sides are hooked onto springs.
Make sure there is no slack anywhere – otherwise someone could get injured while using it!
5 Finally, give everything a once-over to make sure everything is tightened down properly and there are no loose parts that could come off during use. Once you’re satisfied, invite everyone over for a jump party!

Credit: www.amazon.com
How Long Does It Take to Assemble a 6Ft Trampoline?
Assuming you have all the required parts and tools, it should take no more than 30 minutes to assemble a 6ft trampoline. Here is a step-by-step guide:
1. Place the trampoline mat on the ground and locate the eight legs.
There are four short legs and four long legs. The short legs go in the middle of each side, while the long legs go on the outside of each side.
2. Take two of the long legs and insert them into the holes at the end of two opposite sides of the mat.
Make sure that the curved part of the leg is facing downwards. Do this for all four long legs.
3. Next, do likewise with the short legs, inserting them into the holes in the middle of each side of the mat so that they too are facing downwards.
4. Now it’s time to start connecting all eight legs together usingthe U-shaped bolts provided in your kit. Starting with any two adjoining legs, thread a bolt through one hole and then screw on a washer before threading it throughthe second hole and tightening it up with a nut (do not overtighten as this could damagethe trampoline mat). Repeat this process until all eight bolts are in placeand secure.
You may findit helpful to use a power drill for this stage if you have one available – just make sure you usethe appropriate bits!
How Do You Set Up a Trampoline Step by Step?
Assuming you would like a blog post discussing how to set up a trampoline:
Most people think that setting up a trampoline is difficult, when in reality it is quite simple! Here are easy instructions on how to set up your own trampoline in just a few quick and easy steps.
1. Lay out the mat on level ground and make sure there are no rocks or other sharp objects underneath. You want to be sure that the surface is completely flat so that the trampoline will be stable and secure.
2. Unfold the frame and stand it upright.
Be careful not to damage any of the parts as you do this. Once the frame is unfolded, you can begin attaching the legs. Make sure that each leg is locked into place before moving on to the next one.
3. Stretch out the mat over the frame until it’s tight and there are no wrinkles or creases visible. This step is important because it ensures that users will have a safe and smooth jumping experience. Use your hands to pull the fabric taut as you attach it to each side of the frame with spring hooks or zip ties.
4. Now all that’s left to do is test it out!
How Do You Assemble a Trampoline Easily?
Assembling a trampoline is not as difficult as it may seem. With a little bit of patience and some help, you can have your trampoline assembled in no time. Here are a few tips to help you get started:
1. Read the instructions carefully before beginning assembly. This will ensure that you have all the necessary parts and understand the steps involved.
2. Have someone else help you with assembly.
Having an extra set of hands will make the process go much smoother and faster.
3. Begin by attaching the legs to the frame of the trampoline. Make sure that each leg is securely in place before moving on to the next step.
4. Next, add the springs to the frame. There should be a total of 96 springs, evenly distributed around the perimeter of the trampoline.
5. Once all of the springs are in place, stretch out the mat over them and secure it with clips or ties.
Be sure that the mat is tight and free of any wrinkles or creases.
6 Finally, add any safety pads or covers that came with your trampoline kit.
How Do You Put a Small Trampoline Together?
Assuming you have already purchased your small trampoline, the first thing you will need to do is find a level spot in your yard to set it up. Once you have found a good location, lay out the frame of the trampoline on the ground and make sure all of the legs are evenly spaced out. Next, attach the springs to the legs of the trampoline using the hooks provided.
Once all of the springs are in place, stretch them out and hook them onto the frame. Finally, put on the safety pad and jump mat and your trampoline will be ready for use!
Conclusion
If you’re looking for a fun way to get some exercise, a trampoline is a great option. But before you can start jumping, you need to assemble it. Here’s how to do it:
1. Start by placing the trampoline frame on level ground. If you’re not using a pre-assembled frame, put together the sections and make sure all the connections are tight.
2. Next, stretch out the mat over the frame and secure it with the supplied clips or straps.
Make sure the mat is taunt so it will provide a good surface for jumping.
3. Now it’s time to install the safety enclosure, if you’re using one. Start by attaching the top rail to the trampoline frame with the provided clamps or bolts.
Then stretch out the netting around the perimeter of the trampoline and attach it to the top rail with more clamps or bolts.
4 Finally, add any accessories like ladders or padding before inviting everyone over for some fun!