Skywalker Trampolines are a great way to get some exercise and have fun at the same time. They are easy to assemble, and can be done in just a few minutes with some simple tools. Here is how to assemble a Skywalker Trampoline:
First, you will need to gather the following items: the trampoline frame, the mat, the springs, and the bolts. Next, lay out the trampoline frame on level ground and attach the mat to the frame using the springs. Then, use the bolts to secure the frame to the ground.
Finally, test your new trampoline by jumping on it!
- Place the Skywalker Trampoline in an open area with the legs facing up
- Insert the T-joints into the holes on the legs of the trampoline
- Connect the upper and lower frames together with the 8ftCurvedTube
- Affix the netted enclosure to upper frame using zip ties or clips (not included)
- Make sure that there are no gaps between the netting and the frame so that small children cannot fall through
Skywalker Trampolines Mini Trampoline Assembly Video
Trampoline Assembly Instructions Pdf
You’ve finally taken the plunge and decided to buy a trampoline. Congratulations! Trampolines are great for exercise, fun, and spending time with family and friends.
But before you can start bouncing around, you need to assemble your new purchase.
If you’re feeling a little overwhelmed at the thought of putting together a trampoline, don’t worry. We’re here to help with clear and easy-to-follow instructions.
Just grab a Phillips head screwdriver and follow along!
The first step is to lay out all of the parts in an open area. This will help you get a sense of what goes where before you start assembling anything.
Once you have all of the parts laid out, it’s time to start attaching the legs to the frame.
There are usually eight legs on a trampoline, each with its own set of holes that line up with those on the frame. Simply take a leg and line up the holes before screwing it in place.
Repeat this process for all eight legs until they are all securely attached to the frame.
With the legs in place, it’s time to connect the jumping mat to the frame using springs. There are typically 96 springs (48 on each side), each of which needs to be hooked onto both the frame and jumping mat.
Skywalker 12′ Trampoline Assembly Instructions
One of the great things about trampolines is that they are relatively easy to assemble. Even if you’ve never put one together before, it shouldn’t take more than an hour or so to get your new Skywalker 12′ trampoline up and ready to bounce on. Here are step-by-step instructions to help you along the way.
Before you begin, lay out all of the parts in the area where you will be assembling the trampoline. This will make it easier to find everything you need as you go along.
1. Start by attaching the legs to the main frame using the bolts and nuts provided.
Be sure to tighten these well so that the legs are secure.
2. Next, stretch out the mat over the frame and attach it using the spring clips. Again, make sure these are tight so that there is no risk of the mat coming loose while in use.
3. Finally, attach the safety netting around the outside of the frame using zip ties or similar fasteners. Once again, it is important to make sure these are secure so that there is no risk of anyone falling off of the trampoline while in use.
Now your Skywalker 12′ Trampoline is assembled and ready for use!
Just be sure to follow all safety guidelines when using it and have fun!
Skywalker Trampoline Assembly 8Ft
If you’re looking for a trampoline that will give your kids hours of fun, the Skywalker Trampoline is a great option. This trampoline is easy to assemble and comes with everything you need for quick and easy set-up. The Skywalker Trampoline is also very durable, making it a great investment for your family.
Skywalker Trampoline 15
The Skywalker Trampoline 15 is a great trampoline for kids and adults alike. It’s made with heavy-duty materials and can support up to 250 pounds, making it perfect for energetic play. The frame is made of powder-coated steel, while the mat is constructed of UV-resistant polypropylene.
This combination makes the trampoline extremely durable and long lasting. Additionally, the safety netting surrounding the perimeter of the trampoline ensures that everyone stays safe while playing.
Skywalker Trampoline 12
Skywalker Trampoline 12-Foot Round Trampoline with Enclosure
The Skywalker Trampoline 12-Foot Round Trampoline with Enclosure is a great trampoline for your backyard. It’s big enough for the whole family to enjoy, but not so big that it takes up too much space.
The enclosure keeps everyone safe while they’re bouncing around, and the padding on the frame and springs ensures that no one gets hurt. This trampoline also comes with a ladder, so getting in and out is easy.
Whether you’re looking for a trampoline for yourself or your family, the Skywalker Trampoline 12-Foot Round Trampoline with Enclosure is a great option.
It’s well-made, safe, and fun for all ages.
Skywalker Trampoline Basketball Hoop Assembly Instructions
Looking for Skywalker Trampoline Basketball Hoop Assembly Instructions? Look no further! Here are detailed, step-by-step instructions to help you assemble your Skywalker Trampoline Basketball Hoop.
1. Begin by attaching the lower bracket of the basketball hoop to the trampoline frame using the provided bolts and washers.
2. Next, attach the backboard to the lower bracket. Make sure that the backboard is level before tightening the bolts.
3. Now it’s time to install the pole onto the backboard. Start by threading one of the included J-bolts into one of the holes in the backboard. Then, do the same with a second J-bolt in another hole on the backboard.
These two J-bolts will serve as stabilizers for your pole.
4. With both J-bolts in place, insert your pole into position between them and tighten down all four bolts (two on each J-bolt) to secure everything in place. Again, make sure that your pole is level before tightening down completely.
Skywalker Trampoline 15 Ft Weight Limit
The Skywalker Trampoline 15 Ft Weight Limit is a great way to get some exercise and have fun at the same time. This trampoline is perfect for people of all ages and can accommodate up to 250 pounds. The frame is made of heavy-duty steel for lasting durability, and the mat is made of UV-resistant PVC for safety and longevity.
The Skywalker Trampoline 15 Ft Weight Limit also comes with a safety enclosure net to keep jumpers safe while they’re enjoying themselves.
Skywalker Trampoline Weight Limit
If you’re a fan of the Skywalker trampolines, you may be wondering what the weight limit is. After all, you want to make sure that your trampoline can handle your weight before you start jumping on it.
The good news is that the Skywalker trampoline has a weight limit of 250 pounds.
That means that it can handle most people’s weight without any problems. However, if you are heavier than that, you may want to consider getting a different type of trampoline.
Of course, the weight limit is not the only thing to consider when buying a trampoline.
You also need to think about the size and shape of the trampoline. If you have a small yard, you probably don’t want to get a huge trampoline. Likewise, if you have a lot of kids who will be using the trampoline, you may want to get one with a safety enclosure so they don’t fall off.
No matter what your needs are, there is sure to be a Skywalker trampoline that will fit them. Just make sure to check the weight limit before you buy so you know it will be able to handle your weight safely.
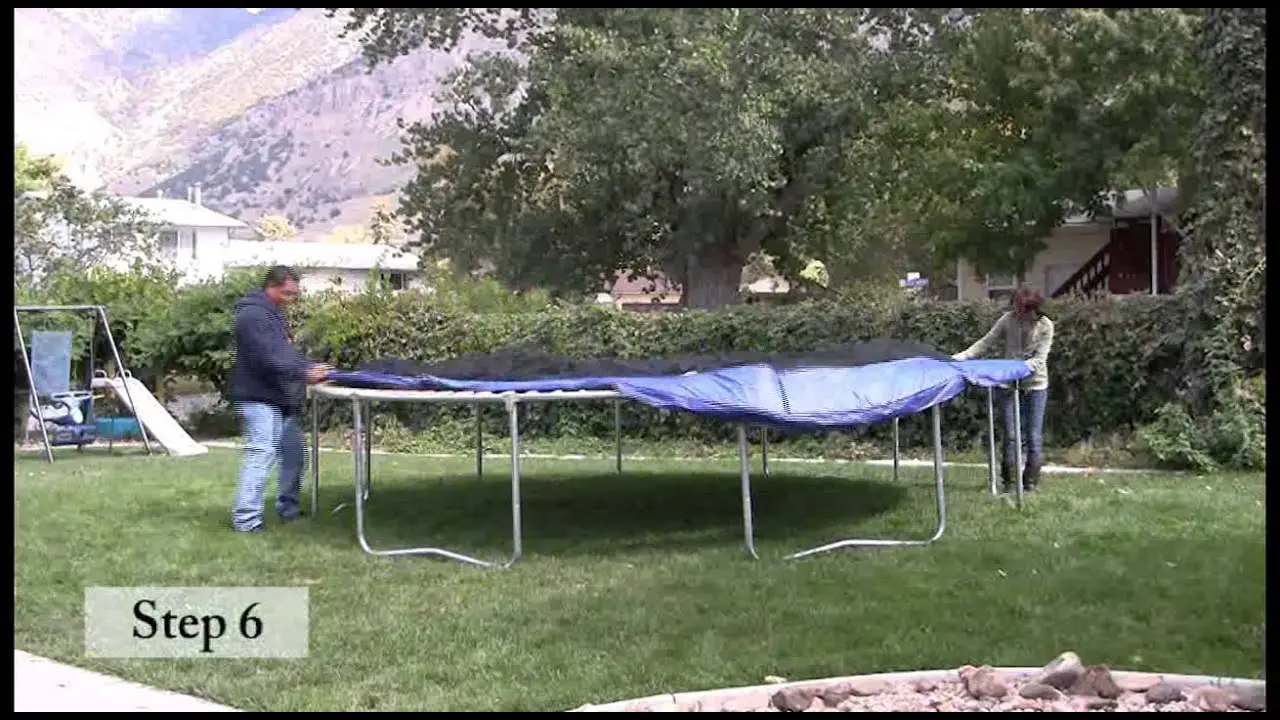
Credit: www.shareyourrepair.com
How Do You Assemble a Skywalker 12 Foot Trampoline?
You’ll be jumping for joy when you see how easy it is to assemble your new Skywalker 12 foot trampoline! Just follow these simple steps and you’ll have it set up in no time.
1. Begin by placing the trampoline frame on level ground in your desired location.
If you’re using the trampoline indoors, make sure there’s plenty of clearance overhead.
2. Unfold the legs of the frame and lock them into place.
3. Attach the spring pad to the frame, starting at the bottom and working your way up.
Make sure that all of the hooks are securely fastened.
4. Now it’s time to add the springs! Starting at the outside edge, hook each spring onto the corresponding hole on the frame.
There are typically 96 springs on a 12 foot trampoline, so this may take a little while. Once all of the springs are in place, give them a quick bounce to make sure they’re all hooked on properly.
How Do You Assemble a Skywalker 15 Trampoline?
Assuming you have all the required tools and parts, assembling a Skywalker 15 trampoline is relatively straightforward. The first step is to attach the legs to the bottom of the frame using the included bolts. Next, you’ll need to stretch out the mat and secure it to the frame with the 96 steel springs.
Finally, you can install the safety enclosure around the perimeter of the trampoline.
How Long Does It Take to Assemble a 12 Foot Trampoline?
Assuming you are referring to a 12 foot round trampoline, it would take the average person approximately 1-2 hours to assemble. This is based on having all of the required tools and parts readily available, as well as some general knowledge of how the trampoline goes together. If you have never assembled a trampoline before, or are missing some of the required tools/parts, it could take longer.
The first step is to lay out all of the parts in their respective places. This means spreading out the frame, connecting rods, springs, and covers on the ground in an area large enough to accommodate the fully assembled trampoline. Once everything is laid out, you can begin attaching the frame pieces together using either bolts or rivets (depending on which type of frame you have).
Next, you will attach the springs to the frame. There are usually between 96 and 120 springs on a 12 foot trampoline, which are connected at specific points around the circumference of the frame using hooks or clips. Once all of the springs are attached, you can install any safety pads or netting that came with your kit (this is optional).
Finally, you will need to stretch out the mat over top oftheframe and secure it in place using either VELCRO® brand fasteners or spring clips (again, depending on your particular trampoline model). And that’s it! Your 12 foot trampoline should now be ready for use.
How Do You Assemble a 16 Foot Trampoline?
If you’re looking to add a trampoline to your backyard, you may be wondering how to go about assembling it. Here’s a step-by-step guide to help you get started.
1. Begin by placing the trampoline mat on the ground in the desired location.
2. Next, take the frame and unfold it so that it is placed on top of the mat.
3. Start by attaching one of the legs to the frame using the bolts provided. Repeat this process for each of the remaining legs.
4. Once all of the legs are attached, flip over the trampoline so that the frame is facing up.
5. Now it’s time to start attaching the springs to the frame. Begin at one end and work your way around until all of them are in place.
Make sure they are tight so that they don’t come loose while in use.
Conclusion
Skywalker Trampolines are a great way to get kids active and have fun at the same time. They are easy to assemble, and can be done in just a few minutes with some basic tools. Here is a step-by-step guide on how to put together your new Skywalker Trampoline:
1. Begin by reading through all of the instructions that come with your trampoline. This will give you a good understanding of how the trampoline works, and what parts you will need to assemble it.
2. Next, lay out all of the parts in the order that they will be used.
This will make it easier to see what goes where, and help you keep track of everything as you put it together.
3. Start by attaching the legs to the frame of the trampoline using the bolts provided. Make sure that these are tightened securely so that the trampoline is stable when in use.
4. Next, stretch out the mat over the frame of the trampoline and secure it in place using the straps provided. Again, make sure that these are tight so that there is no risk of injury when jumping on the trampoline.
5 .
Finally, attach the safety net around the outside of the trampoline using zip ties or similar fasteners . Once again, make sure that these are secure so that there is no risk of anyone falling off or getting hurt while using it .