It takes about two hours to install a 17 ft. trampoline. This time can be shortened or lengthened depending on the type of trampoline, the tools available, and the number of people helping with the installation. The most important thing is to make sure that all of the parts are accounted for and that the area where the trampoline will be installed is level.
Installation instructions typically come with new trampolines and can be found online if needed.
If you’re looking to add a little excitement to your backyard this summer, a trampoline is a great option! But how long does it take to install one?
According to most manufacturers, it should take no more than two hours to assemble a 17 ft trampoline.
This includes set-up time for the frame, attaching the springs, and adding the safety padding.
Of course, every backyard is different and some assembly may be required. If you’re not confident in your DIY skills, we recommend enlisting the help of a friend or family member.
With some extra hands, you can have your trampoline up and ready to use in no time!
Skywalker Trampolines 17 ft. Oval Assembly Video
How Long Does It Take to Assemble a 14Ft Trampoline
A 14ft trampoline can take anywhere from 1-4 hours to assemble, depending on the person’s experience level. It is recommended to have two people assemble the trampoline, as some of the parts are quite heavy. The first step is to lay out all of the parts in an open area.
Then, follow the instructions provided in the manual to start connecting the frame together. Once the frame is complete, it’s time to add on the mat and safety enclosure. Again, following the instructions carefully will ensure a successful assembly.
With two people working together, a 14ft trampoline can be assembled in no time!
How Long Does It Take to Put a 8Ft Trampoline Together
A 8ft trampoline usually takes about an hour to put together. This time can be cut down by enlisting the help of another person. The first thing you need to do is lay out all of the parts in their correct positions.
Once everything is laid out, start by attaching the legs to the frame. Next, stretch out the mat and hook it onto the frame. Finally, put on the safety pad and you’re ready to jump!
How Long Does It Take to Assemble a 12 Foot Trampoline
Assuming you have all the necessary tools and parts, it should take no more than an hour to assemble a 12 foot trampoline. Here is a step-by-step guide to help you through the process:
1. Begin by placing the trampoline frame on level ground.
If you are not working on level ground, use blocks or boards to level out the surface.
2. Next, attach the legs to the frame using the bolts and nuts that come with your trampoline kit. Be sure to tighten each nut securely.
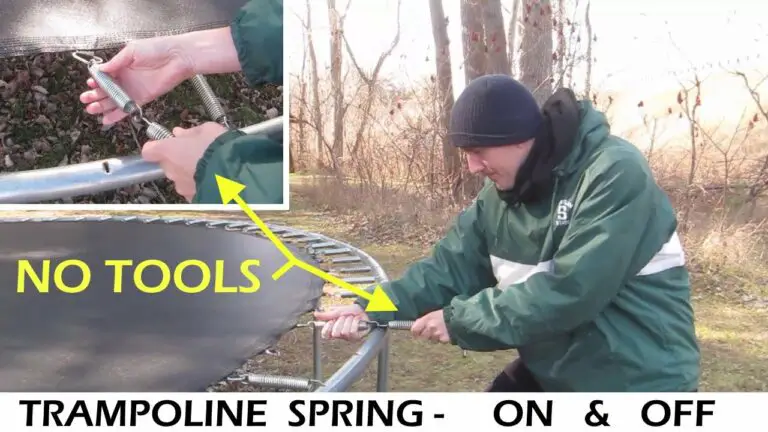
3. Once the legs are attached, it’s time to stretch out the spring around the edge of the frame. Start by attaching one end of the spring to a hole on the outer edge of the frame. Then, stretch out the spring until it reaches another hole on the opposite side of the frame and attach it there as well.
Repeat this process for all ofthe springs aroundthe perimeterofthe trampolineframe .
4. Now you can begin attachingthe matto Theframe . start inonecornerand workyourwayaround , pullingThemattautosecurelyasyougo .
make sureto leavea littlebitof slackinthe materialsoThatthereis somegivewhen someonejumpsonthetrampoline .
5 Finally , onceThematis inplace , AttachThesafetynettingaroundTheperimeterofthetrampolineusing Theropesor strapsincludedinyourkit . be surethatThenettingis tautenoughtocatchanyone whohappens Tofalloff butnot soTightthatit will impede jumping .
6 That ‘s it ! nowyoucantestoutyourhandyworkand enjoyYournew12foottrampoline !
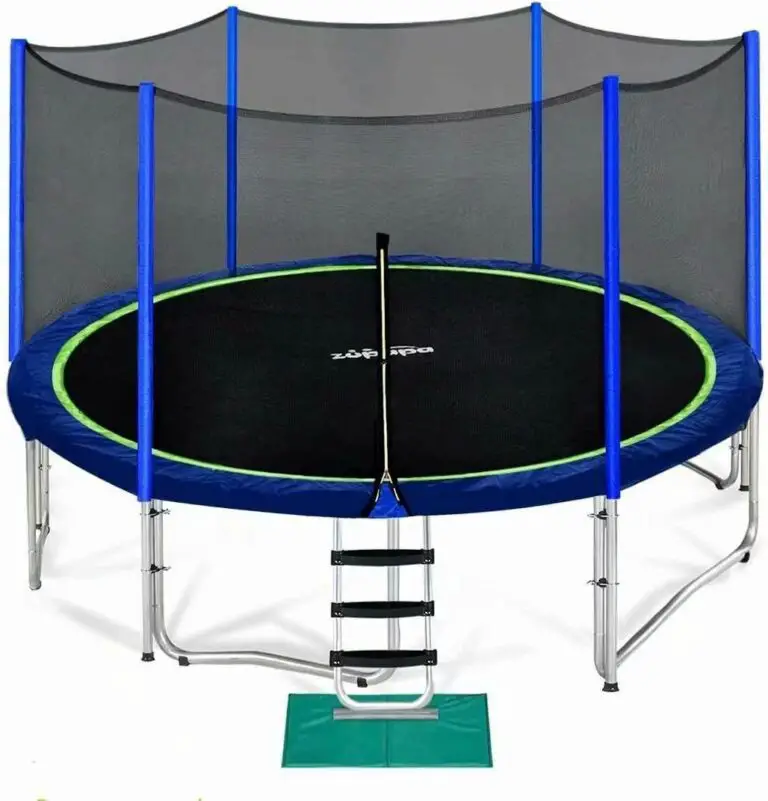
How Long Does It Take to Set Up a Trampoline With Safety Net
It can be daunting to set up a trampoline, especially if you’ve never done it before. But don’t worry, we’re here to help! This blog post will provide detailed instructions on how to set up a trampoline with a safety net, so you can enjoy hours of safe bouncing fun.
First, you’ll need to choose a level spot for your trampoline. Once you’ve found the perfect spot, lay out the frame and attach the legs. Then, stretch the mat over the frame and secure it with the springs.
Next, hook the safety net onto the frame and make sure it’s tight. Finally, give everything a final check before letting anyone bounce on it.
Now that your trampoline is all set up, it’s time to have some fun!
Remember to stay safe while bouncing by not doing any flips or somersaults. And always supervise children when they’re using the trampoline. With these tips in mind, you’ll be able to enjoy hours of safe bouncing fun!
How Much Does It Cost to Assemble a Trampoline
Assembling a trampoline can be a daunting task, especially if you’re not familiar with the process. However, it’s actually not as difficult as it may seem, and it can be a fun project to undertake with the family. The cost of assembling a trampoline will vary depending on the size and type of trampoline you purchase, but generally speaking, you can expect to spend around $200-$300.
Here’s a breakdown of what you’ll need to assemble your trampoline:
-Trampoline frame
-Springs
-Jumping mat
-Enclosure netting
-Padding (optional)
Tools needed for assembly:
-Phillips head screwdriver $5-$10
-Socket wrench set (if applicable) $20-$30 OR Adjustable wrench set $15-$25 https://www.homedepot.com/p/Craftsman-12-pc-Metric-Mechanic s-Tool Set /100322353?
cm_mmc=Shopping%7CBase&gclid=EAIaIQobChMI vb7Xu5O73wIVl5yGCh2I0QjREAAYASAAEgLf_vD_BwE&gclsrc=aw .ds&&dclid=CLKr6NqTztUCFYRjjgodm4IOHQ
Depending on which route you go with the tools, they will either come in a handy case or bag that keeps everything organized or not–which means losing pieces is more likely and taking longer to find what you need when something isn’t working right away since disorganization will reign supreme. If going the socket wrench route, make sure that your chosen set comes with both metric and imperial measurements since many Trampolines are made overseas where metrics are standard. An adjustable wrench set is less precise but easier to use if you don’t have experience working with wrenches and other hand tools regularly. It is also less expensive than purchasing a socket wrench set outright–and who doesn’t love saving money?
How to Assemble a Trampoline
Assuming you would like a blog post discussing how to assemble a trampoline:
Assemble your trampoline easily following these simple steps! If you have any questions along the process, make sure to check your user manual.
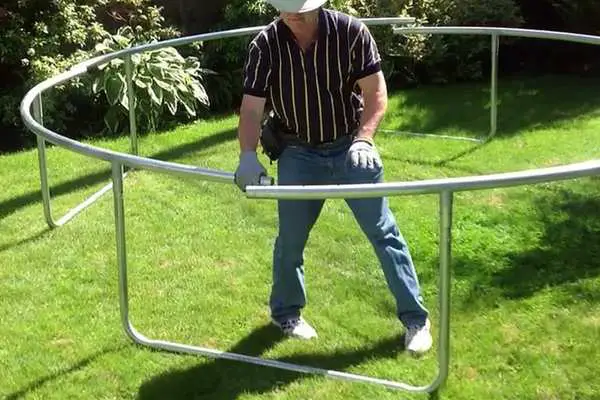
First, find a level spot in your yard to set up your trampoline. Once you’ve found the perfect place, lay out the mat on the ground and start attaching the frame together using the T-hooks. Make sure that you put the legs in first before connecting them at the top with the T-hooks as well.
Use foot clamps to connect each of the V-rings together until they are all attached. The next step is to stretch out the spring and hook it onto each of V-rings on either side of the mat. You can use pliers to help hook on each end if needed.
Now it’s time for assembly! Take each pole and screw them into place at either end of the trampoline until they are tightened securely. The final step is to put on the safety pad which will go around entire circumference of trampoline and cover springs completely – this provides an extra layer of protection when playing.
All that’s left now is to enjoy some fun jumps on your new backyard toy!
14 Ft Trampoline Assembly Cost
A 14ft trampoline assembly cost can be a bit pricey. You want to make sure that you are getting your moneys worth when you are looking at the different options that are available to you. There are a few things that you need to keep in mind when you are trying to determine how much it is going to cost you.
The first thing that you need to think about is the size of the area that you have available for the trampoline. If you have a larger backyard then you might want to consider a bigger size so that everyone in the family can enjoy it. Another thing to think about is how often do you plan on using it?
If it is going to be used mostly by adults then a smaller size would probably suffice but if kids will be using it often then go with a bigger one so they can really get their energy out!
The next thing to consider is what type of material do you want the frame and mat made out of? There are many different options here as well ranging from metal, plastic, or even wood!
Obviously, each option has its own set of pros and cons so take some time to research which would work best for your needs before making any decisions. After all, this will likely be something that your family enjoys for years to come so its important get it right!
Finally, think about any additional features that might interest you such as safety nets or ladders.
These can obviously add extra costs but depending on your budget and needs they might just be worth it in the long run! All in all, a 14ft trampoline assembly cost can vary quite a bit depending on all of these factors but hopefully this gives you a better idea of whats involved.
How Long Does It Take to Disassemble a Trampoline
If you’re looking to disassemble your trampoline, you’re in for a bit of work. The process can take anywhere from 30 minutes to an hour, depending on the size and type of trampoline. But don’t worry, we’ll walk you through it step by step.
First, start by removing the spring cover. This is typically held in place by 6-8 bolts. Once the cover is off, you’ll be able to see all of the springs that give the trampoline its bounce.
Next, remove each spring one at a time. To do this, simply unhook it from the frame at one end, then stretch it out and unhook it at the other end. As you remove each spring, be sure to keep track of where it goes so you can put them back in the same order when it’s time to reassemble the trampoline.
Once all of the springs are removed, carefully fold up the frame and set it aside. The mat can now be removed from the frame – just lift it up and over the edge. And that’s it!
Your trampoline is now disassembled and ready for storage or transport.

Credit: www.amazon.com
How Long Does It Take to Put Together a 16 Foot Trampoline?
Assuming you have all the necessary tools and materials, it should take no more than an hour or two to assemble a 16 foot trampoline. Here is a step-by-step guide to help you get started:
1. Lay out all of the parts in the area where you will be assembling the trampoline.
This will help you keep track of everything and make sure you don’t forget any steps.
2. Begin by attaching the legs to the frame using the provided bolts and nuts. Make sure each leg is attached securely before moving on to the next one.
3. Next, attach the springboard to the frame using the provided hooks. Again, make sure each hook is secure before moving on.
4. Now it’s time to stretch out the mat over the frame and attach it using the provided clips or ties.
Start at one end and work your way around until the entire mat is in place.
5. Finally, test out your new trampoline by jumping on it a few times! If everything seems secure, then you’re ready to start enjoying your new toy!
Can 1 Person Put Together a Trampoline?
One person can put together a trampoline, but it will be much easier with two people. It is important to read the instructions carefully before starting to assemble the trampoline. Once you have all of the parts and tools needed, you will first need to connect the frame together.
The next step is to stretch out the mat and hook it onto the frame. Finally, you will need to attach the springs. This can be done by either clipping them on or tying them onto the frame.
Once all of the springs are in place, your trampoline is ready to be used!
How Long Does It Take to Put a 10Ft Trampoline Together?
Assuming you have all the necessary parts and tools, it should take no more than an hour to put a 10ft trampoline together. Here are step-by-step instructions:
1. Start by positioning the trampoline frame in an open, level area.
2. Unfold the frame and connect the legs, making sure that they are locked into place.
3. Attach the safety enclosure to the frame, starting with the vertical poles first. Then hook the horizontal top rail onto the top of the vertical poles.
4. Next, stretch out the trampoline mat over the frame and hook it onto the springs around the perimeter of the frame. Make sure that it is taut and even all around before moving on.
5. Finally, attach any remaining parts (such as spring covers or padding) according to manufacturer’s instructions.
How Long Does It Take to Put a 6Ft Trampoline Together?
Assuming you have all the necessary tools and parts, it should take no more than an hour to put together a 6ft trampoline. Here is a step-by-step guide to assembling your trampoline:
1. Lay out all of the parts in their respective places.
This will make the assembly process much easier.
2. Begin by attaching the legs to the frame of the trampoline. Make sure that each leg is even with the others so that the trampoline will be stable once completed.
3. Next, stretch out the mat over the frame of the trampoline and secure it in place with the springs. It’s important to make sure that there are no gaps between the mat and frame so that jumpers will be protected from injury.
4. Finally, attach the safety netting around the perimeter of the trampoline before allowing anyone to use it.
This will help keep jumpers safe while they’re enjoying their new toy!
Conclusion
It takes about two hours to install a 17-foot trampoline. This includes setting up the frame, attaching the springs, and stapling the mat to the frame. You will need two people to help with this process.