A trampoline is a great way to get some exercise, have some fun, and impress your friends all at the same time. But before you can start bouncing around like a maniac, you need to assemble your trampoline.
- Check all the parts of the trampoline to make sure they are there and in good condition
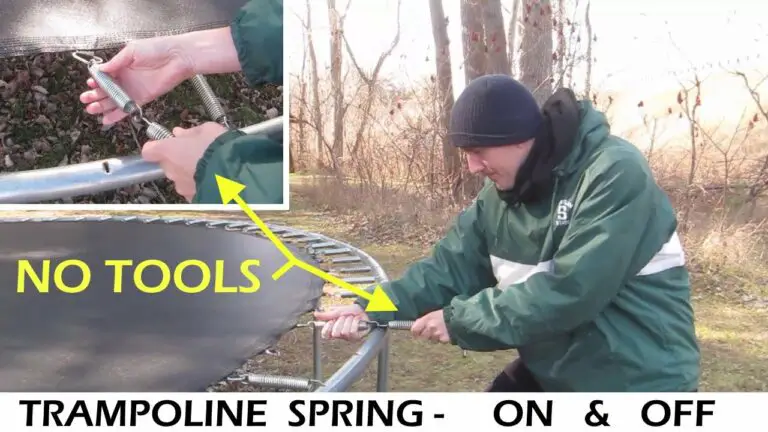
- Spread out the mat on a level surface and attach the springs to the hooks on the mat, using pliers if necessary
- Put together the frame of the trampoline, making sure that all the connections are tight
- 4
- Place the frame over the mat and springs, and secure it in place with the bolts
- 5
- Attachthe safety netting aroundthe outside ofthe frame, using zip ties or similar fasteners
How to assemble a Triple Tree 10FT Trampoline
Trampoline Assembly Instructions Pdf
If you’re planning on buying a trampoline, you’ll need to know how to assemble it. Fortunately, most trampolines come with detailed instructions. However, some people prefer to have a PDF of the instructions so they can refer to it while they’re assembling the trampoline.
If you need a Trampoline Assembly Instructions PDF, we’ve got you covered. Here are links to PDFs for some of the most popular brands:
Skywalker: https://www.skywalkertrampolines.com/v/vspfiles/assets/images/productdownloads/ Skywalker%20Trampoline%20Assembly%20Instructions.pdf
Springfree: https://www.springfreetrampoline.com/media/113742/SF_Owner_Manual_RevD_2016-05-10_.pdf
Ultega: http://www.ultega-trampolin .de / media / pdf / instruction_manuals / 1435779028_Instruction-Manual-ULTEGA-4in1ComboTrainerPROEnglish .pdf
As you can see, there are many different options available depending on the brand of trampoline you purchase.
How to Assemble a Trampoline With Net
If you’re looking for a great way to get some exercise and have a lot of fun, a trampoline is a great option. But before you can start bouncing around, you need to assemble it. Here’s how to do it:
1. Start by placing the trampoline frame on level ground. If you’re using a square or rectangular trampoline, make sure the frame is symmetrical.
2. Once the frame is in place, attach the springs to the hooks on the frame.
There should be an equal number of springs on each side.
3. Next, stretch out the mat over the frame and secure it with the straps or clips that came with your trampoline.
4. Finally, attach the netting around the outside of the trampoline so that jumpers are safely enclosed while they play.
Now your trampoline is ready for use!
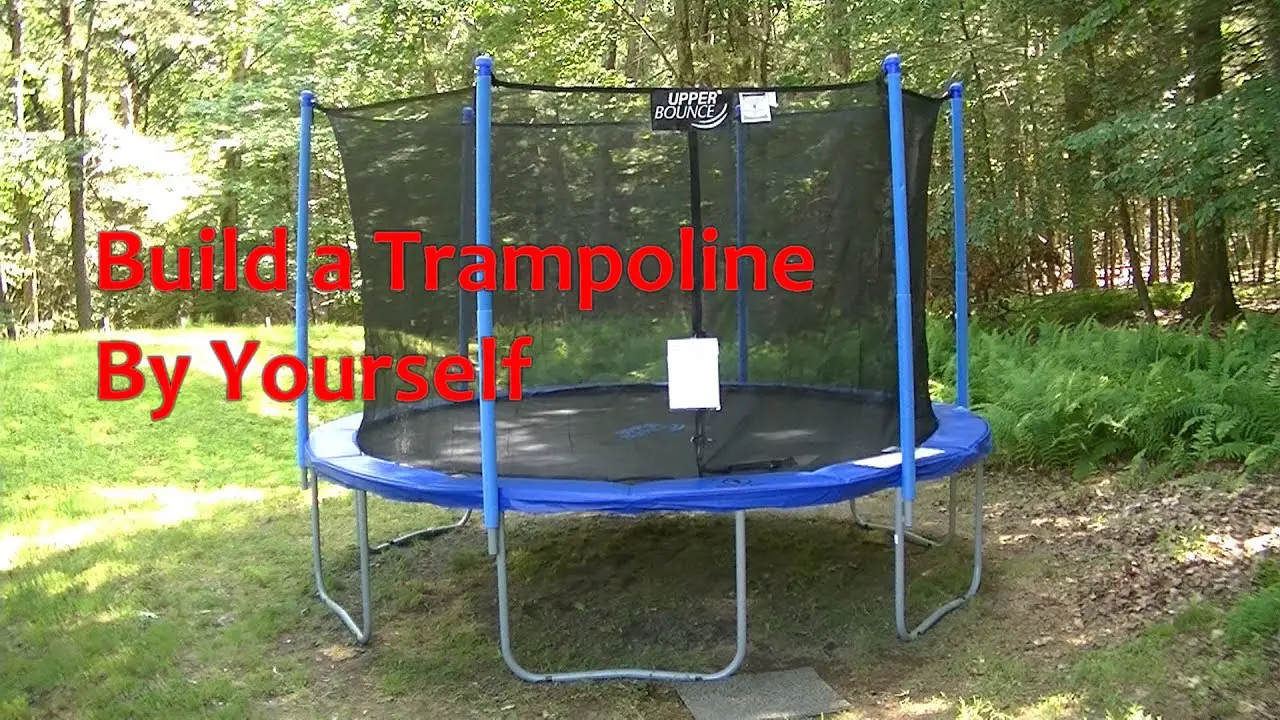
How to Put a Trampoline Together by Yourself
If you’re planning on putting a trampoline together by yourself, there are a few things you’ll need to keep in mind. First, make sure that you have all of the necessary tools and materials. You’ll need a drill, screwdriver, measuring tape, and level.
You’ll also need to find a level spot in your yard where you can put the trampoline together.
Once you have everything gathered, begin by attaching the legs to the frame of the trampoline. Make sure that each leg is screwed in securely before moving on to the next step.
Next, stretch out the mat over the frame and secure it with springs. Be careful when doing this step, as it’s important not to over-tighten or under-tighten the springs.
Finally, attach the safety netting around the perimeter of the trampoline.
Once again, make sure that everything is screwed in securely before allowing anyone to use it. With these steps followed, your trampoline will be ready for hours of backyard fun!
12 Ft Trampoline Assembly Instructions
12 Ft Trampoline Assembly Instructions
If you’re looking for a great activity for your kids (or even yourself!) to enjoy this summer, consider a trampoline. They’re not only super fun, but they’re also great exercise.
Here are assembly instructions for a 12-foot trampoline, so you can get started enjoying hours of bouncing fun!
Before You Begin:
Read through the entire set of instructions before beginning assembly.
This will help you better understand the process and have a game plan.
Gather all of the required tools and materials. You’ll need:Phillips head screwdriverPliersTape measurerLevelTable saw or hand sawSocket wrenchLadderTrampoline spring tool (this is included with most trampoline kits)
Step 1: Assemble the Base Frame
Using the Phillips head screwdriver, attach the two endcaps to the circular base frame using the longer screws provided in the hardware kit. Be sure that the endcaps are flush with the outside edge of the base frame tubing.
Next, use the pliers to connect each of the straight legs to an endcap. The legs should be at a 90-degree angle from boththe base frame and endcap when properly connected. Finally, insert each U-shaped leg into a hole on either side of each straight leg until it snaps into place.
Tools Needed to Put Together a Trampoline
If you’re looking for a fun way to get some exercise, a trampoline is a great option. But before you can start bouncing around, you need to put it together. Here’s what you’ll need:
– Trampoline frame
– Springs
– Jump mat
– Safety padding (optional)
Assembling a trampoline is not too difficult, but it does require some effort. You’ll need to connect the frame together and then attach the springs.
Once that’s done, you can add on the jump mat and any safety padding. Then, it’s time to start bouncing!
How Long Does It Take to Assemble a Trampoline
How long does it take to assemble a trampoline? This is a question that we get asked a lot, and the answer may surprise you. It actually doesn’t take very long at all – in most cases, you can have your new trampoline up and ready to use in less than an hour.
Of course, the time required may vary slightly depending on the size and style of trampoline that you choose, as well as any additional accessories (such as a enclosure) that you opt to add. But in general, the process is pretty straightforward and can be completed relatively quickly.
Here’s a quick overview of what you can expect when assembling your new trampoline:
1. Start by laying out all of the parts in their respective places. This will help you identify each piece and make sure that everything is accounted for before beginning assembly.
2. Next, begin attaching the legs to the frame using the bolts provided.
Make sure that these are tightened securely so that the legs don’t come loose during use.
3. Once the legs are attached, it’s time to start connecting the springs. There are usually around 96 springs on a standard sized trampoline, so this part may take a little bit longer than attaching the legs did.
Take your time and make sure each spring is properly secured before moving on to the next one.
4. The final step is attaching the mat onto which users will bounce.
10Ft Trampoline Instructions
Are you considering a 10ft trampoline for your backyard? This size is a great option for families with young children or those who want a bit more space to play. Here are some instructions on how to set up your 10ft trampoline.
1. Lay out the mat on level ground and make sure there are no sharp objects nearby that could puncture it.
2. Assemble the frame according to the manufacturer’s instructions. Make sure all connections are tight and secure before moving on.
3. Suspend the mat from the frame using the provided hooks or straps. Again, follow the manufacturer’s instructions carefully to avoid any damage.
4. Once everything is in place, give the entire structure a shake to check that everything is secure and there are no loose parts.
If everything looks good, invite your family and friends over for some safe jumping fun!
Sportspower Trampoline Instructions
Assuming you would like a blog post about the Sportspower Trampoline:
The Sportspower Trampoline is a great way to get some exercise, have fun, and entertain the kids (or yourself). Here are some instructions on how to set it up and use it.
First, you’ll need to find a level spot outdoors to set up the trampoline. Once you have found the perfect spot, unpack all of the parts from the box. Next, using the included hardware, connect the base of the trampoline to the enclosure poles.
After that, add in the spring pad protector around the outside edge ofthe trampoline. Now you can start adding inthe springs – hook each spring at both ends ontothe metal hooks sticking out fromthe frame. Once all 36 springs are added in, it’s time to attachthe safety enclosure netting.
Start by stringingthe rope throught he eyelets on each side ofthe netting, then tie offeach end ofthe rope onto an eyebolt near oneofthr legs ofthr frame. Make sure that whenyou put tensiononthr netting ropes, they create an X shape across thr centerofthr trampoline – this will help keep thr netting taut and secure.
Now your Sportspower Trampoline is ready for action!
Have fun bouncing around – but be sure notto bounce too high or go near thr edgesofthe trampoline, as this could leadto injury.

Credit: www.wikihow.com
How Do You Assemble a Trampoline Easily?
There are a few things you need to do in order to assemble a trampoline easily. The first thing you need to do is gather all of the materials that you will need. This includes the trampoline, the frame, the legs, and the springs.
Next, you will need to connect the frame together. Once the frame is together, you can then start attaching the legs. Make sure that the legs are evenly distributed around the frame before moving on to the next step.
Finally, you will need to connect the springs to both the frame and the legs. Once everything is connected, you can then start using your trampoline!
Can You Assemble a Trampoline by Yourself?
You can absolutely assemble a trampoline by yourself! However, there are a few things to keep in mind before you start. First, make sure you have all of the necessary tools and supplies.
Second, read the instructions carefully so that you understand each step. And third, take your time – rushing through the assembly process could result in mistakes or dangerous situations.
Assuming you have everything you need and you’ve reviewed the instructions, assembling a trampoline is actually not that difficult.
The first thing you’ll do is connect the frame sections together using the provided bolts. Once the frame is complete, it’s time to stretch out the spring mat and attach it to the frame with hooks or clips (depending on your trampoline model). Finally, install the safety enclosure around the outside of the trampoline – this is an important step to prevent injuries from falls off of the trampoline.
In short, yes – you can totally assemble a trampoline by yourself! Just be sure to take your time, follow directions closely, and have fun!
How Long Does It Take to Assemble a Trampoline?
Assuming you are referring to a round, outdoor trampoline: It usually takes about an hour or two to assemble a trampoline, depending on the size and type. If you are assemblying it by yourself, it might take a bit longer.
How Do You Assemble a 14Ft Trampoline?
Assuming you have all the tools and materials you need, assembling a 14ft trampoline is a relatively straightforward process. Here are the basic steps:
1. Lay out all of the components in the area where you’ll be assembling the trampoline.
This will make it easier to identify each piece and ensure that everything is accounted for.
2. Begin by attaching the legs to the frame using the bolts provided. Make sure that the legs are evenly spaced around the perimeter of the frame.
3. Next, attach the springs to theframe, again using the bolts provided. There should be two springs per leg – make sure they’re evenly spaced and installed in such a way that they’re facing opposite directions (this will help balance outthe tension).
4. Once all ofthe springs are in place, it’s time to installthe mat onto them.
Start at one end ofthe mat and work your way around, attaching it to each spring with zip ties or similar fasteners. Be sure to stretchthe mat taut as you go so that there aren’t any wrinkles or sags once it’s fully installed.
5. The final step isto installthe safety enclosure aroundthe entire assembly.
Again, start at one end and work your way around, making sure that each section is properly secured before moving on tothe next one..
Conclusion
A trampoline is a great addition to any backyard and can provide hours of fun for the whole family. But before you can start bouncing, you need to assemble your trampoline. Here’s how:
1. First, lay out all of the trampoline parts in the order that they will be assembled. This will make it easier to follow the instructions and avoid confusion later on.
2. Next, attach the legs to the frame using the bolts provided.
Make sure that the legs are evenly spaced and that the frame is level before moving on.
3. Now it’s time to stretch out the mat over the frame. Start at one end and work your way around, making sure that there are no wrinkles or gaps in between The mat should be tight but not too tight – you should be able to bounce on it without feeling any give.
4. Finally, add the safety netting around the perimeter of the trampoline. Once again, make sure that everything is snug and secure before allowing anyone to use it.
With these simple steps, you’ll have your new trampoline up and running in no time!