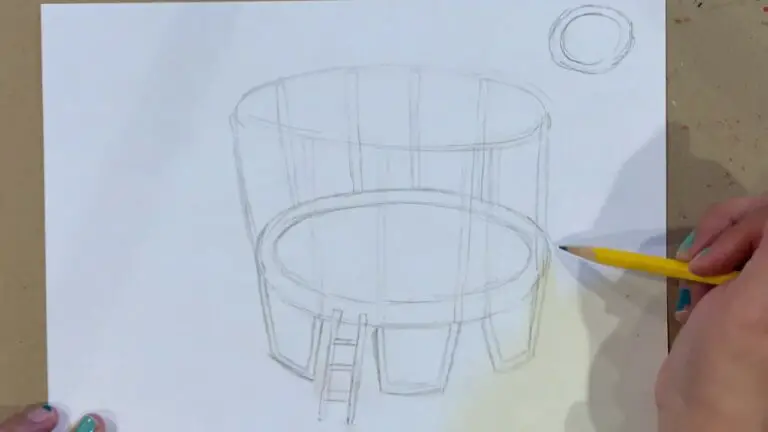
Installing a trampoline can be a fun and easy weekend project. This guide will walk you through the process step-by-step so that you can have your very own trampoline up and running in no time. The first thing you’ll need to do is gather all of the necessary materials.
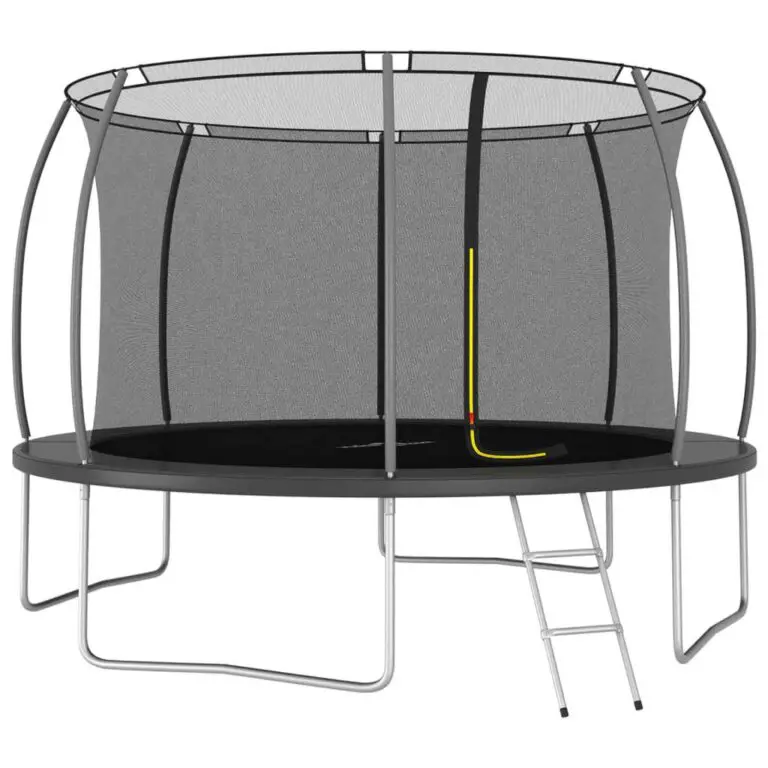
You’ll need a trampoline frame, springs, mat, safety enclosure, and anchors. Once you have all of your materials, it’s time to start assembling the frame. Follow the instructions that come with your frame kit carefully.
Once the frame is assembled, it’s time to attach the springs. Again, follow the instructions that come with your kit carefully. Make sure that all of the springs are evenly spaced around the perimeter of the frame.
Next, it’s time to install the mat onto the frame. Start by attaching one side of the mat to the spring hooks on one side of the trampoline. Then stretch out the mat and attach it to spring hooks on the other side of the trampoline.
- Purchase a trampoline that is the appropriate size for your backyard and weight limit
- Lay out the trampoline where you would like to install it in your backyard
- Assemble the frame of the trampoline according to the manufacturer’s instructions
- Spread out the mat over the assembled frame and secure it with the spring clips around the perimeter
- Install the safety enclosure around the perimeter of the trampoline, if desired
- Test out your new trampoline by bouncing on it!
Unboxing and setup of a Kanga Trampoline
How to Put a 14Ft Trampoline Together
A 14ft trampoline is a great addition to any backyard and can provide hours of fun for the whole family. But before you can start jumping, you need to put it together! Here is a step-by-step guide on how to do just that:
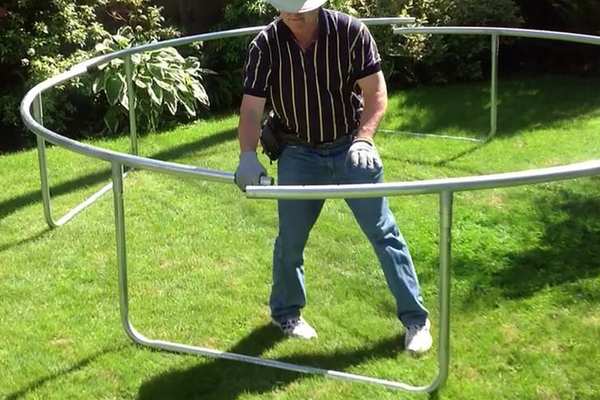
1. Lay out all of the parts in an open area. This will make it easier to identify each piece and also give you a chance to make sure that everything is there.
2. Begin by attaching the legs to the frame.
Make sure that the legs are evenly spaced out and that they are securely attached.
3. Next, add the springs to the frame. There should be 24 springs in total, 12 on each side.
Again, make sure that they are evenly spaced out and securely attached.
4. Now it’s time to add the mat onto the frame. Start by attaching one side of the mat and then work your way around, making sure that it is properly secured onto the frame with all of the hooks provided.
5 . Finally, add the padding around the edge of the mat . Once again , make sure that it is properly secured so that there are no gaps .
It’s importantthatthepaddingisintact becauseitwill protectyou ifyou falloffofthetrampoline . Also , checkto makesurethatthegapbetweenthepadsandthematshouldbe no morethan 1 inch . Any widerandyou maybeat riskforinjury .
Now your trampoline is ready for use! Just remember to always jump safely and have fun!
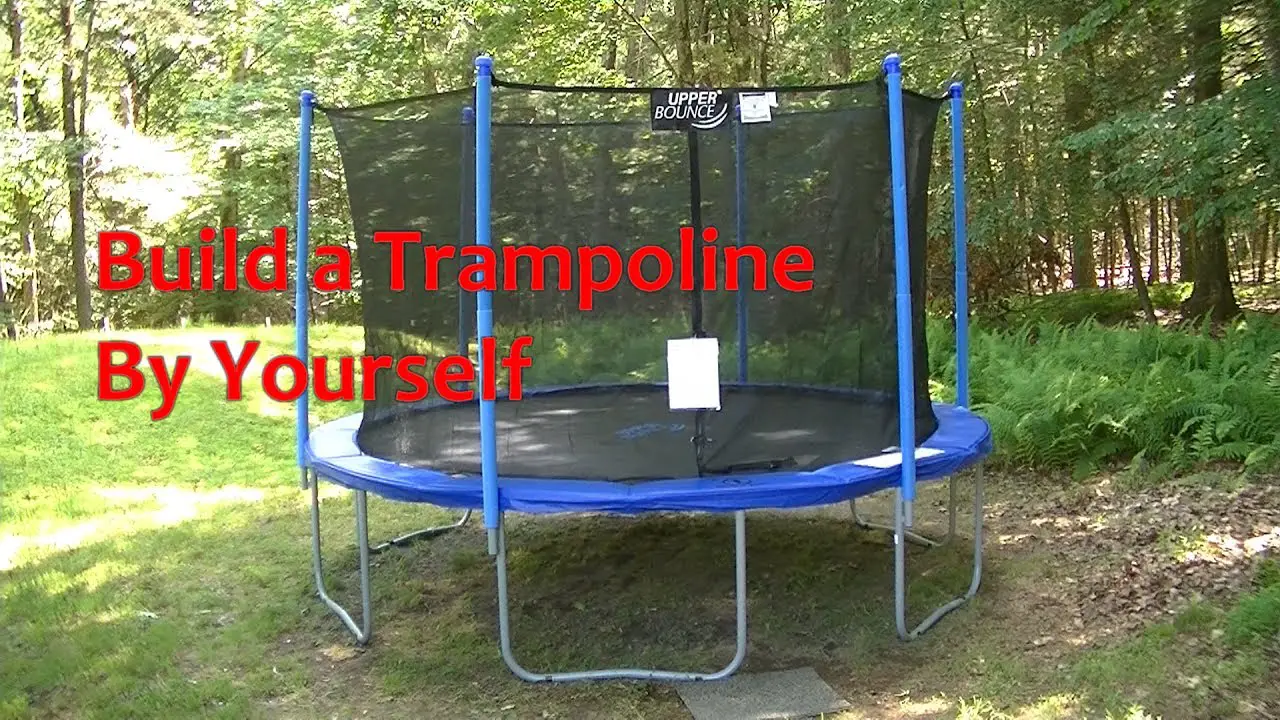
How to Put a Trampoline Together by Yourself
If you’re like most people, the thought of putting together a trampoline by yourself probably seems daunting. But don’t worry – it’s actually not that difficult! With a little bit of patience and some careful instructions, you can have your trampoline assembled in no time.
Here are the steps you’ll need to follow:
1. Lay out all of the parts for your trampoline on a flat surface. This will make it easier to identify each piece and ensure that everything is accounted for.
2. Begin by attaching the legs to the frame of the trampoline. Make sure that the legs are evenly spaced and securely fastened before moving on.
3. Next, stretch out the mat over the frame and secure it in place with the springs.
Be sure to attach each spring at equal intervals around the perimeter of the trampoline.
4. Finally, assemble any remaining parts (such as safety pads or enclosures) according to their instructions. Once everything is in place, give your newly assembled trampoline a test bounce to make sure it’s sturdy and ready to use!
How to Put a Trampoline Together With Net
When you purchase a trampoline, it will come in many pieces that you will need to put together. While this may seem like a daunting task, it is actually not that difficult if you follow the instructions. In this blog post, we will walk you through how to put a trampoline together with net step-by-step so that you can get jumping as soon as possible!
The first thing you will need to do is lay out all of the parts of the trampoline on the ground. This includes the frame, springs, mat, and net. Once everything is laid out, take a look at the instructions to familiarize yourself with how it all goes together.
Next, start by attaching the frame together. This is typically done with metal clamps or bolts. Once the frame is together, stretch out the springs and hook them onto each of the legs of the frame.
After all of the springs are in place, drape the mat over top and secure it with clips or Velcro strips around the edge.
Finally, it is time to install the netting around your new trampoline. The netting attaches to hooks onthe top ofthe frame and then wraps aroundthe entire circumferenceofyour jump surface.
Make sure thatthe hooks are securely in place before moving onto staking downthe bottomofthnet soit doesn’t blow away in windy weather!
How to Put a Net on a 14Ft Trampoline
If you have a 14ft trampoline, you might want to consider putting a net around it. Doing so will provide extra safety for your kids (or anyone else who might use the trampoline). Fortunately, putting a net on a 14ft trampoline is not too difficult.
Here are the steps you need to take:
1. Purchase a net that is specifically designed for 14ft trampolines. You can find these nets at most sporting goods stores or online.
2. Attach the netting to the frame of the trampoline using the hooks or clamps that come with it. Make sure that the netting is taut and secure before moving on to the next step.
3. Test out the new setup by jumping on the trampoline yourself (or having someone else do it).
If everything seems good, then you’re all set!
Putting a net on your 14ft trampoline is a great way to add an extra layer of safety. Follow these simple steps and you’ll have it done in no time!
Trampoline Assembly Instructions Pdf
When you are ready to install your new trampoline, be sure to follow these helpful tips! First, always consult the instruction manual that came with your purchase. This will give you specific guidance on how to properly assemble your trampoline.
In general, however, there are a few key things to keep in mind.
Before you begin, it is important to choose a level spot for installation. You’ll need enough space around the perimeter of the trampoline so that users can safely jump without hitting anything nearby.
Once you have found the perfect location, clear away any debris or objects that might get in the way during assembly.
Next, review all of the parts and hardware that came with your trampoline kit. Make sure you have everything you need before beginning assembly.
Once you have all of the necessary components, start by attaching the legs to the frame of the trampoline. Be sure to hand-tighten each bolt until it is snug against the metal – over-tightening can damage the threads and make it difficult to remove bolts later on.
After the legs are attached, connect the springs at each corner of the frame using hooks or clamps (again, following manufacturer’s instructions).
Once all of the springs are in place, stretch them out evenly aroundthe entire circumference ofthe trampoline bed. Now comes time for what many considerto be th e most daunting task: attachingthe mat!
Ifyou purchaseda pre-made mat with holes already cutfor springs, simply line up those holeswiththe spring attachmentsand use zip tiesor VELCRO®brand fasteners toresecurethe matin place.
Ifyou’re workingwitha plain pieceof fabric , however ,you’ll needtocutholes for eachspringand then securelyattachthemattotheframeusingzip tiesor similarfasteners . The final step isto add any safety pads or coversthatcamewithyourtrampolinekit . Thesewill helpto cushionspringsand metalbarsaroundthe edgeofthe bed , reducing theriskof seriousinjury if someonehappens tobumpinto them while jumping .
Trampoline Instructions
A trampoline is a great way to get some exercise, have fun, and learn new skills. Here are some instructions on how to use a trampoline.
First, make sure the area around the trampoline is clear of any obstacles.
Next, check that the mat is securely attached to the frame and that there are no rips or holes in it. Once you’ve done that, it’s time to bounce!
Start by standing in the middle of the trampoline with your feet shoulder-width apart.
Bend your knees and jump up into the air, using your arms for balance. Land softly on your feet and absorb the impact by bending your knees again. Repeat this process until you’re tired or ready to move on to something else.
There are lots of different ways you can use a trampoline once you’ve mastered the basic jump. You can try doing flips or somersaults, or working on your endurance by bouncing for long periods of time. Get creative and have fun!
12 Ft Trampoline Assembly Instructions
If you’re looking for instructions on how to assemble a 12 ft. trampoline, you’ve come to the right place! Here are step-by-step instructions that will make the process as easy as possible.
Before you begin, it’s important to have all of the necessary tools and materials on hand.
You’ll need a Phillips head screwdriver, a wrench, and pliers. Additionally, you’ll need the following parts:
– The frame (including legs)
– The mat
– The spring system
– The safety enclosure (if applicable)
1. Start by attaching the legs to the frame. Make sure that the legs are evenly spaced and that they’re securely fastened. If there are any gaps between the legs and the frame, fill them with foam pads or similar material.
2. Next, attach the mat to the frame using the included straps or hooks. Be sure that the mat is tight and free of wrinkles or creases; otherwise, it could tear during use.
3. Now it’s time to install the spring system.
First, connect one end of each spring to its corresponding hole on the frame; then do the same at the other end of each spring until all springs are in place. Finally, hook each spring onto its respective leg ofthe frame – be careful not to overstretch them!
4If you’re using an enclosure netting system, this is typically installed next.
. For most models, this simply involves attaching netting panels aroundthe perimeter ofthe trampoline using zip ties or similar fasteners; however, always refer to your specific product’s instructions for details.. 5Now give everything a final once-overto ensurethatall boltsaretightenedandthereare no loose piecesof fabricor metal anywhere.. You may also want tomakesurethatthe groundunderneaththe trampolineis levelandfreeof debrisbefore letting anyone jumpon it.. Andthat’sit! With these simple steps,.you should now havea fullyassembled12fttrampolinereadyforuse..
10Ft Trampoline Instructions
In order to safely and properly set up your 10ft trampoline, please follow these instructions:
– First, find a level spot in your yard that is at least 10 feet away from any trees, fences, or other obstacles. Once you have found the perfect spot, clear away any debris or sharp objects that may be in the area.
– Next, unroll your trampoline mat and frame on the ground and position it so that the legs are facing outwards. Then, attach the legs to the frame using the provided bolts and wrench. Make sure that each leg is tightened securely before moving on to the next one.
– Now it’s time to connect the springs! Starting with the first spring at the top of the frame, hook it onto one of the V-rings. Then do the same for all of the remaining springs until they are all hooked onto their respective V-rings.
At this point, your trampoline should start to take shape!
– Finally, stretch out each spring by hooking its corresponding S-hook onto one ofthe lower rungs ontheframe. Once alloftheringsaresecurelyfastened,you’rereadyforthebounciest backyard fun imaginable!
Credit: www.gettrampoline.com
Can I Put a Trampoline Together by Myself?
You can absolutely put a trampoline together by yourself! In fact, it’s not as difficult as you might think. Here are some simple steps to follow:
1. Lay out all of the parts for your trampoline. This will include the frame, the springs, the mat and the enclosure (if you have one).
2. Assemble the frame according to the instructions.
This is usually pretty straightforward – just make sure that all of the pieces are fitted together correctly.
3. Once the frame is assembled, stretch out the springs and hook them onto the frame. Again, refer to your instructions if you’re unsure of how to do this.
4. Spread out the mat over top of the frame and springs, then secure it in place using any clips or ties that came with your trampoline.
5. Finally, set up your enclosure (if you have one) following any included instructions. Once everything is in place, give your new trampoline a test jump to make sure everything is secure and working properly!
How Easy is It to Put Up a Trampoline?
It’s actually quite easy to put up a trampoline! All you need is a level surface, some patience and about 30 minutes of your time. Here are the steps:
1. Choose a level spot in your yard for the trampoline. Make sure there are no trees, power lines or other obstacles nearby.
2. Lay out the circular frame of the trampoline on the ground.
3. Assemble the legs of the frame, using screws or bolts to secure them in place.
4. Install the safety netting around the edge of the frame, if desired.
5. Attach springs to the legs of the frame, using hooks or clamps.
6. Place the jumping mat over the springs and secure it in place with more springs around its perimeter.
How Do You Put a Trampoline in the Ground?
If you’re looking to add a trampoline to your backyard, you may be wondering how best to go about it. After all, you don’t want your new toy tipping over or becoming a safety hazard. Here are a few tips on how to put a trampoline in the ground:
1. Choose a level spot in your yard that’s at least 10 feet away from any structures or trees. This will help reduce the risk of damage if the trampoline falls over.
2. Dig out a hole that’s slightly larger than the base of the trampoline.
The hole doesn’t need to be very deep, but make sure the sides are nice and even.
3. Place the trampoline into the hole and start filling it in with dirt or sand. Use your hands to pack it down as you go until the entire hole is filled and the trampoline is level with the ground around it.
4. Once everything is packed down tight, cover the area around the base of the trampoline with mulch or wood chips. This will help keep weeds from growing up around it and makes it look more attractive too!
How Do You Assemble a Trampoline Frame?
If you’re looking for a great way to get some exercise, or if you have kids that love to play, a trampoline is a great addition to your backyard. But before you can start bouncing around, you need to assemble the frame. While it might seem daunting at first, assembling a trampoline frame is actually quite easy.
With a little patience and some help from friends or family, you’ll have your trampoline up and ready in no time!
Here’s what you’ll need to do:
1. Start by laying out all of the parts for your trampoline frame.
This includes the legs, crossbars, springs, and mat. Make sure that everything is there and in good condition before you begin assembly.
2. Next, attach the legs to the crossbars using the bolts provided with your kit.
It’s important to make sure that the legs are evenly spaced so that your trampoline will be stable when it’s finished. Once all of the legs are attached, double check that they’re tight before moving on.
3. Now it’s time to add the springs!
Begin at one end of the trampoline and hook each spring into place on the leg closest to it. Then stretch the spring out towards the opposite leg and hook it onto that one as well. Repeat this process until all of the springs are in place (you should have an even number).
Again, make sure that they’re all nice and tight before continuing on.
Conclusion
In this blog post, we will show you how to install a trampoline. This can be a great addition to any backyard, and it is sure to provide hours of fun for the whole family. There are a few things that you will need to do in order to properly install your trampoline, and we will walk you through each step so that you can get started right away.