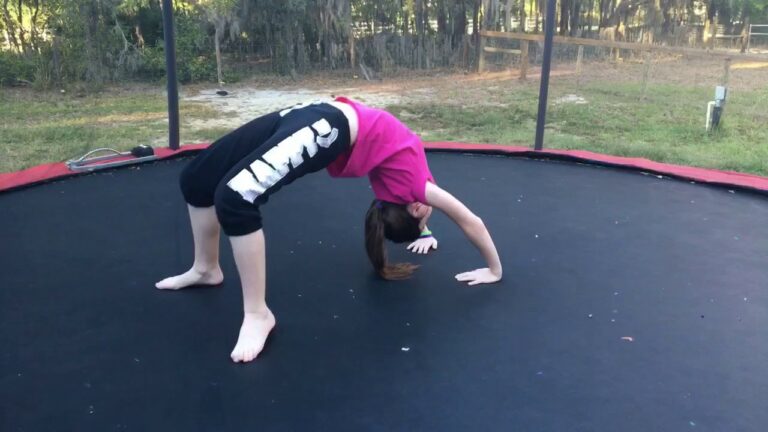
If you have a trampoline with a net, you’ll need to know how to tie it down properly. This is important for safety reasons, as well as to keep the net from blowing away in strong winds. The good news is that tying down a trampoline net is relatively easy to do.
You’ll just need some basic supplies and a little bit of time.
- Secure the corners of the trampoline netting to the hooks or loops on the trampoline frame using zip ties
- Stretch the trampoline netting around the entire perimeter of the trampoline frame and secure it in place with additional zip ties
- Trim off any excess netting material from the zip ties, being careful not to damage the trampoline mat in the process
- Test the stability of the trampoline net by bouncing on it lightly to make sure it is properly secured in place before allowing anyone to use it
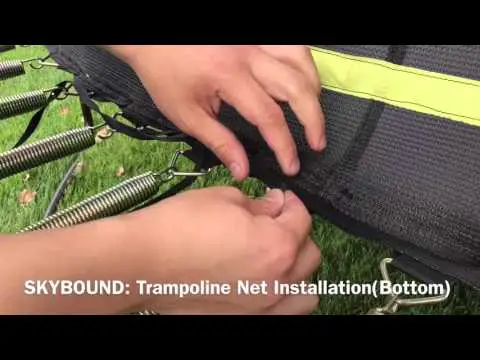
How to Install a New Replacement Trampoline Net (Attaching the Bottom Rope)
Trampoline Net Inside Or Outside
If you’re looking for a way to keep your kids entertained while also getting them some exercise, a trampoline is a great option. But when it comes to setting up your trampoline, you might be wondering if it’s better to have the net inside or outside of the frame.
Here’s a look at the pros and cons of each option:
Trampoline Net Inside
PROS:
-There’s no risk of the net blowing away in windy weather.
-It can provide additional support for the frame, which can be helpful if you live in an area with high winds.
-It can offer more privacy if you’re using the trampoline in your backyard.
-You don’t have to worry about animals or insects getting into the netting.
CONS:
-It can be more difficult to get on and off the trampoline, since you have to go through the netting.
-The netting can get dirty or wet more easily since it’s closer to the ground.
Trampoline Net Outside
PROS:
-It’s easier to get on and off the trampoline since you don’t have to go through any netting.
Trampoline Net Cords, Tie down Rope for Enclosure Nets
If you have a trampoline with an enclosure net, it is important to make sure that the netting is properly secured. This can be done with trampoline net cords or tie down ropes. Trampoline net cords are made specifically for securing enclosure nets.
They are adjustable and can be tightened or loosened as needed. Tie down ropes are also effective for securing enclosure nets. They can be tied to the frame of the trampoline or to stakes in the ground.
Whichever method you choose, make sure that the netting is securely fastened so that it does not come loose and pose a safety hazard.
How to Install Skybound Trampoline Net
If you’ve ever wanted to install your own trampoline net, here’s how! Skybound makes it easy with their straightforward instructions. First, make sure you have all the necessary tools and materials.
You’ll need a drill, screwdriver, measuring tape, hammer, and level. You’ll also need the trampoline net kit which includes the netting, straps, hardware, and instructions.
Next, follow the instructions included in the kit to attach the brackets to the top of the trampoline frame.
Then stretch out the netting and pull it over the top of the frame until it’s taut. Attach the hooks on the bottom of the netting to the bottom of the frame using more straps from the kit. Make sure everything is tight and secure before letting anyone use it!
How to Put a Net on a 14Ft Trampoline
If you have a 14ft trampoline, you may want to consider adding a net to it. Nets provide a number of benefits, including safety, weather protection, and added fun. Here are some tips on how to put a net on a 14ft trampoline:
1. Choose the right type of net. There are many different types of nets available, so make sure to choose one that is compatible with your trampoline size and shape.
2. Install the netting around the entire perimeter of the trampoline frame.
Make sure that the net is taut and secure before attaching it to the frame.
3. Test the net before allowing anyone to use the trampoline. Ensure that there are no gaps or tears in the netting that could allow someone to fall through.
How to Install Skywalker Trampoline Net
Skywalker Trampoline Net Installation Guide
If you’ve recently purchased a Skywalker trampoline, you may be wondering how to go about installing the net. Luckily, it’s not as difficult as it may seem.
With a few simple steps, you can have your trampoline up and running in no time. Here’s what you need to do:
1. Assemble the frame of your trampoline according to the instructions that came with it.
Make sure that all the poles are securely in place before proceeding.
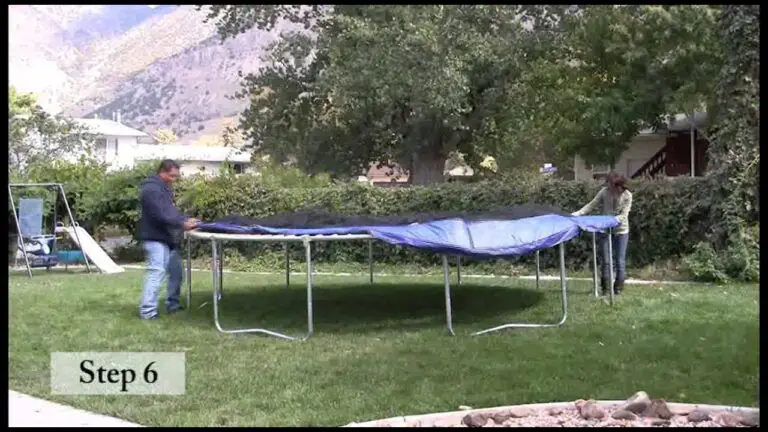
2. Once the frame is assembled, lay the netting over top of it and secure it in place with the provided zip ties or similar fasteners. Start at one side of the trampoline and work your way around until the entire perimeter is covered.
3. Now it’s time to install the enclosure poles. These should fit into sockets that are already present on the frame of your trampoline. If they don’t seem to be fitting properly, consult the instruction manual for troubleshooting tips.
4 .With all of the poles in place, stretch out the netting so that it’s taut against them and secure it once again with zip ties or similar fasteners . Be sure to double-check that everything is nice and tight before letting anyone use the trampoline .
All done! Your Skywalker trampoline is now ready for action .
Trampoline Net And Pole Replacement
If you’re in need of a trampoline net and pole replacement, you’ve come to the right place! Here at TrampolinePartsandSupply.com, we carry a wide selection of nets and poles to fit any trampoline size. Whether you have a round, square, or rectangular trampoline, we have the perfect net and pole combination for you.
Our nets are made from high-quality materials that are built to last. They feature double-stitched seams and UV-resistant fabric that will stand up to sun and weather damage. Our poles are made from galvanized steel for rust resistance and durability.
We offer several different options for attaching your new net to your trampoline. You can choose from our standard zip ties, which are easy to use and provide a secure connection; our ratchet straps, which offer a tighter connection; or our bungee cords, which give you the option of adding a little extra tension for an even more secure fit.
Installing your new net is quick and easy with our step-by-step instructions.
We also include all the necessary hardware with every purchase. And if you ever have any questions or need assistance with installation, our friendly customer service team is always here to help!

Credit: www.amazon.com
How Do You Tie the Top of a Trampoline Net?
Assuming you have a trampoline with a net already attached:
First, find the top of the net. There should be a rope or strap running along the very top.
Once you’ve located it, pull it down so the edge of the net is hanging over the side of the trampoline.
Next, take the end of the rope and tie it to one of the legs of the trampoline frame. Make sure it’s tied tightly so it won’t come undone.
Repeat this process on the other side, and your trampoline net will be secure!
Can You Zip Tie the Net on a Trampoline?
You can zip tie the net on a trampoline, but it’s not recommended. The zip ties can come loose and the net could sag, which would create a gap that children could fall through.
Where Does the Rope Go on a Trampoline?
Assuming you are referring to a rectangular trampoline, the ropes will be attached to the outside of the frame at the corners. There will typically be 4 ropes, one at each corner. The rope will be knotted or tied to create a loop that can be placed over a stake in the ground, holding the trampoline in place.
How Do You Put a Net on a 12 Foot Trampoline?
Assuming you would like tips on how to properly put a net on a 12 foot trampoline:
It is important to follow the manufacturer’s instructions when attaching the net to your trampoline. In general, however, you will need to first secure the top of the netting to the frame of the trampoline using zip ties or similar fasteners.
Make sure that the net is taut and not saggy. Once the top of the net is secure, attach the bottom of the netting to the frame in the same manner. Again, be sure that there is no slack in the material.
If necessary, use additional zip ties or other fasteners to keep everything tight and secure.
Conclusion
This blog post provides step-by-step instructions on how to properly tie down a trampoline net. The author begins by outlining the materials you will need, which include: trampoline net, ratchet straps, and spring clips. Next, they provide detailed instructions on how to attach the net to the frame of the trampoline using the ratchet straps.
Finally, they explain how to use the spring clips to secure the netting in place. By following these simple steps, you can ensure that your trampoline net is properly secured and will not come loose during use.