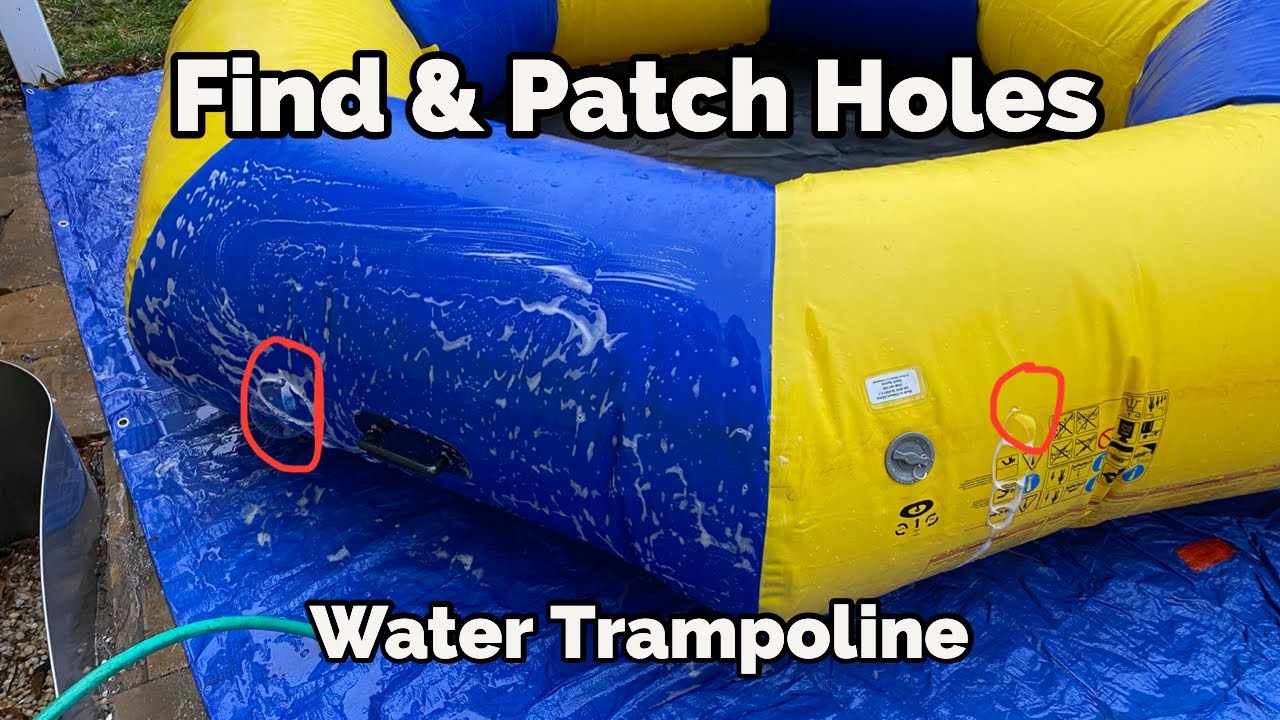
A water trampoline is a great addition to any pool. They are perfect for kids and adults alike. But, like anything else, they can get damaged and need to be repaired.
Here is a quick guide on how to patch a water trampoline.
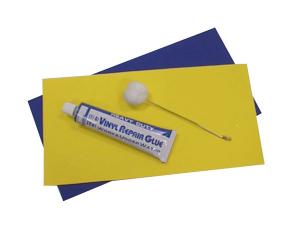
- -To patch a water trampoline, you will need the following supplies: a tube of vinyl repair adhesive, a clean cloth, and a utility knife
- -Start by cleaning the area around the hole with the cloth
- This will help the adhesive to better adhere to the trampoline
- -Next, use the utility knife to cut out a square or rectangle around the hole
- The size of this patch should be slightly larger than the hole itself
- -Now apply a generous amount of adhesive to both the patch and the trampoline material around the hole
- Be sure to smooth it out so that there are no air bubbles
- -Press the patch firmly into place and hold for several seconds
- Allow the adhesive to dry completely before inflating or using the trampoline again
Water Trampoline Patch Kit
If you have a water trampoline, you know how much fun they are! But sometimes, even the best products can get a little bit of wear and tear. That’s why it’s important to have a water trampoline patch kit on hand, just in case.
A water trampoline patch kit is a great way to repair any small holes or tears that may occur in your trampoline. Most kits come with an adhesive backing that makes it easy to apply the patches. Simply clean the area around the hole or tear, peel off the backing, and press the patch into place.
Most water trampoline patch kits also come with a tube of sealant. This can be used to repair any larger holes or tears. First, clean the area around the hole or tear.
Then, cut a piece ofpatch material to fit over the hole or tear. Apply sealant around the edges of the patch, then press it into place. Allow the sealant to dry for 24 hours before using the trampoline again.
Whether you’re repairing a small hole or a large tear, a water trampoline patch kit is an essential piece of equipment for any trampoline owner!
Rave Trampoline Patch Kit
Are you a fan of trampolines? Do you love to rave? Well, now you can combine your two passions with the Rave Trampoline Patch Kit!
This kit allows you to turn your trampoline into a giant dance floor, perfect for throwing an epic party or just bouncing around to your favorite tunes.
The Rave Trampoline Patch Kit comes with everything you need to get started, including:
-A set of 24 LED lights that attach to the frame of your trampoline (batteries not included)
-An audio input so you can hook up your music player of choice
How to Repair a Inflatable Water Slide
Assuming you have an inflatable water slide that needs repair, here are some tips on how to do so. First, you will need to identify the damage. This may be a hole, ripped seam, or something else.
Once you know what needs to be repaired, you will need to gather the necessary materials. This may include a patch kit, glue, and/or sewing supplies.
If the damage is a hole, use the patch kit to repair it according to the instructions.
If the damage is a ripped seam, you will need to glue or sew it back together. Be sure to allow plenty of time for the repair to dry before using the slide again.
Rave Sports
Rave Sports is all about getting people out on the water to have fun! We carry a wide variety of water sports products, from kayaks and stand up paddle boards to towables and inflatables. Whether you’re looking to get some exercise, spend time with family and friends, or just relax on the water, we have something for everyone.
Our mission is to provide our customers with high quality products at great prices, while also offering outstanding customer service. We believe that everyone should be able to enjoy the outdoors, and we are dedicated to helping make that happen.
If you’re new to the world of water sports, or if you’re a seasoned pro, we hope you’ll give us a try.
We think you’ll be glad you did!
Water Trampoline Repair near Me
If you have a water trampoline that needs repair, there are a few things you can do to find someone near you who can help. First, check online directories or search engines for companies that specialize in repairing water trampolines. You may also want to ask your friends or neighbors if they know of any good companies in your area.
Once you’ve found a few potential candidates, give them a call and ask about their experience repairing water trampolines. Be sure to get quotes from multiple companies so that you can compare prices. When you’ve found the right company, schedule an appointment and be prepared to pay for the repairs.
How to Seal Inflatables
Assuming you would like a blog titled “How to Seal Inflatables”:
Inflatable items are great for both indoor and outdoor use. They are lightweight and can be easily transported from one location to another.
However, one downside to inflatables is that they can be punctured or torn easily. This is why it’s important to know how to properly seal an inflatable before using it.
There are several methods that can be used to seal an inflatable:
– Use clear packing tape: Cover the entire patch area with a single layer of clear packing tape. Make sure the edges of the tape are sealed well so that air does not leak out.
– Use a glue gun: Apply a generous amount of glue around the hole or tear.
Then, place a piece of fabric over the glue and hold in place until the glue dries.
– Use superglue: Superglue can also be used to seal small holes or tears in an inflatable. Simply apply the glue directly to the affected area and hold in place until dry.
Inflatable Water Slide Not Holding Air
If you’re trying to set up an inflatable water slide and it’s not holding air, there are a few things you can check. Make sure that the inflation tube is properly connected and that there are no holes in the slide. If the slide does have holes, use patching tape to repair them.
Once you’ve checked for holes and made sure the inflation tube is secure, try inflating the slide again. If it still won’t hold air, take it to a professional to have it repaired.
How to Patch a Trampoline
If you have a trampoline, chances are you will eventually need to patch it. Whether it’s from normal wear and tear or from an accidental hole, repairing your trampoline is a fairly easy process. With just a few supplies and some elbow grease, you can have your trampoline looking good as new in no time.
Here’s what you’ll need to patch your trampoline:
-Trampoline patch kit (available at most sporting goods stores)
-Scissors
-Ruler or measuring tape
-Pencil or pen
-Towel or rag
-Water hose with nozzle (optional)
follow the instructions that come with your patch kit. In general, you will need to cut thepatch to size and then apply adhesive to both the patch and the trampoline surface.
Once the adhesive is dry, simply press the patch into place and secure it with the provided clips or other fasteners. If desired, you can also use a water hose to wet down the area around the repair before jumping onthetrampoline again. This will help extend the life of your repair by preventing further stretching ofthe fabric.
Credit: watertrampolines.ca
Where is the Leak in Rave Water Trampoline?
If you have a Rave water trampoline, you may be wondering where the leak is. The good news is that there is usually only one place that leaks can occur on these types of trampolines. The bad news is that finding the leak can be difficult and time-consuming.
Here are some tips to help you find the leak in your Rave water trampoline:
1. Check all of the seams. There are several places where seams come together on a Rave water trampoline.
These include the seam between the frame and the mat, as well as the seams around the edge of the mat. If you see any wet spots or stains, it’s likely that there is a leak at that location.
2. Check for holes or tears in the mat itself.
If you see any holes or tears, it’s likely that water is getting through them and causing leaks.
3. Inspect all of the connections between pieces of the trampoline frame. These include both bolts and rivets.
If any of these connections are loose or damaged, it could be causing leaks.
4..Check for cracks in any of the plastic parts of the trampoline frame.
. If you see any cracks, it’s possible that water is seeping through them and causing leaks..
Any crack no matter how small should be sealed to prevent further leaking..
5..Inspect all gaskets and seals.. These are located between sections ofthe frame and serve to keep water from leaking through.. If anyof these gaskets or seals are damaged, it could be causingleaks.. Replacing them should solvethe problem..
6..
How Do You Repair an Inflatable Trampoline?
Assuming you have an inflatable trampoline with a hole in it, the first thing you’ll need to do is find the hole. Once you’ve found the hole, patch it up with a repair kit designed for inflatable trampolines. These kits usually come with a patch and some adhesive, so just follow the instructions that come with the kit.
Once you’ve patched up the hole, give the trampoline a good inspection to make sure there are no other holes or weak spots. If everything looks good, then you’re ready to re-inflate the trampoline and start using it again!
How Do You Fix a Leaky Bounce House?
There are a few things you can do to fix a leaky bounce house. First, check all of the seams and make sure they are sealed properly. You can use a sealant to reseal any areas that may be leaking.
Another option is to patch the area with repair tape. This tape can be found at most hardware stores. If the leak is coming from a hole, you can try to patch it with repair putty or silicone caulk.
Conclusion
Water trampolines are great fun for kids, but they can be a bit of a pain to keep inflated. If you’ve got a hole in your water trampoline, don’t despair! With a little time and effort, you can patch it up and get back to bouncing.
To patch a water trampoline, start by deflating the trampoline and drying off the area around the hole. Then, cut a piece of heavy-duty fabric that’s slightly larger than the hole. Apply a layer of adhesive to the fabric and press it over the hole.
Finally, use a hair dryer to heat-seal the patch in place.